Do you encounter a frustrating Blue Screen with the restart of the system time and again. BSOD error might also occur due to amdppm.sys that cause the system to crash unexpectedly. This error is commonly associated with IRQL NOT LESS OR EQUAL, PAGE FAULT IN A NONPAGED AREA, KERNEL DATA INPAGE, SYSTEM SERVICE EXCEPTION, CRITICAL_PROCESS_DIED, SYSTEM THREAD EXCEPTION NOT HANDLED, VIDEO_TDR_FAILURE, and KMODE EXCEPTION NOT HANDLED BSOD errors.
So far as the question of what is amdppm.sys it is a part of AMD GPU driver. AMDPPM refers to AMD Primary Processor Module. Basically, Amdppm.sys is a Windows driver that allows your PC to communicate with hardware aka the Processor module. Now let’s discuss, what would be the reasons for amdppm.sys BSOD error. The root cause of this issue is the corrupted .sys file or its registry entry that leads to the system crash. Other factors are conflicts with third-party programs, buggy Windows updates, malware. Now come to the solution part.
Blue screen error amdppm.sys BSOD Solutions
Here is how to fix amdppm.sys BSOD Blue Screen error in Windows 10 or 11 –
Way-1: Modify Registry
Only a modification in the registry entry associated with amdppm.sys does a trick and fixes the system crash. Follow the steps –
- Click – Start.
- Type – regedit. See – 9 Ways to Open Registry Editor in Windows 10.
- Right click on the Registry Editor from the Best match section.
- Select – Run as administrator.
- When a User account control pop-up appears, click – Yes.
- Copy the following address – Computer\HKEY_LOCAL_MACHINE\SYSTEM\CurrentControlSet\Services\amdppm.
- Paste into the address bar of the registry editor.
- Hit the – Enter.
- Go to the right pane and double-click on Start.
- Put in Value data 4.
- Click – OK.
- Exit the Registry Editor and reboot your computer.
Way-2: Uninstall the AMD Program
Since the BSOD occurs because Amdppm.sys failed and this file belongs to an AMD program, uninstalling this will solve the problem. However, you can uninstall and after then reinstall the AMD processor driver of an up-to-date version to avoid disturbance in any task or gameplay. Windows 10 and Windows 11 as well provide you the options to remove any program whether it is a built-in or third party. You can execute the method using programs and features or the Settings app. However, it becomes a bit techie, but if you are an advanced user of Windows you can use Command prompt or PowerShell for the same. As of now, we are going to present an easy way –
- Press – Winkey+I.
- Select – Apps.
- Click on – Apps & features.
- On the list of all installed programs, find the AMD program.
- Right-click on the hamburger menu (3 dots icon).
- Select – Uninstall.
- A tiny pop up will appear just below the menu.
- Next, select – Uninstall.
- You may get a verification prompt; click Yes on that.
- Follow the online instructions if any wizard guides you.
Way-3: Remove the third-party apps
Third-party applications are often found to create struggles with system files and other programs. Therefore if you have already installed any software from the web, it might create a blue screen error on your system. We have discussed above the method to uninstall the AMD program. Pursue that method having steps inside in order to remove the software. . If you have multiple software we will suggest uninstalling the programs one by one and restarting the PC after each. When the occurrence of BSOD error stops, that is your solution. So go with the steps given in the previous method aka Way-2.
Way-4: Run System file checker to fix amdppm.sys Blue Screen error
System file checker or SFC is a basic command-line tool that has the capability to curate corrupted or missing system files. When a blue screen of death occurs. When a blue screen of death occurs the most generic cause is corruption in the system files. This is the result of conflicts between third party programs and system components, outdated drivers, the presence of malware, or other. amdppm.sys BSOD error might have the same reasons and situations. So follow the guidelines to run system file checker –
- Click on Search from the taskbar.
- Type – CMD.
- Select – Run as administrator.
- Click on Yes on the User account control prompt.
- When the command prompt appears coma type – SFC /scannow.
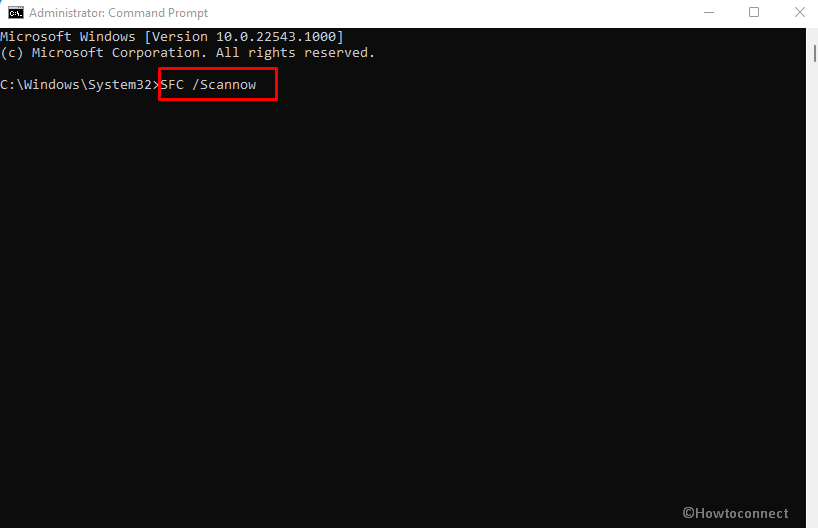
- Hit – Enter.
- In a few minutes, the scanning and verification will be completed.
- Restart the computer and see if the blue screen error now does not occur.
Way-5: Clean storage to increase space
amdppm.sys blue screen of death error might also be triggered when the disk space is running out. Disk cleanup is a built-in utility to wipe out garbage from your system that is stored in the form of temporary files, remnants and residues of external software, cache files, and other. Once you clear all the unnecessary data the essential files start working perfectly. As a result, the BSOD is also solved so move forward with the steps –
- Click on – Start.
- Type – cleanmgr.
- Hit the – Enter.
- Select (C:) on the Disk cleanup Drive Selection pop-up.
- Click on OK.
- The tool will figure out how much data is worth deletion and show you a window. Click – Clean up system files.
- Again choose the installation drive (C:) here. And Select – OK.
- Mark all the checkboxes under Files to delete.
- Click OK and confirm the prompt.
- This will take some time, so allow the tool to clean the disk.
- Reboot the machine and check if the error still persists.
You can also follow – How to Clear Cache on Windows 10 – All Type.
Way-6: Check for updates to solve amdppm.sys BSOD
Windows update in the shape of security update, non-security update like optional update, out of band update come to Windows 11 and 10 to add new features and address running problems. If you are facing amdppm.sys failed error with BSOD then it can be repaired through installing a pending Windows update.
- Click on – Search.
- Type – updates.
- Press – Enter.
- Click – Check for updates.
- Allow the system to scan and download if any update is pending.
- Click on Restart now when a pop asks you to choose.
See – 4 Ways to Update Windows 10.
Way-7: Clean boot the PC
This method will start Windows with fewer risks of interference from other software and files. Yes, the process will restart with a minimal set of drivers and apps to run the OS. Consequently, there will be no chance of conflicts and bugs to continue their activities further. Go with the guidelines –
- Press Windows and R keys from the keyboard at a time
- Type – msconfig.
- Hit the – Enter.
- Once the System Configuration window appears, click on the Services tab.
- Check the box for – Hide all Microsoft services.
- Click on – Disable all.
- Now switch to the Startup tab.
- Next, click on the link – Open Task Manager.
- Go to the Task Manager which is showing with the Startup programs.
- Right-click on each one and select – Disable if it is enabled.
- Close the Manager and back to System Configurations window.
- Click on Apply and then on OK.
- Select Restart on the message pop up.
Way-8: Uninstall Windows update
Opposite to the aims of Windows update, they sometimes create problems for systems causing different errors. Actually, the patches occasionally bring bugs along with security improvements and changes. Therefore, after installing a patch you might get amdppm.sys Bsod in Windows 10 or 11. At this time, you have the only option, and it is to uninstall the update. One thing, you need to check whether the error started after installing an update. If you are sure that the Blue Screen appeared after receiving a certain update then uninstall this one without spending time. You can check the date and time of each update by following these instructions –
For Windows 10 –
- Click the – Start.
- Type – updates.
- Hit – Enter.
- On the Settings app, select – View update history.
- Check the list and ensure if the error started after installing one.
- If yes, then click – Uninstall updates.
- Once a window appears from the control panel, find the update (KB…).
- Right-click on it.
- Select – Uninstall.
- If a warning dialog comes, click on Yes.
For Windows 11 –
- Press – Windows logo+I keys.
- Select Windows Update from the left pane.
- Go to the right and click on – Update history.
- From the next page, click on – Uninstall updates.
- Select the link- Uninstall.
Methods list:
Way-1: Modify Registry
Way-2: Uninstall the AMD Program
Way-3: Remove the third party apps
Way-4: Run System file checker
Way-5: Clean storage to increase space
Way-6: Check for updates
Way-7: Clean boot the PC
Way-8: Uninstall Windows update
That’s all!!