The Windows 10 operating system provides you with the option to adjust the brightness of the screen to make the content more comfortable to view. If you are using a laptop which is unplugged, then a lower brightness will help you to preserve battery for a longer time. Unfortunately, many users encounter an issue of Brightness Slider Not Working in Windows 10.
For many users, the brightness of the screen changes automatically without their interference. This is a little frustrating for those who need to work on vital documents and can’t seem to adjust the brightness appropriately. And if the screen is too bright, it results in the consumption of power at a faster rate. Several users experience this behavior after upgrading the OS. So, let us explore all the workarounds and see which one fixes for you.
Brightness Slider not working in Windows 11 or 10
Here is how to fix Brightness Slider Not Working in Windows 11 or 10 –
The problem can be due to incompatible, incorrect, or outdated drivers. So, you need to update display driver, try Microsoft’s Basic Display Adapter, or restore to default settings. You need not execute any complex changes to make the slider work again. Here are the workarounds to fix the Brightness slider not working in Windows 10 –
Way-1: Update Display Adapter Driver
Corrupted, incompatible, and outdated drivers usually result in brightness control problems in Windows 10. So, you need to update the display driver to check if it solves the problem. A device driver basically acts like a middleman between the software/operating system and the hardware and enables seamless data exchange with one another. It serves more as a translator between hardware and software. Hence, you are likely to confront Brightness Slider Not Working issue if the required display driver is not either corrupted or outdated.
Step-1: Click Search.
Step-2: Type devmgmt.
Step-3: When the Best match displays Device Manager, click on it.
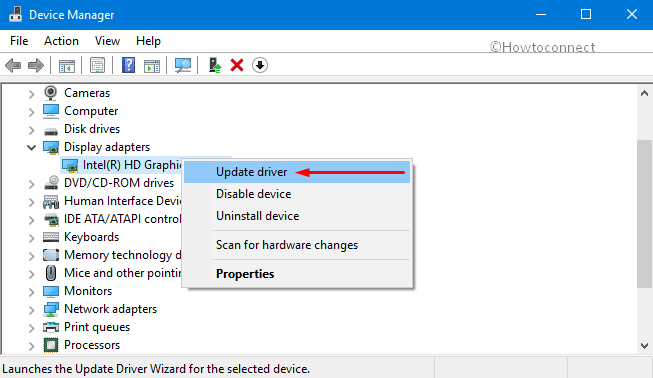
Step-4: Double-click on Display Adapters.
Step-5: Right-click on the relevant display driver.
Step-6: Choose Update driver.
Step-7: Select “Search automatically for updated driver software”.
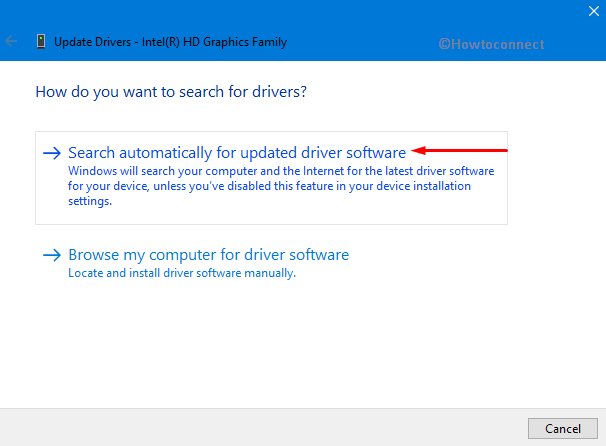
Step-8: Windows will search the internet as well as your device for the latest driver software which is compatible with your device. Once it installs the driver, see if the brightness control works or not. If you still cannot manage the brightness slider, try out the next workaround.
Way-2: Reinstall Display Driver
If the above solution fails to give any relief, you need to reinstall the display driver.
Step-1: Right-click on Start and select Device Manager from Win+X menu.
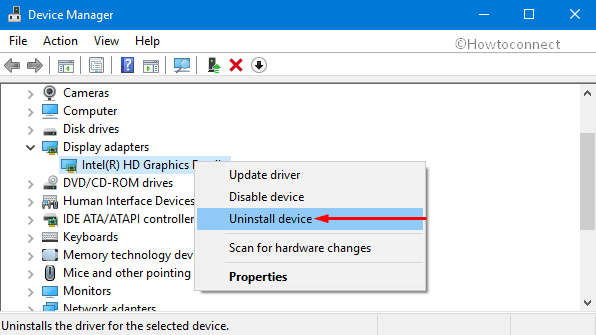
Step-2: Expand Display Adapter by double clicking.
Step-3: Right-click on the installed display card/graphics card.
Step-4: Select the Uninstall device from the context menu.
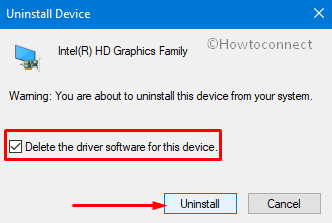
Step-5: Click on the Uninstall. Ensure to tick mark the box against the box “Delete the driver software for this device” (see snapshot). Now, restart Windows 10 PC.
Upon reboot, Windows 10 would automatically install the display/graphics drivers that are missing from your device.
If Windows does not install the missing drivers, then you can do it manually by accessing the Device Manager. Right-click on your display adaptor name and select “Scan for hardware changes“. This would detect missing drivers and would install the drivers automatically.
Way-3: Use the Microsoft Basic Display Adapter
This is a built-in Windows Display driver software which is utilized when the display driver offered by the manufacturer is not available or has not been installed. Using this display adapter can temporarily resolve the brightness slider not working in Windows 10 problem. This should however not be treated as a permanent solution as the drivers that the manufacturer provides offer quicker performance, additional graphical features, and higher screen resolution.
Here are the steps that you can follow to activate the Microsoft Basic Display Adapter.
Step-1: Right-click on Start.
Step-2: Select – Device Manager.
Step-3: Locate Display Adapters and double-click on it.
Step-4: Right-click on the installed adapter.
Step-5: Choose the Update Driver.
Step-6: Select the “Browse my computer for driver software” option.
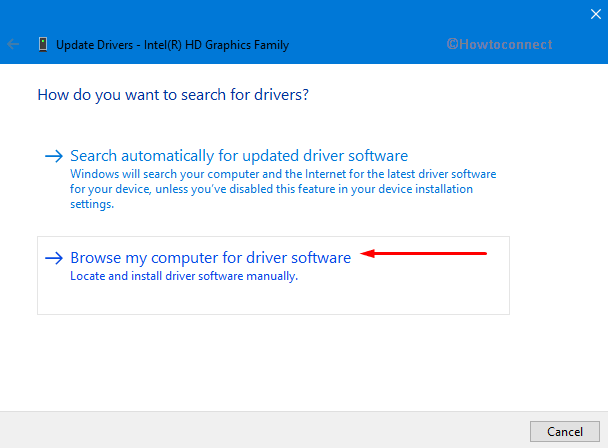
Step-7: Then click the “Let me pick from a list of available drivers on my computer” option.
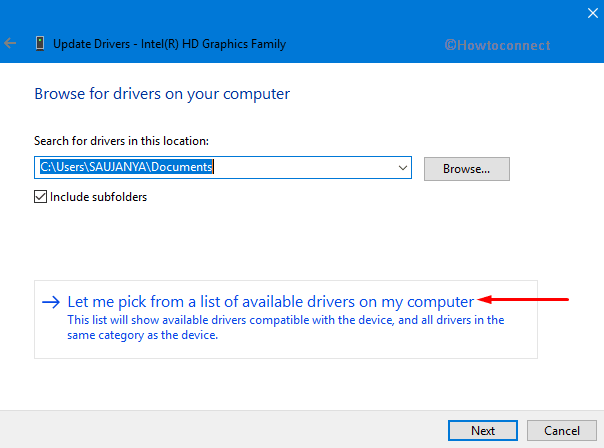
Step-8: You need to make sure to select the “Show compatible hardware” checkbox (see screenshot).

Step-9: Scroll down and select Microsoft Basic Display Adapter.
Step-10: Click Next and follow the guidelines on the wizard.
Restart the computer and check if the problem has been fixed. Try to update the drivers again if the problem does not get resolved.
Way-4: Run Power Troubleshooter
Windows comprises a set of built-in troubleshooters that have been designed to diagnose several common issues and resolve them automatically. However, please do note that the “Windows Troubleshooter” may not be able to fix all the issues that you encounter.
Step-1: Click “Win + I” .
Step-2 : Select Update & security.
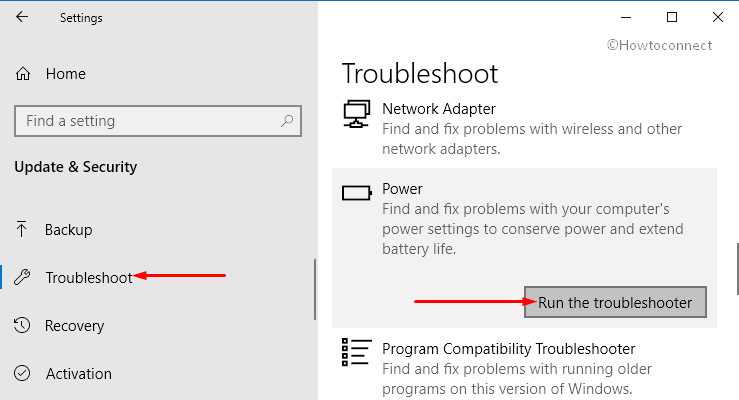
Step-3: Go to the Troubleshoot section.
Step-4: Click on Power.
Step-5: Click Run the troubleshooter button (see screenshot). This will detect as well as make an attempt to fix the issues of power including battery.
Restart the system and see if you are able to bypass the brightness slider not working in Windows 10 issue or not.
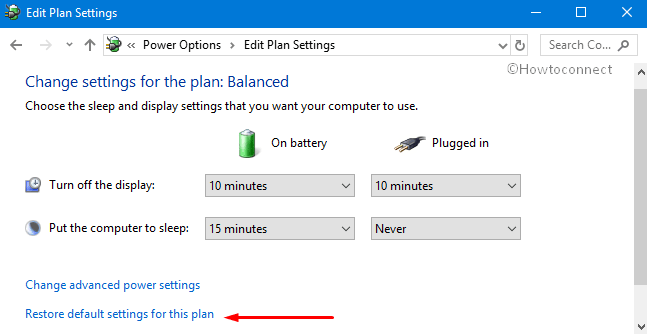
Way-5: Restore Default Power Options Settings
If none of the above workarounds fails to bring back the brightness slider, then restore the power plan settings to default. You need to do this for all the plans.
Step-1: Press Win + X
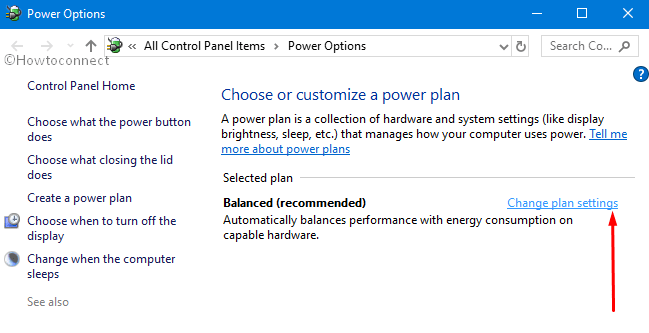
Step-2: Choose Power Options from the list.
Step-3: Click Change plan settings.
Step-4: Finally, click on Restore default settings for this plan (see snapshot).
Repeat this for all the power plans that you have. Perform a reboot and check for the problem.
Methods:
Way-1: Update Display Adapter Driver
Way-2: Reinstall Display Driver
Way-3: Use the Microsoft Basic Display Adapter
Way-4: Run Power Troubleshooter
Way-5: Restore Default Power Options Settings
That’s all!
Thanks for the info. For me, the Brightness slider had no effect on my Dell XPS 13 9Q33 laptop with Intel HD Graphics. I did the first steps to do the Auto update video driver and it worked. Its weird that the Driver Date is 28-Oct-2015… must have just needed to be reinstalled. I have Windows 10 Pro 1809. Comment date: 24-Feb-2019.