Blue screen error in Windows 10 Today is no doubt one of the most headache creating issues. So we will discuss here some easiest ways to fix the CLUSTER_RESOURCE_CALL_TIMEOUT_LIVEDUMP Error. This error has a bug check code of 0x00000166 which deliberately represents that a Cluster Resource call was taking longer than the configured timeout. The system also generated a live dump while analyzing the reason for the delay. Usually, Blue Screen errors are evolved from driver problems mostly with slight abnormalities in the system files, outdated BIOS, defective areas in the hard disk.
Resolving the error is a difficult task for sure but not an invincible one with the resources we have in Windows 10. In the below section, we will show you some workarounds to fix this BSOD error with bug check value 0x00000166. Let’s proceed to the methods list first –
CLUSTER_RESOURCE_CALL_TIMEOUT_LIVEDUMP
Here is how to fix CLUSTER_RESOURCE_CALL_TIMEOUT_LIVEDUMP Error Windows 10 –
1] Make the system stable by disabling Automatic Restart
Blue Screen error is a critical fatality in the computer that forces Windows to restart unexpectedly. Very seldom you may come across a warning notice but never can have enough scope to save an ongoing task. Usually, these critical crashes cause huge data loss and the system becomes unstable where any kind of troubleshooting is beyond imagination. Therefore in order to deploy the workaround, we need to approach for disabling the Automatic Restart feature tweaking the default settings. Here are the steps to follow –
- First, make sure to save and close all the ongoing processes to avoid all sorts of data loss.
- Move for the desktop area pressing Win+D hotkeys at once.
- When in the place, right-click the This PC icon and select Properties option from there.
- Click Advanced system settings located at the left pane from the newly opened window.
- When the System Properties popup opens, move into the Advanced tab.
- Scroll to Startup and Recovery area and click on Settings.
- Proceed ahead to System failure area followed by unchecking the box that reads “Automatically restart”.
- Click the OK button from the bottom in the end and save the changes.
With changes saved immediately, the Operating System will no more reboot automatically hence, the whole unstable environment will regain stability. You can now try out the following workarounds one by one and fix CLUSTER_RESOURCE_CALL_TIMEOUT_LIVEDUMP Error Windows 10.
2] Install every single update released
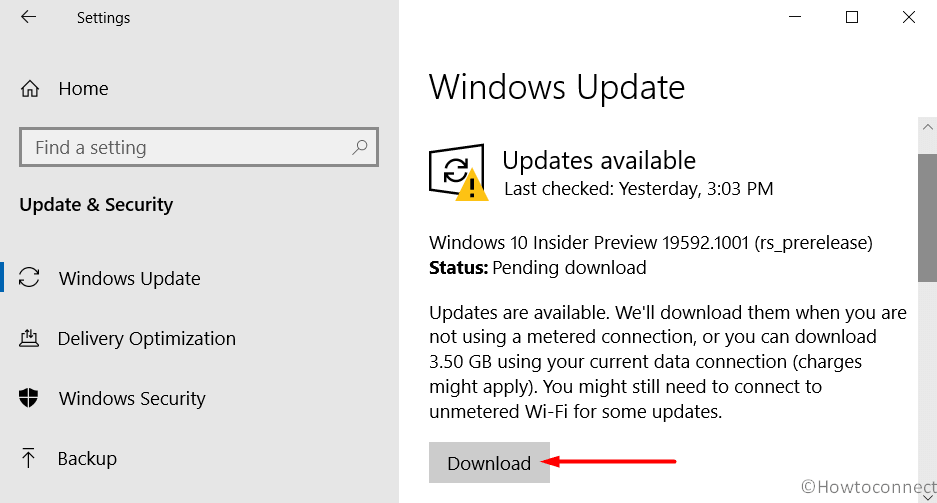
Operating System needs to keep updated always in order to keep it safe from bugs and update issues as well. All the new patches released come with new features, latest Users Accessibility, and a good number of tools to fix potentially harmful bugs. When the Windows 10 is up to date, CLUSTER_RESOURCE_CALL_TIMEOUT_LIVEDUMP will be no longer present in your system. Here are the guidelines to follow for installing the latest patches –
- Fire up Start menu and click the tiny Gear shape icon.
- Click Update & Security tile.
- Windows Update section from the left pane gets highlighted by default.
- Shift corresponding right side and click on Check for updates button.
- When all the patches are available, click the Download button.
- After the files being downloaded successfully, installation will begin automatically.
- You may have to attend a couple of restarting processes in order to complete the process.
3] Update the drivers to fix CLUSTER_RESOURCE_CALL_TIMEOUT_LIVEDUMP
Most of the Blue screen issues nowadays evolved due to problems faced by the driver software. When drivers are outdated, they reduce the functionality of the system and make it unstable. Hence, CLUSTER_RESOURCE_CALL_TIMEOUT_LIVEDUMP Blue Screen error may evolve. Many people have fixed the BSOD error by updating the drivers in the past and here’s how you can carry out the task –
- Invoke the Run dialog pressing Windows key and R.
- Type devmgmt.msc in the empty text space and press Enter.
- In the device console, have a closer look for any mark of exclamation. If there is any, expand the category list by double-clicking the same.
- Now, right-click the outdated device and select Update Driver.
- From the small pop up opening next, click Search automatically for drivers.
- Update all the outdated drivers following the same procedure as above.
- Finally, restart the computer for bringing these changes into effect.
4] Re-install or rollback the defective drivers
If updating drivers doesn’t fix the CLUSTER_RESOURCE_CALL_TIMEOUT_LIVEDUMP Blue Screen error, you need to think out of the box. Sometimes, defective driver software may get installed by mistake. You can uninstall the defective driver and then proceed for installing the compatible one manually. Rolling back to default is another great idea if the driver had no issues in the earlier version. So to carry out these tasks, follow the below guidelines –
- Open the Power user menu pressing Win+X hotkeys at once.
- Select Device Manager from the menu.
- In the app reach the driver causing issues and unveil the same by double-clicking the device.
- Do a right-click on device that received an update recently and select Uninstall device.
- When the confirmation message prompts up, click Uninstall again.
- After the task finishes, reboot Windows 10 to save the changes.
- When the device turns back to operation, download the latest driver software from the manufacturer site, and install it.
You can also roll back a driver to default state using below steps –
- Right-click the problematic driver and select Properties option.
- In the next pop up opening, enter into its Driver tab.
- Click on the Roll Back Driver button.
- Complete the process by following the on-screen guidelines.
- Once done, reboot the device and when loading the next session, check for the error.
5] Fix up Memory problems to Fix CLUSTER_RESOURCE_CALL_TIMEOUT_LIVEDUMP
Memory problem in Windows is yet another prominent reason to cause CLUSTER_RESOURCE_CALL_TIMEOUT_LIVEDUMP BSOD error. This problem is related to one of the modules and you need to take prompt action against it. RAM issues oftentimes can also evolve from bad RAM stick which has fallen on the ground or exposed to physical damage. Though the unit may demand full replacement of the RAM stick, you can diagnose the issue quite a bit using default utility. The tool is Windows Memory Diagnostic which carries a number of tests to detect and fix such issues in Windows 10. Hence, for accomplishing the task, follow the below guidelines –
- Do a right-click on Start and choose Run.
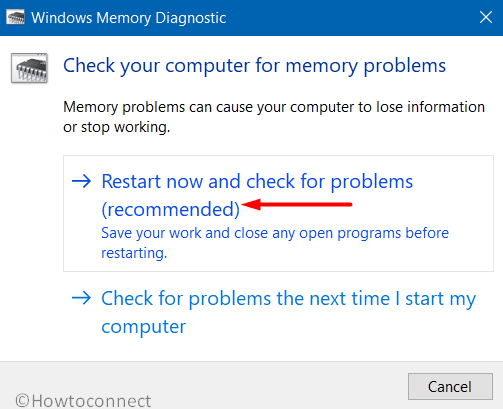
- Type mdsched.exe and click OK to open Windows Memory Diagnostic tool.
- From the wizard, click “Restart now and check for problems (recommended)” option.
- Windows will restart now and in the next bootup, will show the blue screen detecting problem.
- After this process reached 100%, the system will restart itself for the second time.
- Check the detected issues and their status in the System Tray of Notification area.
6] Disable Fast Boot mode to restrict carrying over errors
In certain devices, starting up takes a longer time than usual since some processes consume a couple of minutes to start. Fast Startup is a great idea to make this booting faster helping you to make the operating system up and running in the shortest time. Nevertheless, the idea of Fast Boot is a brilliant one, there is a small hindrance here as well. Since the process collects information passes over to the next session, it will also carry over CLUSTER_RESOURCE_CALL_TIMEOUT_LIVEDUMP Blue Screen error too. Therefore we have to disable Fast Mode to restrict this carrying over using below steps –
- Open the Taskbar Search and type control panel in the empty text box.
- Make the icons view into Small or Large size and click Power Options.
- When the succeeding window opens, select What the power buttons does link from left pane.
- On the next page, click on “Change settings that are currently unavailable” to unveil the hidden options.
- Scroll down and remove the checkmark from the box saying Turn on fast startup (recommended).
- Finally, hit the Save Changes button from the bottom.
7] Repair bad areas in the Hard Disk using chkdsk command tool
Hard Disk often can suffer from bad areas and lead to cause CLUSTER_RESOURCE_CALL_TIMEOUT_LIVEDUMP Blue Screen error in Windows 10. Usually, two types of issues may evolve namely Hard and Soft bad areas. Hard or Physical bad sectors formed in the disk for having physical damage. Logical or soft bad areas will form due to sudden power surge or forcibly removing a cable from the CPU. Disk Checking tool is a handy utility to fix these sectors and here is how to complete the process –
- Access Taskbar Search and type cmd.exe in it.
- Right-click Command Prompt and select “Run as Administrator”.
- When UAC prompts for permission, click Yes to continue.
- In the elevated Command Prompt window, enter below command at the base of blinking cursor and press Enter –
chkdsk C: /f /r /x
- The process might take a while, wait for the full scanning to complete.
- Once done, Restart Windows 10 and make all changes effective.
8] Avoid a software collision by uninstalling similar programs
Some applications may have different names but similar functionality and they are available to download with lucrative features. If we download them both and install them in the system, there is a risk of software collision in the system too. The result of such conflict can be truly dangerous as many system files will go missing or become corrupted. Therefore, uninstall the unnecessary or similar applications using the below instructions –
- Perform a right-click on Start, choose Apps and Features.
- When the Apps settings page arrives, shift to the adjacent right side upon the installed app showing up.
- Move out for the problematic application, select it, and click Uninstall from the extended pane.
- From the confirmation popup, click Uninstall.
- Follow the guidelines that come into view and complete the uninstallation.
- Lastly, restart the Windows 10 to make changes effective.
9] Update the outdated BIOS firmware to Fix CLUSTER_RESOURCE_CALL_TIMEOUT_LIVEDUMP
Outdated BIOS restricts the proper functionality of the system as it cannot perform the task in time. Many people have claimed that CLUSTER_RESOURCE_CALL_TIMEOUT_LIVEDUMP Blue Screen error has resolved once they updated the BIOS. We can do the same using below guidelines –
- Launch Taskbar search, type in the command “msinfo32” and press Enter.
- When the System Information app opens, locate the BIOS Version/Date on the right-side pane.
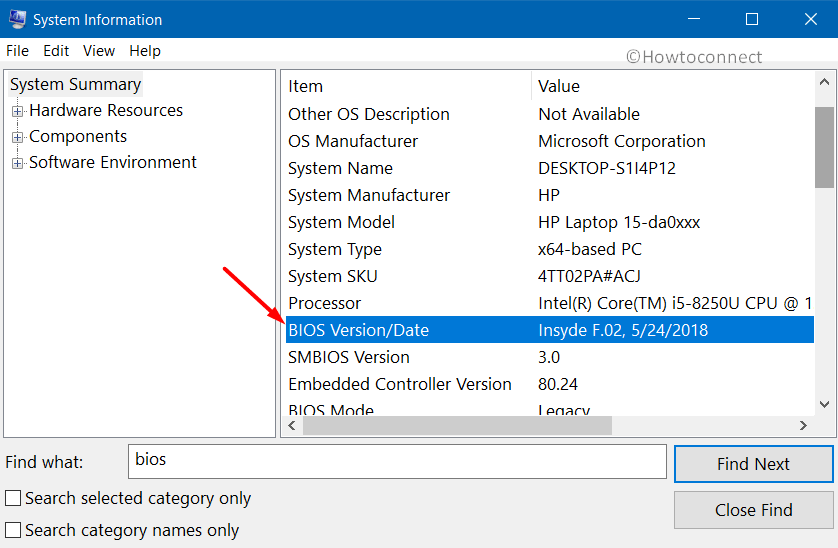
- Check the information provided here and note down the same.
- Launch a web browser and navigate to your BIOS manufacturer site and find out its latest version.
- Download the latest BIOS file compatible with your device.
- Run the downloaded file to install the latest version of BIOS.
10] Run a Full Scan in the system for destructive malware
When bugs manage to fuse the security system, they will reside in the system like an ordinary file and you cannot detect them easily. They will make the system files corrupted as well which may lead to CLUSTER_RESOURCE_CALL_TIMEOUT_LIVEDUMP Blue Screen error too. A full system scan will help you eliminate them and eventually resolve the BSOD error as well. Here is how to carry out the scan in Windows Security –
- Go to system tray and click the shield icon to open Windows Security.
- Select Virus & threat protection.
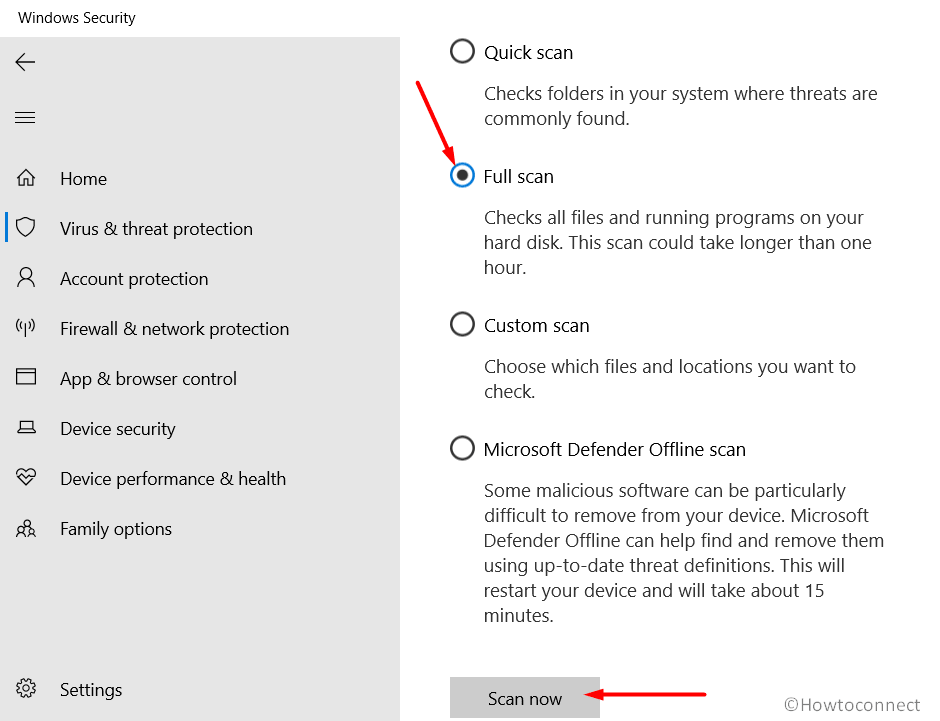
- Click on Scan options link from the right side pane.
- Select the radio button set for Full scan and click Scan now button.
- Scanning will commence shortly and after completion, it will show results.
- Hit the Clean Threat option to get rid of them.
- Click Remove followed by a click on Start actions to clean up all the threats.
- When the process ends, reboot Windows 10 to make changes effective.
11] Run the System File Checker tool to fix CLUSTER_RESOURCE_CALL_TIMEOUT_LIVEDUMP
System files can be corrupted due to many reasons like a sudden power outage, malware infection, defective update installation. When they get corrupted, the components no longer stays in allotted place and some may go missing as well. These often cause CLUSTER_RESOURCE_CALL_TIMEOUT_LIVEDUMP Blue Screen error too. In order to fix the corrupted system files, we have to execute a specific command in elevated Command Prompt. The utility named System File Checker helps in recovering missing DLL Files too and for carrying out the task, follow the below steps –
- Open Run Dialog and type cmd in the empty text area.
- Press Ctrl+Shift+Enter keys together at once.
- Click Yes when UAC floats up to open Elevated Command Prompt.
- In the black window, type below command and press Enter –
sfc /scannow
- With execution, System File Checker will detect and fix problematic components and rectify them. If there are any missing DLL files, they will be recovered accordingly as well. The process may take a while and you need to wait till it ends.
- Once done, perform restarting to Windows and check if BSOD has resolved once the next session starts.
12] Delete bulk junk files from disk space to Resolve CLUSTER_RESOURCE_CALL_TIMEOUT_LIVEDUMP
A lot of temporary files are saved as junk in the storage along with cache from browsing data. When the space is almost full, the system cannot deal with additional load and it starts freezing while frequently. Sometimes the effect can also give rise to CLUSTER_RESOURCE_CALL_TIMEOUT_LIVEDUMP Blue Screen error as well. We actually need to clear up the space covered with unnecessary files regularly before that becomes a cause of the disaster. But deleting the bulk of files is not quite easy unless you have a utility beforehand. Here is how to use the tool for cleaning up junk files –
- Open Run and type cleanmgr in the empty box of it.
- Click OK and Disk Cleanup tool will now identify installation drive automatically and calculate the amount of unwanted files.
- From the next pop up, click on Clean up system files.
- After a while, Disk Cleanup for C:/ will arrive in the display with removable files in categories and their amount.
- Check all the boxes and click OK.
13] Uninstall the defective update patches installed recently
We have seen how updating Windows can easily resolve CLUSTER_RESOURCE_CALL_TIMEOUT_LIVEDUMP Blue Screen error. As the process is autonomous, often some partially buggy update patch may get installed in the system and ultimately OS suffers a lot for that. So you can uninstall a problematic Windows Update file using below guidelines –
- Press Win+I hotkeys and open Windows Settings app.
- Click on Update & Security.
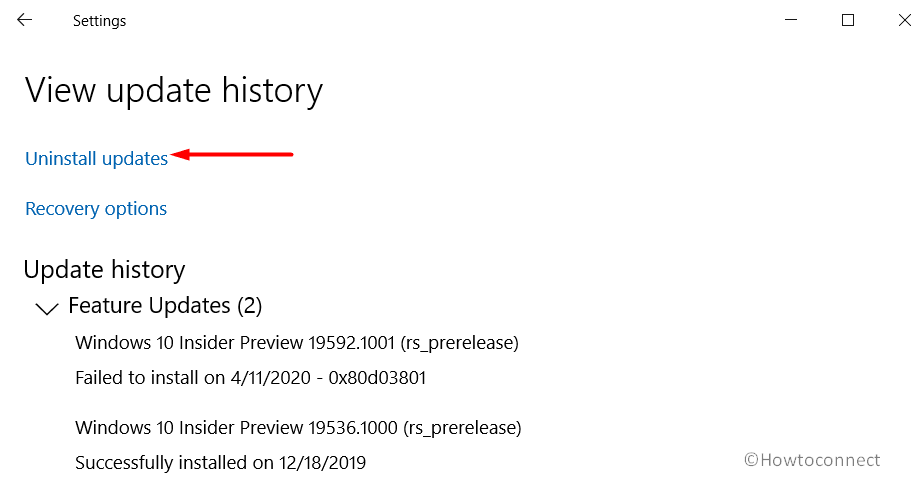
- On the right side, click View update history.
- After the succeeding page opens up, click the Uninstall updates link.
- A new page will open up from Control Panel, reach to the dreadful update files installed recently.
- Select the same followed by clicking Uninstall option from the top ribbon.
- Follow the on-screen guidelines to complete the process.
- Restart Windows and when the Desktop loads again, check if the BSOD error has resolved.
14] Boot Windows 10 Safe Mode
Safe Mode is usually a basic startup where most of the processes are not allowed to load and Windows operates with minimum programs. It narrows down the applications especially the third party ones which split the troubleshooting to half portion. Follow the below steps to boot Windows 10 in Safe Mode –
- Save all the going tasks and proceed to Desktop area pressing Win+D keys together.
- Now, press the combination keys Alt+F4 together.
- Click drop-down menu located under What do you want the computer to do? and select Restart.
- Click Troubleshoot from the appearing context.
- Next, click Advanced Options and then Startup Settings in the process.
- Slide down to the right bottom corner of this page and click the Power cog.
- Click Restart option and let the computer reboot again.
- When a new session starts, there will be a context with the option to Boot in the Safe Mode.
- Select it and enter into the Safe Mode.
15] Use Online Blue Screen Troubleshooter
Blue Screen error does not have the accurate cause always and unfortunately, most of them don’t have a clue following which you can troubleshoot. In order to reduce the stress on the users, Microsoft introduced a new Windows Blue Screen Troubleshooter. The utility can easily detect from where the error is coming and show you guidelines to fix accordingly. Here are the steps to access the utility and fix CLUSTER_RESOURCE_CALL_TIMEOUT_LIVEDUMP Blue Screen error –
- Click this link to visit Microsoft’s online troubleshooting web page.
- When the web page loads fully, scroll down to When did you get the error? area.
- Choose one of the radio buttons from here according to your problem.
- When the troubleshooter shows stepwise tasks to resolve the existing issue, follow them to the point.
16] Fix corrupted Windows Image Files
Windows image files can be corrupted by malware infection or third party programs and lead to CLUSTER_RESOURCE_CALL_TIMEOUT_LIVEDUMP Blue Screen error. Well, the files can be fixed easily using the Deployment Image Servicing and Management tool. DISM is a handy utility that can be applied to offline images as well when activated through an Elevated Command Prompt. Here are the guidelines to follow –
- Manage the access to Elevated Command Prompt using guidelines used before.
- Type the below command at the blinking cursor –
DISM.exe /Online /Cleanup-image /Restorehealth
- Press Enter key and wait until the tool detects defective Windows image files.
- Fixing will begin automatically once the utility finished detecting corrupted image files.
- Restart the computer once it gets over.
17] Unplug Hardware accessories causing BSOD error temporarily
Blue Screen errors don’t have a definite root cause everytime, often it can happen for weird reasons too. Some users have come up in the recent past with CLUSTER_RESOURCE_CALL_TIMEOUT_LIVEDUMP Blue Screen error in their system after connecting hardware accessories. Many users have been benefited by just removing those hardware accessories for a while and restarting the device. You can also do the same with all necessary care and try fixing the trouble soonest.
18] Perform Clean Boot to Windows 10
Clean Boot is a startup method where only essential programs can load at the time of the initialization of the operating system. It cuts down the number of third party programs as well as services and let Windows run with default ones only. Thus, any problem arising from the third party programs will resolve automatically. If that doesn’t happen, you can take action against the default programs accordingly but it will lessen the effort for sure. So to perform a Clean Boot, follow the below guidelines –
- Open Run dialog and type msconfig in the empty text space.
- Press the Enter key and let System Configuration window shows up.
- In the current General tab, click the radio button set for Selective startup.
- Uncheck the box that reads Load startup items.
- Jump into Services tab and put checkmark to box saying Hide all Microsoft services.
- Click the Disable all button.
- Return to Startup tab and click the link to Open Task Manager.
- Upon opening the Task Manager, right-click on each program listed here and choose Disable.
- Head back to the System Configuration window and click on Apply button first and then OK to save the changes.
19] Head back to a point of no issue by performing System Restore
System Restore is necessary when you cannot resolve CLUSTER_RESOURCE_CALL_TIMEOUT_LIVEDUMP Blue Screen error using conventional workarounds. The process seems to bypass the evolved problem as the issue is quite irrecoverable and loading the old state of the Operating System. Here are the guidelines to carry out a system restore –
- Open the Taskbar Search pressing Windows key and S together.
- Type ‘rstrui’ and press Enter.
- Once the System Restore opens, click Show more restore points option.
- From the following page, select the latest point.
- Hit the Next button to proceed ahead.
- After the succeeding page loads, click the Finish and start the restoring process.
Methods:
1] Make the system stable by disabling Automatic Restart
2] Install every single update patches released
3] Update drivers
4] Re-install or rollback the defective drivers
5] Fix up Memory problems in the computer
6] Disable Fast Boot mode to restrict carrying over errors
7] Repair bad areas in the Hard Disk using chkdsk command tool
8] Avoid a software collision by uninstalling similar programs
9] Update the outdated BIOS firmware
10] Run a Full Scan in the system for destructive malware
11] Run the System File Checker tool to fix corrupted components
12] Delete bulk junk files from disk space
13] Uninstall the defective update patches installed recently
14] Boot Windows 10 Safe Mode
15] Use Online Blue Screen Troubleshooter
16] Fix corrupted Windows Image Files
17] Unplug Hardware accessories causing BSOD error temporarily
18] Perform Clean Boot to Windows 10
19] Head back to a point of no issue by performing System Restore
That’s all!!