Ever so often you might encounter Fail to Install Fonts issue on Windows 10 problem when trying to experience a taste of better typography. Windows 10 is a great OS but at times bugs and issue cause weird things you couldn’t imagine. Commonly, the installation process of fonts fails because the built-in Firewall blocks the application assuming that this is risky.
You have two options in this situation to solve Fail to Install Fonts on Windows 10. Either completely disable Windows Defender Firewall or Allow the app through this before starting the installation. This might appear to be crazy as it sounds but this is true. Several Users have reported that doing this will bring back the charm of addition and installation of new fonts on your PC.
Fail to Install Fonts on Windows 10 Solutions
Here is How to Fix Fail to Install Fonts on Windows 10 –
Turn off Windows Defender Firewall
The Windows Defender Firewall prevents you to add some new apps like fonts when it is turned ON. This could be the reason behind fail to Install Fonts on Windows 10 PC. Hence turn off the Firewall and reinstall the font again.
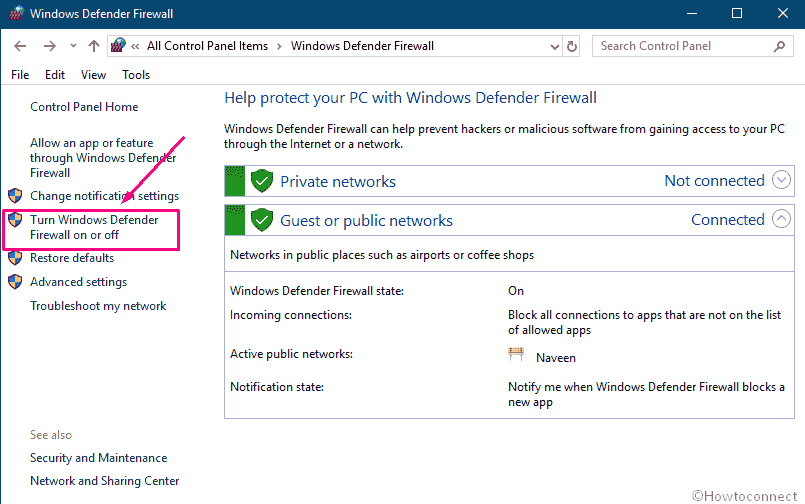
Step-1: Go to Cortana and type Control Panel in the search box. If you want to learn more methods follow – How to Open Control Panel on Windows 10 – Instant Ways. When the result appears, either press Enter or click on Open to launch this app.
Step-2: On the following page, click on Windows Defender Firewall icon.
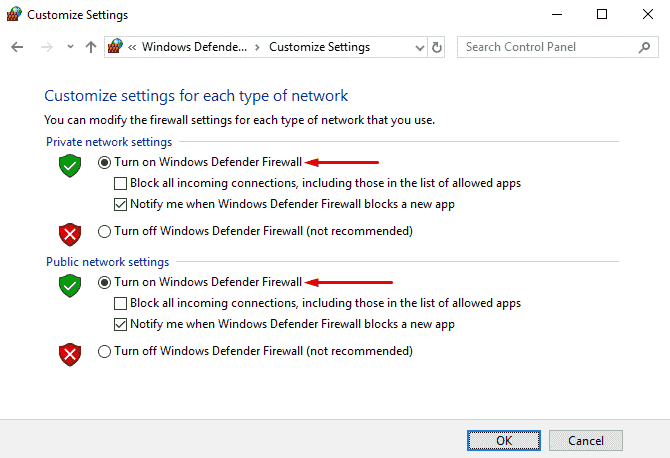
Step-3: Next, click on Turn Windows Firewall on or off from the left hand side column.
Step-4: Click on the radio buttons showing the cross red marks (X) for Turn off Windows Defender Firewall. Note that this option is under both of the Private and Public network settings and you must check them all.
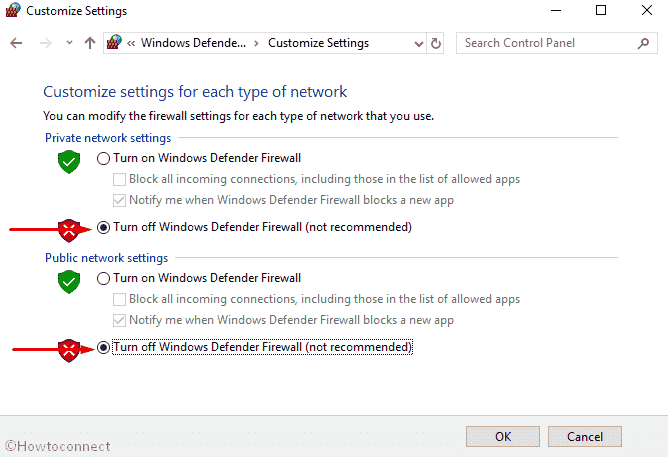
Step-5: Finally, click on OK to save the alterations and close the window. Never miss enabling the Windows Defender Firewall after the installation of Font is finished.
Alternatively, add the Application into the allowed list with the help of this procedure – Allow Apps to Communicate through Firewall in Windows 10.
Now Install the font creating the issue
Now download the font for which you are getting the failed error. Extract this, right click on the desirable font file and then select Install.
To avoid any errors install the fonts from Microsoft Store
To avoid Fail to Install Fonts on Windows 10 you can get them from Microsoft Store instead –
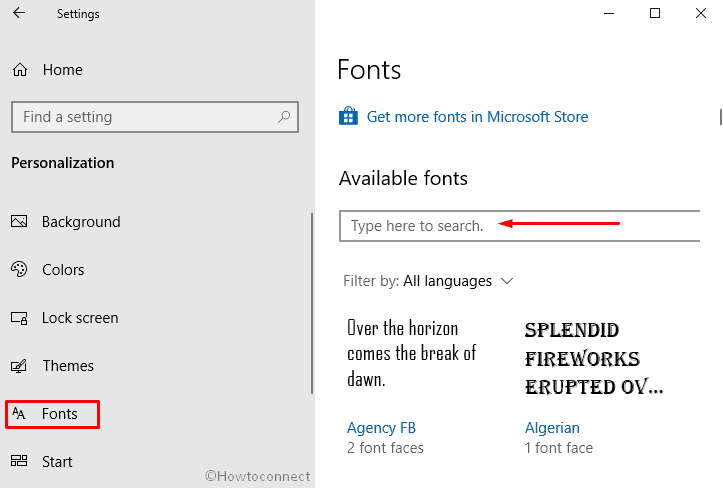
- Press Win+I hotkey together in order to launch the Windows Settings app.
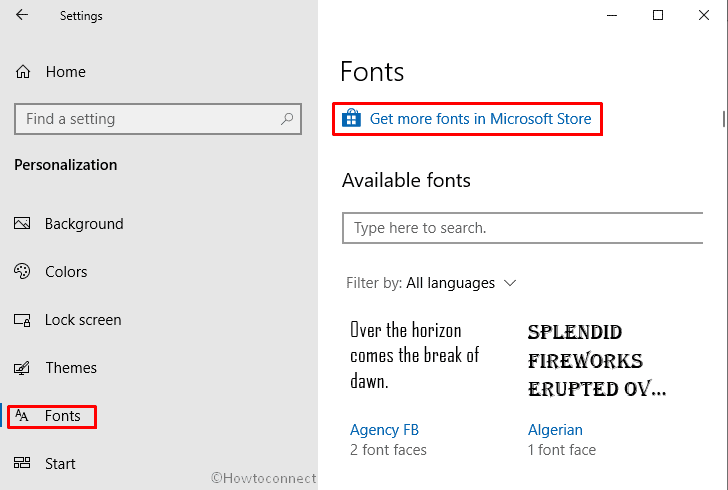
- Select Personalization.
- Move the cursor to the left pane and make a click on the Fonts.
- Go to the right-hand side and select Get more fonts in Microsoft Store.
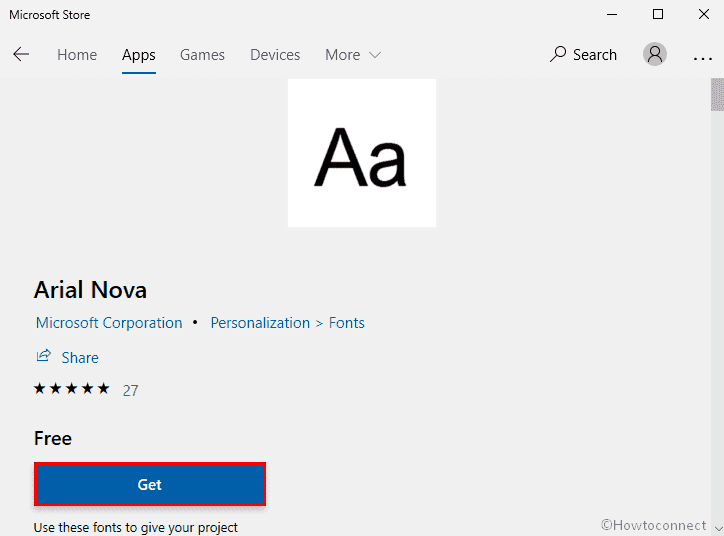
This will redirect you to Microsoft Store and shows the list of free and paid fonts.
Select any desired and then do the click on the Get button to install this.
Once the font gets installed successfully, it will appear in Font page by default. If you are unable to see it then go to the search box below the Available fonts section then type the name.
To see the detail of the method you can navigate to this article – How to Customize Font Settings in Windows 10.
Once the installation gets over Go back to Firewall and turn on the option to keep your security intact.
That’s all!!