Do you encounter a nagging blue screen of death issue with the frequent restart of the system? If your answer is yes and the error message includes ‘What failed: Netwtw10.sys’ then you are on the right location here. This is a stop error that commonly occurs with CRITICAL_PROCESS_DIED, SYSTEM_SERVICE_EXCEPTION, IRQL_NOT_LESS_OR_EQUAL, DPC_WATCHDOG_VIOLATION, SYSTEM_THREAD_EXCEPTION_NOT_HANDLED, VIDEO_TDR_TIMEOUT_DETECTED, PAGE_FAULT_IN_NONPAGED_AREA, and VIDEO_TDR_FAILURE. Netwtw10.sys refers to an Intel Wifi driver.
Netwtw10.sys BSOD mostly occurs due to a defective or incompatible WiFi driver. Furthermore, you may experience this kind of error because of broken system files, malware, and third-party programs in Windows 10 or 11. Fortunately, it can be fixed really easily, so, let’s follow in-depth at these solutions.
Blue Screen error Netwtw10.sys BSOD
Here is how to fix Netwtw10.sys BSOD Blue Screen Error in Windows 10 or 11 –
Way-1: Roll back the Wifi Driver
To solve this error, rolling back the Wireless driver works like a wonder as several users report. So follow the steps –
- Press – Win+X.
- Select – Device Manager.
- On the Device Manager Window, double click on – Network adapters.
- Right-click on WiFi driver and select – Properties.
- Go to the Drivers tab.
- On the Properties wizard, click on – Roll back driver.
- Reboot the PC and see for the error.
Way-2: Update Wireless Adapter Driver
netwtw10.sys BSOD error can occur if the wireless adapter driver is out of date. Obsolete driver files can be corrupted soon and can cause conflicts with system components. You might know that netwtw10.sys driver is required to establish communication between the wifi adapter and Windows. In this scenario, if the netwtw10.sys file is not able to perform correctly then the system generates a stop error. To fix this, update WiFi driver through Device Manager by carefully following the steps –
- Hold down Windows key and press R.
- Then, type – devmgmt.msc.
- Hit – Enter.
- Go to the Device Manager and double-click on – Network adapters.
- Look for – WiFi driver currently in use.
- Right-click on this and choose – Update driver.
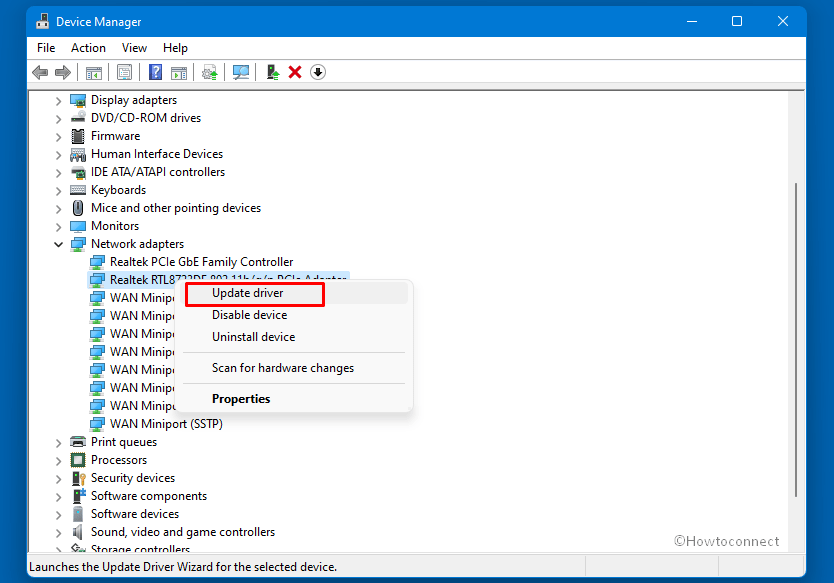
- Click on – Search automatically for drivers.
- Now thoroughly observe the list on the Device Manager if any driver is showing yellow exclamation mark.
- If found, right-click and select – ‘Update driver’.
- Restart your machine and check if the blue screen still occurs.
- If the error persists, again go to the Device Manager.
- Right-click on the same wireless adapter and choose – Update drivers.
- This time, click – Browse my computer for drivers.
- On the next screen, select – Let me pick from a list of available drivers on my computer.
- Highlight the correct one and click on Next. Here if multiple options are showing and are unable to decide which one is correct for your computer then try one by one.
- Once again, restart your PC.
Way-3: Uninstall Windows update
Updates are yet the lifeline of an operating system but at times they may contain errors that create problems. This is a way to protect your system from everyday threats and fix past errors on Windows. When Netwtw10.sys bug checking occurs there might be a Windows update behind this problem. Recall in your mind that whether you have installed a Windows update before the error was started. You can also check a list of updates history on the location Settings (Win+I) > Windows update > Updates history for the same. If confirmed then you need to remove the update first.
- Click on Search.
- Just, type Control.
- Hit the Enter key.
- Select – Programs and features from the control panel.
- Select the Installed updates link in the left sidebar.
- Find the update and right-click on it.
- Select – Uninstall.
- There will be a confirmation dialog; click uninstall or Yes as shown.
- It is now hoped that Netwtw10.sys will no longer cause blue screens anymore.
Way-4: Run System File Checker (SFC)
Basically, any stop error with the message “What failed: Netwtw10.sys” is caused by a conflict between an invalid or faulty .sys file and a Windows component. Even when it happens due to the incompatibility of a driver the conflict involves. The main victims of this situation are system files that get corrupted, go missing or break. Thankfully, System file checker tool always stands by in this case which not only checks but also repairs the files. You need to run this tool via cmd command line –
- Hit – Start.
- Simply, type – cmd.
- Select – Run as administrator.
- If prompted, click on – Yes.
- Type – SFC /Scannow when the command prompt appears.
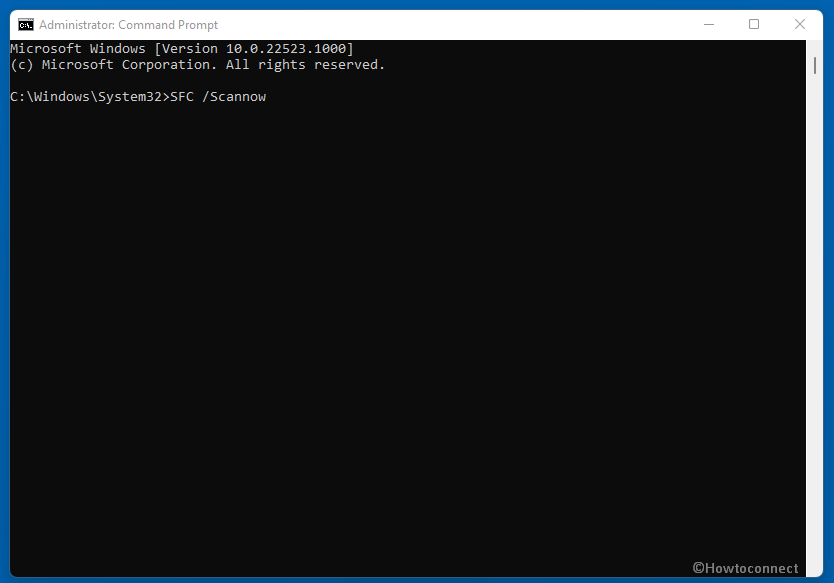
- Hit – Enter key.
- When the command starts the repair, you will see the message “Beginning system scan”. It may take a while.
- After reaching 100%, restart the computer.
- This time may be the BSOD error is not occurring.
Way-5: Use DISM Tool
Blue screen error netwtw10.sys may occur due to Windows image files malfunction. A .wim file can be checked and repaired with DISM (Deployment Image Servicing and Management) utility. Therefore try using DISM with the steps –
- Press – Winkey+R.
- Please type – cmd.exe.
- Press – Ctrl + Shift + Enter.
- When UAC shows up, click – Yes.
- After the command prompt is visible, type – DISM /Online /Cleanup-Image /RestoreHealth.
- To run the tool, press – Enter.
- Restart the computer after the process is finished.
Way-6: Uninstall third-party programs
It is a universal truth that Windows BSOD error occurs because of third-party programs. In fact, the incompatible software has the possibility to create messes turning into blue screen error. So when netwtw10.sys BSOD problem rose up there might be a 3rd party utility behind it. In this case, there are 2 options – you can update the software or uninstall the same. For updating, you will find a control button on the interface, use it. To uninstall the utility, please follow the listed steps –
- Press – Windows+R.
- Write – appwiz.cpl.
- Hit the – Enter.
- The Programs and Features window shows you all installed programs.
- To remove a utility, right-click on it and select – Uninstall.
- If a warning pop-up appears, click – Yes.
- To check Netwtw10.sys BSOD whether it persists, you need to restart your system.
Way-7: Install Windows update
If none of the above solutions works, installing pending Windows update may fix the error Netwtw10.sys. However, this stop error is currently not on the list of Known issues despite Microsoft pushes resolutions for errors reported through feedback at times. So, check for Windows updates if anyone is pending and install it using the below guidelines –
- Click – Search.
- Write – updates.
- Press – Enter.
- In the Settings app, once it has loaded, click on – Check for updates.
- Right at the time, the system will start checking for updates. It will take a short while to complete the downloading depending on the internet speed.
- On ending, a pop up will appear on the screen; click – Restart now.
Way-8: Run a full scan of built-in Window defender
NetworkWtw10.sys errors may also be caused by malware if it snuggles in Windows. The threats often reach the system through less trustworthy software, mails, or flash drive. If in this case, the malware is the reason then the built-in Windows defender will detect and remove it. Follow the instructions –
- Click on – start.
- Type – security.
- Hit – Enter.
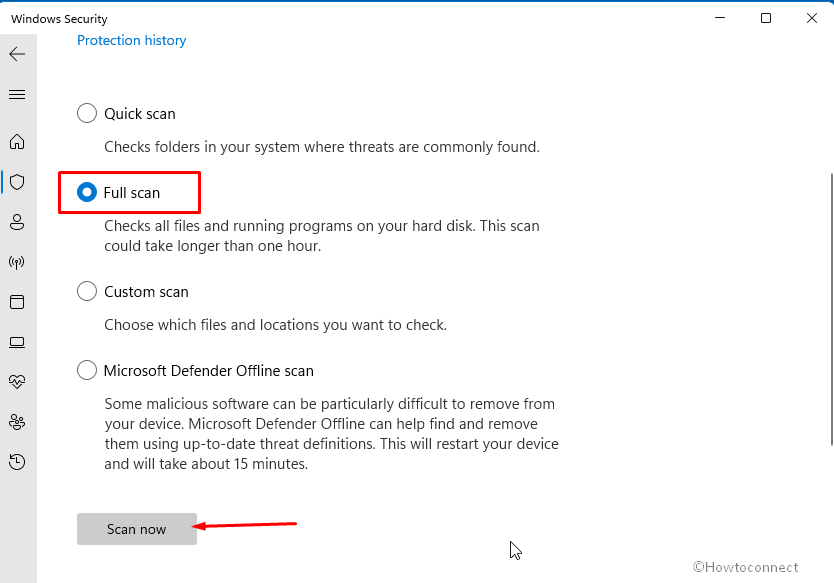
- In Windows security application, select – Virus & threat protection.
- Click on – Scan options.
- Check the radio button for – Full scan.
- Click – Scan now.
- Wait for the process to complete (It may take hours so stay with patience).
- After finishing, you’ll see a notification carrying some recommendations. Make sure to follow them carefully.
- Reboot your PC to check if the BSOD is fixed.
Way-9: Clean Boot Your Computer to Fix the Netwtw10.sys BSOD
The clean boot process starts a Windows-based computer with only a few drivers installed that can at least handle the system. This method has the benefit that there are no third-party programs present that can interfere with the operations on Windows. Consequently, you become able to trace out if any outsider software is at fault. This is how you do it –
- Press the Windows + R.
- Type – msconfig.
- Hit the – Enter.
- Shift to the Services tab once the system configuration window appears.
- Mark the box that says – Hide all Microsoft services.
- Then click on – Disable all.
- Switch to the Startup tab.
- Choose – Open Task Manager.
- You can now see a list of all Startup programs.
- Right-click an app and select Disable.
- Repeat the same for all enabled startup apps.
- Return to System Configuration after closing the Task Manager.
- Click on Apply then on OK.
- Choose – Restart when prompted.
- After the system has rebooted, see if the Blue Screen appears.
Methods list:
Way-1: Roll back the Wifi Driver
Way-2: Update Wireless Adapter Driver
Way-3: Uninstall Windows update
Way-4: Run System File Checker (SFC)
Way-5: Use DISM Tool
Way-6: Uninstall third-party programs
Way-7: Install Windows update
Way-8: Run a full scan of built-in Window defender
Way-9: Clean Boot Your Computer
That’s all!!