Here, you will find all possible ways to resolve SPECIAL POOL DETECTED MEMORY CORRUPTION error in Windows 10. This BSOD indicates that the driver you are trying to work with has been traced out in an invalid section of the special pool. Bugcheck value 0x000000C1 refers to this blue screen of death and it pop-up anytime when something abnormal occurs with the hardware and RAM as well. Additionally, corrupted Realtek driver for Wireless USB 2.0 is found the culprit of creating such an issue.
According to the reports, SPECIAL_POOL_DETECTED_MEMORY_CORRUPTION is often carried out either with rtwlanu.sys or nvlddmkm.sys system files. Furthermore, outdated drivers, missing system files, bad areas in hard drive and conflict between similar apps are equally liable. Once affected, your PC causes multiple issues but most infuriating among all is Windows 10 restarts automatically at regular intervals. Freezing desktop and unexpected termination of programs are pretty common scenarios too.
SPECIAL POOL DETECTED MEMORY CORRUPTION Error in Windows 10 Solutions
Here is how to fix SPECIAL POOL DETECTED MEMORY CORRUPTION error in Windows 10 –
1] Run Sfc /scannow to repair corrupted system resources
Corrupted system resources and missing DLL files are the most common causes to generate SPECIAL_POOL_DETECTED_MEMORY_CORRUPTION Windows 10 BSOD error. To mend or restore them, you need to bring a command line for System File Checker into action via the CMD (admin). In any case, if the found corruption can not be repaired automatically the tool will let you know about the details. Rest guidelines are as follows –
- Right-click on the Start button and select Run from the Power user menu.
- After appearing, type cmd in the text box provided there.
- Press Ctrl+Shift+Enter to get access to Command Prompt with admin privilege.
- When a UAC prompts, click the Yes button to assure your consent.
- While in the black window, type the following command there and hit Enter to execute the same –
Sfc /scannow.

Now, wait patiently and let the system complete the process. Once the procedure hits 100%, see the report and then work accordingly.
2] Keep your Windows 10 up-to-date
An outdated OS is comparatively inadequate and can easily get affected with bugcheck value 0x000000C1. However, Microsoft releases two major builds in a year and cumulative updates frequently. These patches come up with lots of new features and bug fixes as well. That’s why keeping your operating system updated is pretty much effective to eradicate Windows 10 BSOD issues automatically including SPECIAL POOL DETECTED MEMORY CORRUPTION. So, let’s move for downloading the update in the below part.
Important – To get the updates without interruption, manage to have a speedy internet connection. In case of using Mobile Hotspot, turn off Metered Connection to start with otherwise the downloading will not begin. After setting all the things, move with the below method –
- Launch Windows Settings app by pressing Windows logo and I keys together on keyboard.
- Click Update & Security.
- On the next page, shift to the right pane and click Check for updates button.
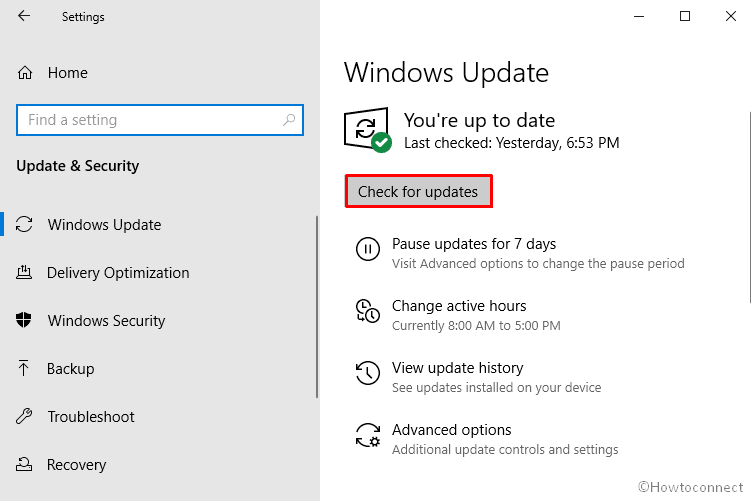
- When the system gets any patches, hit Download button.
- Once downloading ends, the installation will be done automatically. All you need to do is keeping your eyes on the computer screen as it will ask you to Restart the device.
3] Bring Device Manager into the action to get the latest driver
Faulty or outdated device drivers often result in SPECIAL_POOL_DETECTED_MEMORY_CORRUPTION along with plenty of other problems. Furthermore, corrupted applications are responsible for slow operational speed too. Therefore, good idea is to update them all by putting Windows Device Manager into the action. Using this utility is quite helpful and facile as outdated ones are indicated with yellow exclamation here.
- Press Win+X and choose Device Manager from the upper part of the Quick link menu list.
- When it turns up on the screen, search for the devices having yellow exclamation marks beside them and double-click on the same.
- From the expanded list, right-click on an item and select Update driver option to initiate the process.
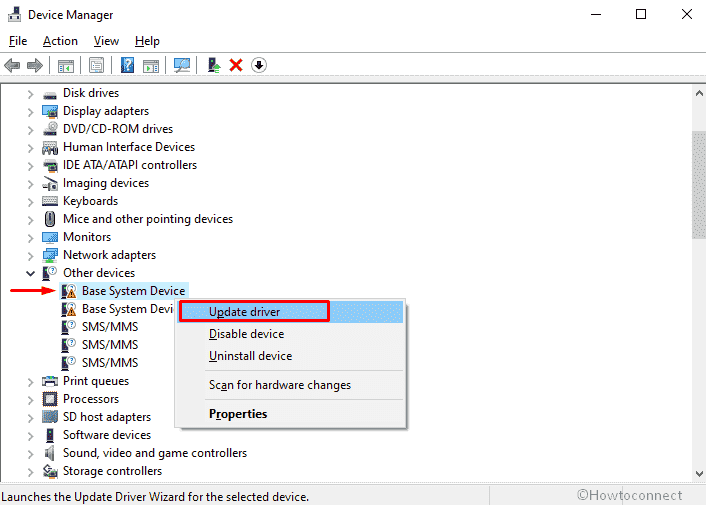
- Now the system will present two options; Choose Search automatically for updated driver software.
- Do the same for each driver having a yellow warning sign and after completion, restart the Windows to make the changes effective.
4] Uninstall third-party antivirus to fix SPECIAL POOL DETECTED MEMORY CORRUPTION
Viruses and malware cause tangled damage to the system and you can hardly avoid them once affected. As a safeguard, you install third-party antivirus programs but unfortunately, most of them are not trusted every time and quite often they create Windows 10 BSOD error including SPECIAL POOL DETECTED MEMORY CORRUPTION. Thus, you need to remove them to escape the errors by removal of the existing program. Let’s see the procedure –
- Invoke Run command by pressing Windows logo and R on the keyboard.
- Type appwiz.cpl in the provided text bar.
- Click the OK button to bring forward the Program and Features window.
- Next, select the installed third-party antimalware program. In our case, it’s Avast Free Antivirus.
- Click on the same and hit the Uninstall option from the top ribbon.
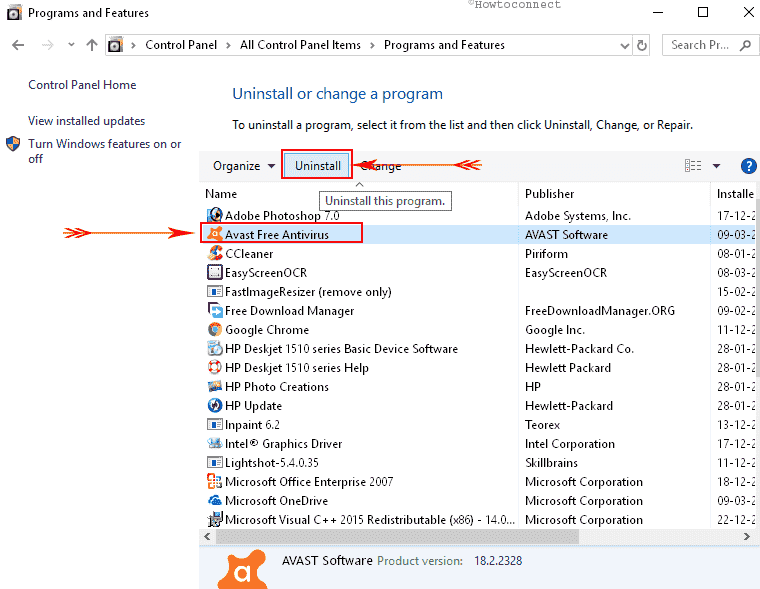
Follow the on-screen instructions to remove the app completely from your system.
5] Sort out defective Windows image files
Sometimes Windows image files of your OS can interfere with corruption and end up causing SPECIAL_POOL_DETECTED_MEMORY_CORRUPTION with bugcheck value 0x000000C1. To settle this issue, Deployment Image Servicing and Management tool has been proved to be handy. See the executing method down below –
- Open the Cortana with text view by using Win+Q hotkey.
- Type cmd.exe in the search bar and when result shows up, click Run as Administrator from the right pane.
- After UAC becomes visible for permission, hit Yes to give consent.
- Copy the following command and paste it after C:\Windows\system32> –
DISM.exe /Online /Cleanup-image /Restorehealth
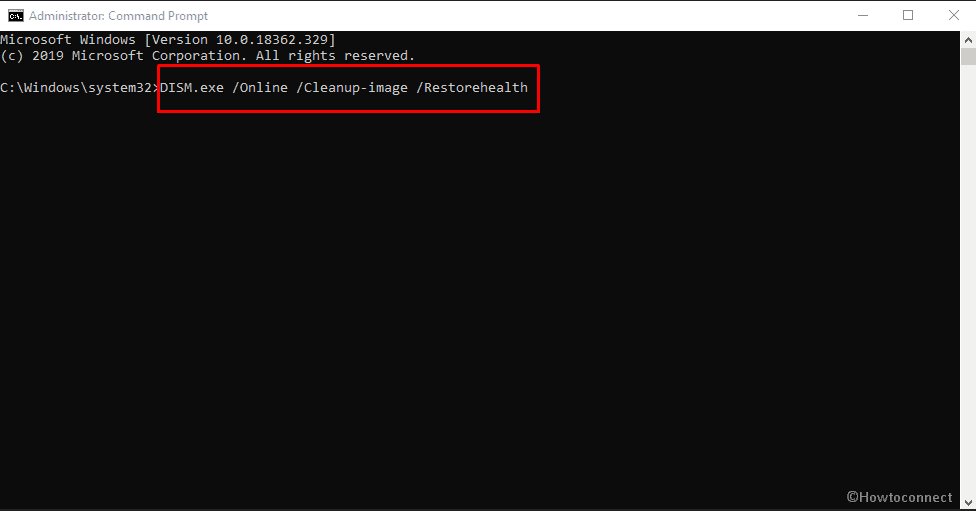
- Hit Enter key and let the utility start checking for problematic windows image files.
- When it is finished finally, reboot the PC so that the changes can be effective.
6] Analyze minidump to fix SPECIAL POOL DETECTED MEMORY CORRUPTION
To find out the driver that is causing Windows 10 BSOD error SPECIAL_POOL_DETECTED_MEMORY_CORRUPTION, you have to look over minidump files. It might seem complicated but still, a substantial number of people found it beneficial. Here are the steps you need to follow –
- Head over to Desktop screen and right-click on This PC followed by choosing Properties.
- Click Advanced system settings from the left column.
- When System Properties makes an appearance with Advanced tab, click on Settings located under the Startup and Recovery section.
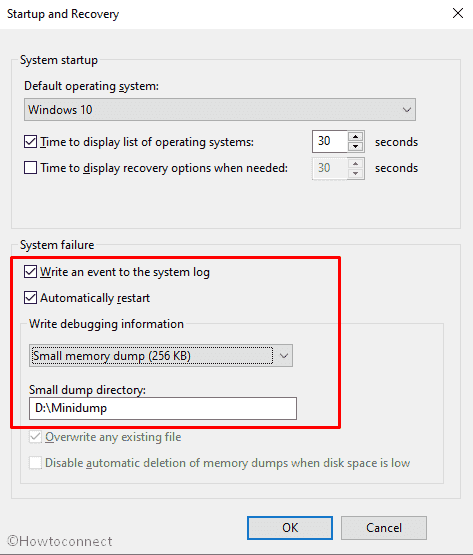
- On the next wizard, make sure the checkboxes of Write an event to the system log and Automatic restart are ticked.
- Now, click the arrow icon located under Write debugging information and choose Small memory dump (256KB) from the drop-down menu.
- Put D:\Minidump into the box of System Dump Directory as shortcut path. You can set any other path if you wish to and then click OK button to apply the changes.
- Navigate the official page of the Windows Driver Kit and download the tool.
- On completion, open the file and install it as well by following the instructions showing on the display.
- After that, . Put the following command in order to change to the Debugging Tools for Windows folder and hit Enter –
cd c:\program files\debugging tools for windows
- To load the dump file into a debugger, execute any of the following commands in the same Command Prompt –
windbg -y SymbolPath -i ImagePath -z DumpFilePath
kd -y SymbolPath -i ImagePath -z DumpFilePath
- To save the file in C:\windows\minidump\minidump.dmp folder then use the following command –
windbg -y srv*c:\symbols*http://msdl.microsoft.com/download/symbols -i c:\windows\i386 -z c:\windows\minidump\minidump.dmp
- After finishing all the above steps, check the file to get the error information and explore the bugs in Google to resolve this Windows 10 BSOD error.
7] Update, Rollback or Disable the responsible Drivers
We already said the Realtek Wireless USB adapter might cause SPECIAL_POOL_DETECTED_MEMORY_CORRUPTION BSOD error in Windows 10. It mostly happens if you recently updated this driver. In such a case, roll back to the previous version or disable it for a while and check if bugcheck value 0x000000C1 has vanished. If it didn’t work, you can update Windows 10 them later to get the latest version. Follow the below guidelines to head over –
- using any convenient way.
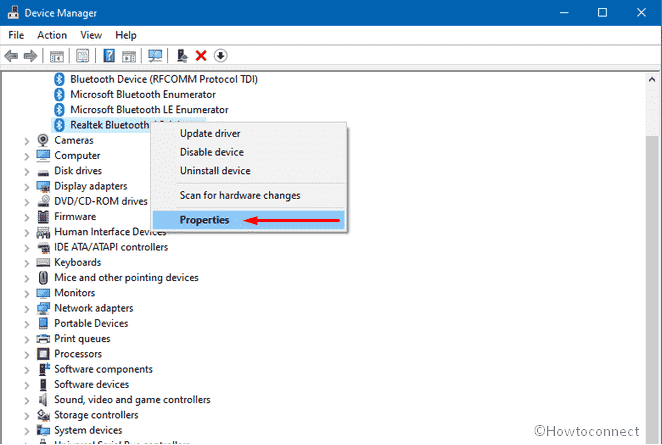
- Once it becomes visible, locate Bluetooth and double-click on the same to expand the driver list.
- Then, right-click on Realtek Bluetooth and choose Properties.
- On the upcoming wizard, jump to the Driver tab and click Roll Back Driver button. This will only work if you have updated it already.
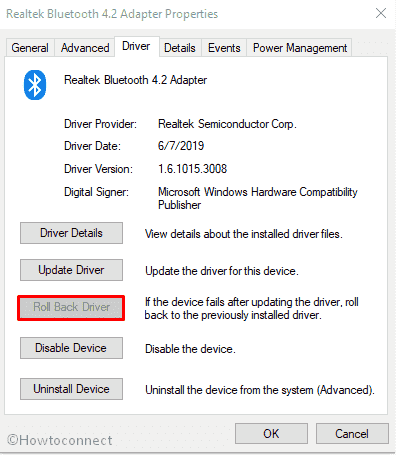
- By following similar way, you can disable this device too.
8] Wipe out the junk files
A pile of temporary files generated in your system due to normal browsing or usage of the computer. These are junk files and if you don’t clear off regularly, they occupy huge space on your Hard disk. Often several problems including Windows 10 BSOD error show up because of this reason only. However, Microsoft has provided Disk Cleanup utility on Windows to get rid of such needless stuff and free-up disk space. To use this, here are the sequence of steps you must follow –
- Press Win key and S simultaneously to open Windows search.
- Write down, cleanmgr in the specific bar and from the results, launch Disk Cleanup.
- On the imminent wizard, click all the checkboxes located beneath Files to delete. Be careful with Download and Recycle Bin. If any important file exists there leave them unchecked.
- After that, click OK button from the bottom to initiate the cleaning process.
- On finishing, reboot the Windows to view the changes.
9] Perform a clean boot
Your PC might throw SPECIAL_POOL_DETECTED_MEMORY_CORRUPTION error due to some corrupted programs and services. Therefore, overcome the situation using Clean Boot and check if the bugcheck value 0x000000C1 resolved. Here is the process to do so –
- First of all, click the search icon located in the taskbar and type control panel.
- Hit Enter to open Control Panel.
- Set its View by option to small icons.
- Thereafter, click Administrative Tools from the available links.
- Open System Configuration by double-clicking on the same from the folder.
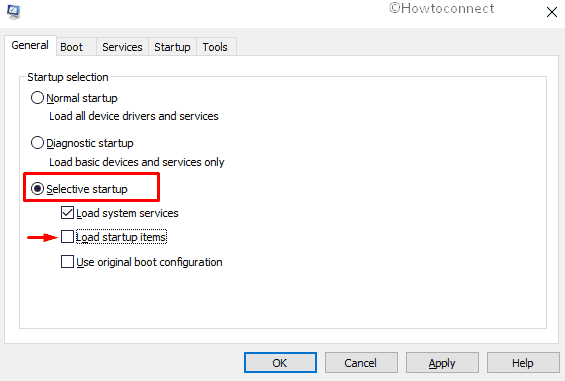
- Next, click the radio button against Selective startup and deselect the box assigned for Load startup items.
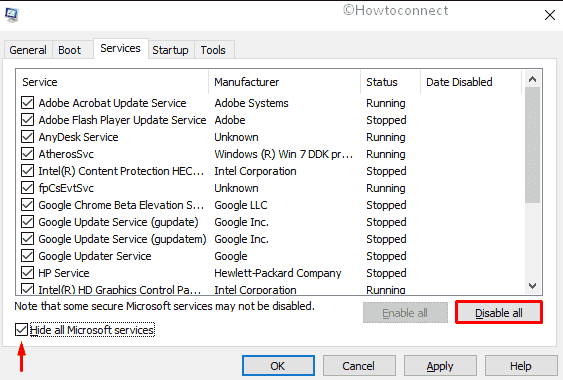
- Then, move to Services tab and click the checkbox adjacent to Hide all Microsoft services
- Hit Disable all button.
- Following that, shift to the Startup tab and click on the link Open Task Manager.
- The manager will be visible with Startup tab opened by default. Right-click on each item listed here and choose Disable for all.
- Finally, get back to the System Configuration window and click on Apply followed by OK to implement the changes.
10] Conduct a full scan to eliminate threats
With developed tech world, the security system is becoming more vulnerable to threats and malware infections. As a result, you become easy prey by visiting a suspicious website or clicking a link coming in spam mail. Often the malware removes important components that cause Windows 10 error SPECIAL POOL DETECTED MEMORY CORRUPTION. Therefore, you must run Windows Defender Full Scan to wipe out that malware from the system. Following instructions will help you to maze out from this –
- Click on the Action Center icon from the lowermost right of the Taskbar
- Select Expand if the options are collapsed.
- Choose All Settings to get access to the Windows Settings app.
- Once the application opens up, select Update & Security.
- From the upcoming page, select Windows Security from the left column and shift to the right pane.
- Now, choose Virus & threat protection option.
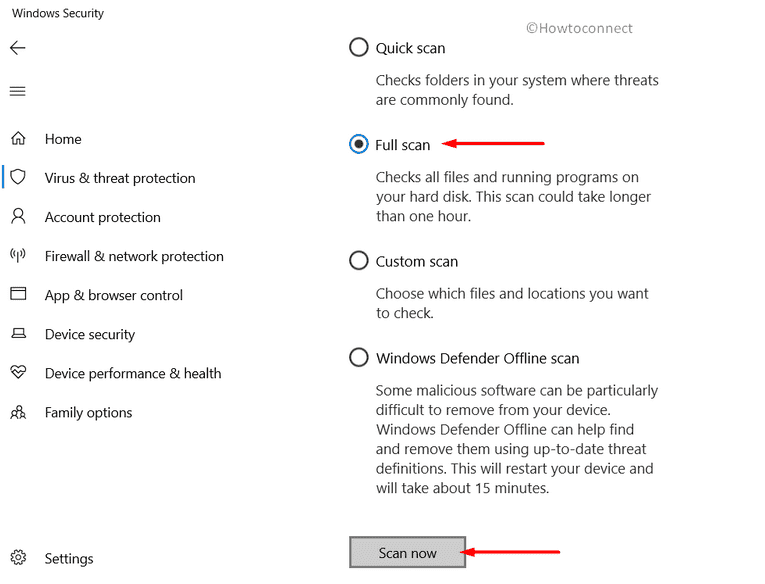
- A separate window will make an appearance now, click Scan options link.
- At the moment, select the radio button of Full scan followed by clicking Scan now button.
11] Check for RAM and memory issues
When Windows forms bad sector in memory, there is a high chance to get Windows 10 BSOD errors such as SPECIAL POOL DETECTED MEMORY CORRUPTION. To mend this bugcheck value 0x000000C1, Windows Memory Diagnostic is quite handy as it detects the problem automatically and resolve them as well. Go through the guidelines below to use the tool –
- Bring Windows Settings app by jointly hitting Win logo + I hotkey.
- Once it becomes visible, type memory in its search box.
- From the outcome list, go ahead with the Diagnose your computer’s memory problems option.
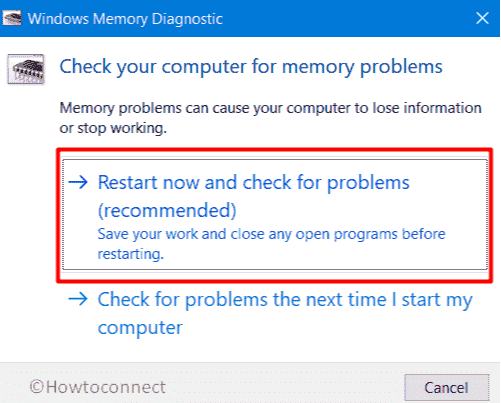
- On the evident pop-up, click the option entitled Restart now and check for the problems (recommended).
- Now, the OS will prepare itself for rebooting. After a cycle of restarts, you will see a blue screen detecting memory issues.
- Upon completion of 100 percent, the device will reboot once again.
- Once the system powers up, check the output of the diagnosis from the System tray of the notification area.
12] Go for automatic repair to fix SPECIAL POOL DETECTED MEMORY CORRUPTION
Automatic Repair is a built-in utility by Microsoft that is able to correct startup failure errors including SPECIAL_POOL_DETECTED_MEMORY_CORRUPTION. Even though the tool has certain restrictions, it works fine to eradicate several blue screen of death. Let’s see the process –
- Open Windows Settings app and then click Update & Security.
- On the next page, select Recovery option from the subsections on the left column.
- Head over to the right side and click Restart now button located beneath Advanced startup.
- Wait until the device gets restarted and after powering up, select Troubleshoot =>Advanced options => Startup Repair.
- When you view Automatic Repair page, provide the credentials of your account and then click Continue to initiate the repairing process.
13] Take the help of disk checking utility to settle upon Hard Disk
Disk error and lost clusters often put forward blue screen of death SPECIAL POOL DETECTED MEMORY CORRUPTION that holds bug check value 0x000000C1. To settle things up, you need to execute chkdsk utility tool in Elevated Command Prompt. Here is the guideline to follow through –
- Access Elevated Command Prompt using any preferred method.
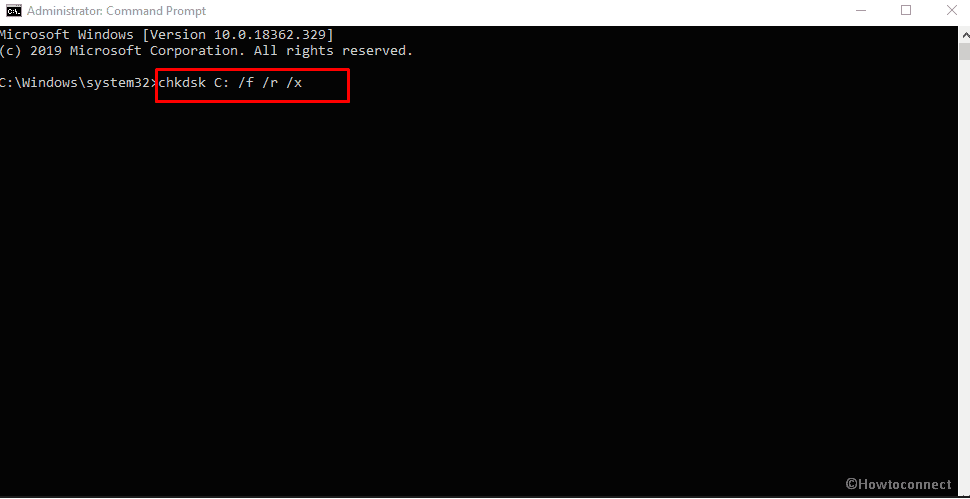
- Once the black window comes into the sight, enter the following command at the blinking cursor –
chkdsk C: /f /r /x
- Hit Enter to let the Disk Checking utility take necessary action.
- This process might take a little longer as it will pass through whole areas of Hard Disk.
- After the checking is finished, reboot Windows to make changes effective.
14] Make Automatic Restart disable
Once SPECIAL_POOL_DETECTED_MEMORY_CORRUPTION BSOD error shows up in the system, Windows undergoes through automatic restart continually. This is a pretty uncomfortable situation as you hardly can finish an important task. Making automatic restart inoperative doesn’t resolve the blue screen of death but you will get enough time to run the PC efficiently. Here is the way to proceed –
- Initially, save and then close all ongoing processes or simply minimize them. Afterward, move ahead to the Desktop area using the hotkey Win+D.
- Now, right-click on This PC icon and from appearing fly-out menu, choose Properties option.
- From the subsequent window, choose Advanced system settings lying in the left pane.
- Once System Properties window turns up with Advanced tab displayed, move down to Startup and Recovery area and make a click on Settings.
- On the forthcoming wizard, move to the System failure area and remove the tick mark from the box against the option Automatically restart.
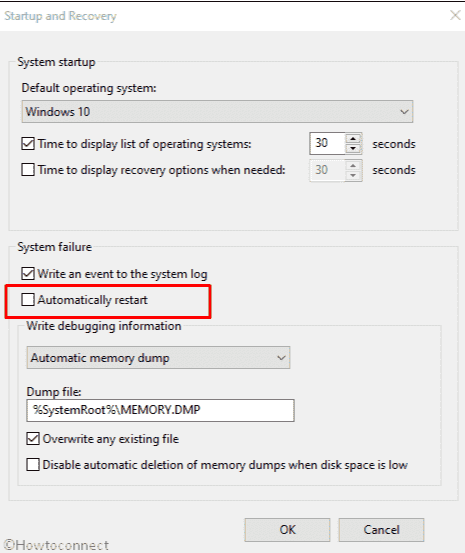
Step-6: Lastly, click the OK button to implement the modifications that you made.
15] Remove apps having similar congruence
Applications that perform similar tasks have a tendency to create conflict. As a result, they lose track of the necessary components from each eventually cause several errors including blue screen of death SPECIAL_POOL_DETECTED_MEMORY_CORRUPTION. So, you need to uninstall the app that may create a collision. To remove a program from the system, follow below instructions –
- Press Win+X hotkey to invoke Power user menu and then select Apps and Features option.
- On the following page, go to the right side and search for the suspicious applications from the available list.
- Once found, click on the same and hit Uninstall from the extended pane.
- If a UAC prompts, select Yes to provide your consent.
- Follow the on-screen instructions to remove it completely and do the same for each application that is creating issue.
- Lastly, Restart the PC and check if the Windows 10 BSOD error still exists.
16] Separate the connection of external accessories
It’s really adverse that you might get SPECIAL_POOL_DETECTED_MEMORY_CORRUPTION Error in your system just after attaching Hardware accessories like mouse and HDD. Well, the fix is not hard at all, only disconnecting does the trick. Follow the below guidelines to separate them –
- Disconnect everything attached to your device externally.
- Keep them in a safe place with care and then Restart Windows 10 PC.
- After performing a cycle of rebooting check for the blue screen of death error in the system.
- If the bug check value 0x000000C1 vanishes, plug in all the accessories gradually.
- Afterward, open a web browser and visit the manufacturer’s website for those devices to download and install the latest drivers.
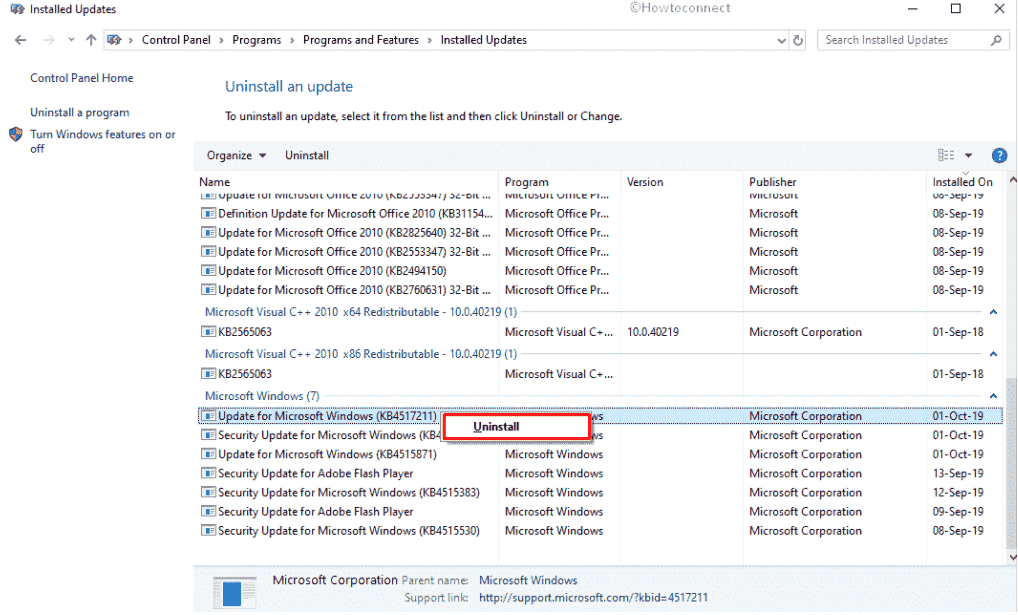
17] Get rid of faulty Windows Update Files
In rare cases, released patches of Microcarryrries out sort of bugs and ended up causing various kinds of errors including SPECIAL_POOL_DETECTED_MEMORY_CORRUPTION. Besides, there are some times when the installation process gets stuck in between due to slow internet speed and can cause the same. Hence, you need to uninstall that faulty update in order to settle down the blue screen of death. Here’s how –
- Right-click on Start button and choose Settings from the Win+X menu.
- Navigate to the Update & Security => Windows Updates => View Update history => Uninstall updates.
- This will bring forth Program and Features windows showing all the installed patches.
- Select the most recent received one and click on the Uninstall button from the top.
18] Boot into Safe Mode
Safe mode is a basic resolution that saves you from all those crucial problems including SPECIAL_POOL_DETECTED_MEMORY_CORRUPTION. Basically, this is a special startup method where Windows loads only basic programs and solve the general issues. The procedure is as follows –
- Open Run command by pressing Win+R hotkeys together.
- In the text bar, type msconfig and press the Enter key.
- When System Configuration window becomes visible, go into the Boot tab.
- Move on to Boot options segment and check the box of Safe boot to activate all the grayed out options.
- Next, click the radio button before Minimal to continue.
- Hit the Apply button first followed by clicking OK to save these changes.
- Now, restart the PC and upon completion of the first cycle of rebooting, continuously press F8 key until the next page shows up.
- From the consequent page, select the Safe Mode option.
- Boot into Safe Mode on the subsequent move.
19] Run online Blue Screen Troubleshooter to fix SPECIAL POOL DETECTED MEMORY CORRUPTION
After getting so many reports about Windows 10 BSOD error, Microsoft introduced Blue Screen Troubleshooter in the Settings app. But right now the utility needs to be run online however you can access it through search bar. Follow the below procedures to use it –
- Press Windows key and Q together to call up Cortana with text view mode.
- Type bluescreen in the search bar and when the result rolls out click Find and fix bluescreen problems.
- A pop up will make appearance named Troubleshooting wizard. Let this find out the issue related to the specific blue screen of death and solve them by following on-screen instructions.
20] Update BIOS
SPECIAL_POOL_DETECTED_MEMORY_CORRUPTION often comes up due to outdated BIOS. Therefore, you need to update the same to fix Windows 10 BSOD error along with other stop codes. But, you need to be extra cautious while doing so as most of the sensitive components of your PC are completely dependent on this. Follow the below steps carefully to move ahead –
- Launch Run dialog box by pressing Win+R and type msinfo32 in the blank text box.
- Hit Enter key to access System Information window.
- When it comes into the view, type BIOS version in the search bar and click the Find button.
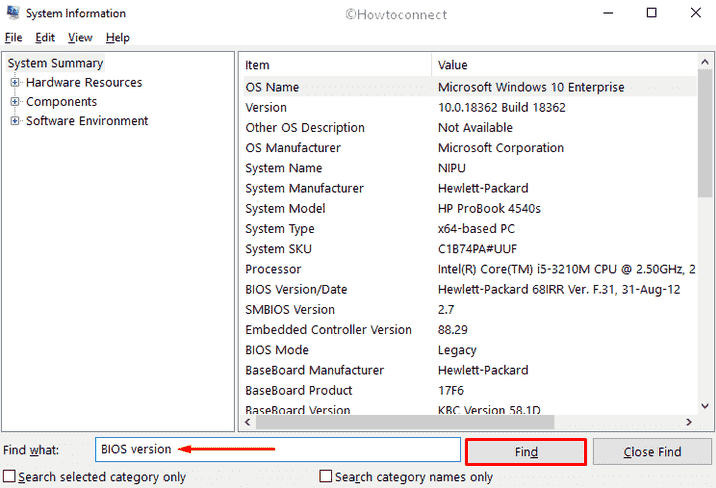
- Now, the system will present all information about the developer as well as the version of BIOS on the desktop screen.
- Note down the info if needed and close that window.
- Thereafter open a web browser, visit the manufacturer website for your BIOS using the information you got earlier.
- Finally, download the file and install them as well.
21] Put fast startup out of action
Fast Startup is used to store the inside story of your system in its memory when you shut it off. Using that information, the operating system loads faster when you power it up next time. In the continuation of this process, Windows 10 keeps storing related info about SPECIAL_POOL_DETECTED_MEMORY_CORRUPTION too once affected. To get rid of such situation, check out the below steps to disable fast startup –
- Click on the search icon located in the Taskbar and type cp in the given bar.
- When you see Control Panel in the result, hit the Enter key.
- Set the View by option of succeeding window to Small icons.
- Search for Power Options eventually click on the same.
- From the impending page, select Choose what the power buttons do link from the left-hand side.
- Next, click Change settings that are currently unavailable to unveil the hidden options.
- Move down and untick the checkbox located beside Turn on fast startup (recommended).
- Once done, click Save Changes button to make the modifications effective.
22] Revert to the error-free state using System Restore
If you are conflicting with SPECIAL_POOL_DETECTED_MEMORY_CORRUPTION blue screen of death just after making any change to the system, undo it with system restore. In this way, you will be able to head over a previous state where there was no error. Here is how to proceed –
- Invoke Taskbar search by pressing Windows key+S together.
- Type rstrui in the specific field and hit Enter.
- When System Restore wizard makes an appearance, click Next button from bottom.
- On the next page, choose the last restore point and again hit the Next.
- In the end, click the Finish button to initiate the procedure of restoring Windows.
Methods:
1] Run Sfc /scannow to repair corrupted system resources
2] Keep your Windows 10 up-to-date
3] Bring Device Manager into the action to get the latest driver
4] Uninstall third-party antivirus
5] Sort out defective Windows image files
6] Analyze minidump
7] Update, Rollback or Disable the responsible Drivers
8] Wipe out the junk files
9] Perform a clean boot
10] Conduct a full scan to eliminate threats
11] Check for RAM and memory issues
12] Go for automatic repair
13] Take the help of disk checking utility to settle upon Hard Disk
14] Make Automatic Restart disable
15] Remove apps having similar congruence
16] Separate the connection of external accessories
17] Get rid of faulty Windows Update Files
18] Boot into Safe Mode
19] Run online Blue Screen Troubleshooter
20] Update BIOS
21] Put fast startup out of action
22] Revert to the error-free state using System Restore
That’s all!!