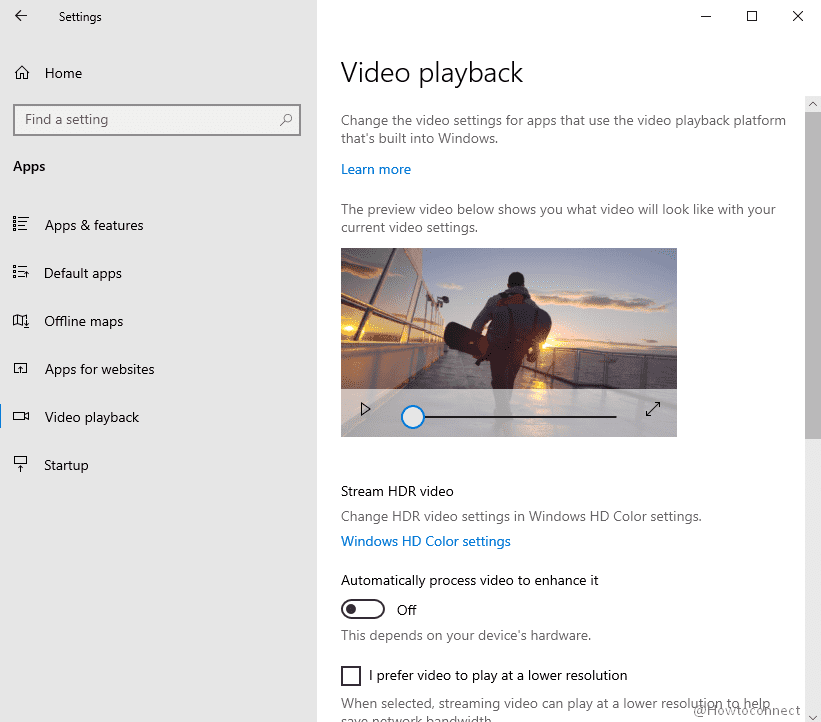
Some Windows 10 users like you disable Stream HDR feature before upgrading the device to its next immediate versions. But unfortunately, they find that the setting won’t turn on after updating to version 1903 or 1909. Sum is, you encounter Switching off this High Dynamic Range fails to get activated upon upgradation.
Microsoft experts suggest two solutions to make the streaming of HDR videos working again. One is to restore the device to the previous version, toggle On Stream HDR video setting, and then install the next version. Secondly, to modify a registry entry through Command Prompt which will automatically enable HDR functionality. Explore the below section of this article to see both the methods in detail. Let’s begin –
Table of Contents
HDR won’t turn on in Windows 10
Here is How to Fix HDR won’t turn on in Windows 10 –
1] Enable HDR video switch through Registry
- Open taskbar search by using Win+S shortcut.
- Type cmd and when Command Prompt and select Run as administrator from the right flyout.
- Click Yes button on the prompt of User Account Control (UAC) dialog.
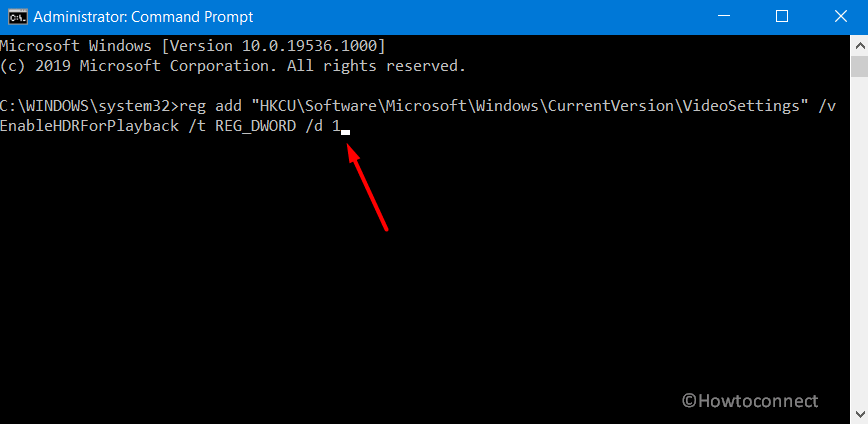
- On the command prompt, copy-paste the following text on a single line and hit Enter.
reg add “HKCU\Software\Microsoft\Windows\CurrentVersion\VideoSettings” /v EnableHDRForPlayback /t REG_DWORD /d 1
- Once you successfully execute the above command, exit Command Prompt and Restart Windows 10 PC.

2] Restore device to the previous version
Remember that restoring to the earlier version is needed because you have to enable Stream HDR video setting. Once you have enabled, update Windows 10 to the subsequent edition v1903 or v1909 to fix the problem.
To roll back to the previous version, go through these series of steps –
- Press Win Logo+I.
- Click Update & Security.
- Choose Recovery subsection from the left pane.
- Switch to the adjacent side and click Get started button underneath Go back to the previous version of Windows 10.
You can also follow – How to Restore Earlier Build in Windows 10.
Note – This option will be available only for a limited time, so you need to roll back within 10 days of upgradation. Choosing this method will upkeep the personal files; whereas the apps and drivers that you installed after the upgrade will be removed. Moreover, rolling back to the previous version will also remove the settings you made earlier.
After successfully enabling the “Stream HDR” video switch in Win 10, v1809, do check for updates and grab the next version 1903 or 1909.
Methods:
1] Enable HDR video switch through Registry
2] Restore device to the previous version
That’s all!!
