Creating a backup is the most important part when working on a PC but you might often face an annoying situation. The built-up tool in Windows 10 may show low disk space error during the process stopping the backup operation. However, don’t worry we are here with foolproof solutions to fix the issue.
Windows 10 0x80780119 often occurs due to not enough disk space, unnecessary, language packs, and obsolete drivers. Furthermore, disabled System Protection, outdated OS, USN Journal might also lead to the problem. See the ways now –
The Backup Failed Error 0x80780119
Here is how to fix The Backup failed Error 0x80780119 in Windows 10 –
1] Set the correct size of OEM partition
In order to resolve this issue, you can create a new disk partition or simply allocate more space to the OEM Partition by increasing its size. Commonly, the backup process fails because of insufficient room in a drive so this error code might be a result of that. However there are only a handful of configurations that let you do that, and if it works for your system, then here’s how you proceed with it :
- Click the search box or icon on the taskbar and type the – diskmgmt.msc.
- Press Enter to open Disk management.
- Right-click on System Reserved and select the – Properties.
- Ensure the minimum free space available is more than 40 MB the space allocated to be used is above 100 MB as well.
Note – Sometimes it’s quite a complex task to allocate new space to system reserved volume rather than to create a new volume. Therefore, let’s see how you can proceed with creating a new volume –
First of all, you need to determine where you want to have your system reserved volume since it can only be created on a primary partition of an MBR disk. Let’s say that the name of our new volume is ‘E’ –
- Press Win+S and type the – cmd.
- Select the – Run as administrator.
- In the command prompt type in the following syntax exactly as it’s written and hit the enter –
bcdboot.exe /s c: \windows /s E:
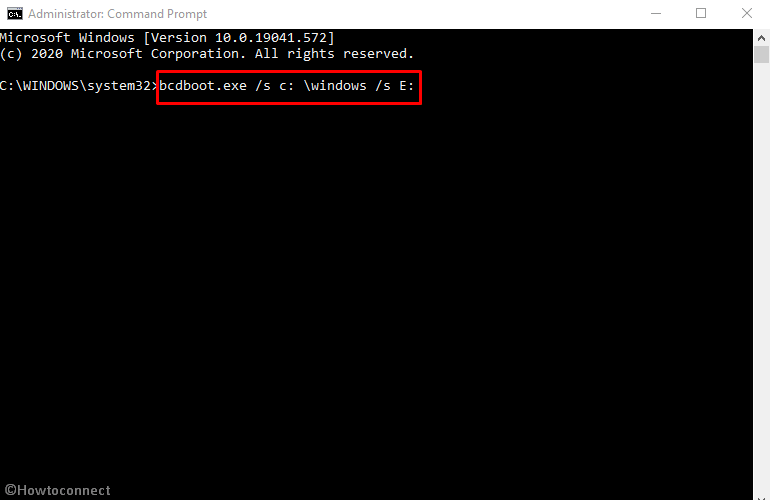
(Important – This command assumes that your installation folder is located in “C:\windows” if it’s not then change it accordingly. And If you already have a volume E then you can put in whatever letter you wish as per your choice.)
- This command would create a new volume “ E ” what you need to do next is open DISKPART and ensure that the volume E is active. You are able to do this by typing in the following three commands, making sure that you hit enter after each one.
DISKPART
DISKPART> select volume E
DISKPART> active
Now restart your computer and volume E would become your new system volume. Check whether Backup failed Error Code 0x80780119 still persists.
2] Remove the USN Journal
The NTFS format of system reserved storage entails a unique feature USN ( Universal Sequence Number) Journal. This maintains a record of all the alterations made into the root drive of the system. Over a period of time, this drive becomes so large that it leaves very little or no space at all for any system image to be created. As a result, Error 0x80780119 is generated and the backup fails. To get rid of this annoying issue all you need to do delete this USN Journal. Here’s how you can do that –
- Press the – Windows + X keys.
- Select the – Disk management.
- Right Click the – System Reserved Volume
- Choose the – Change drive letters and Paths.
- Next, click the – Add.
- Check the – Assign the following driver letter.
- Put in any alphabet/letter to assign a name to the drive, just make sure that there’s no such drive with the same letter already exists.
- Click the – OK.
- Again access the command prompt as you have done in the previous method.
- Type in the following 2 commands exactly as it’s written and hit enter each time.
fsutil usn querryjournal E:
fsutil usn deleterjournal /N /D E:
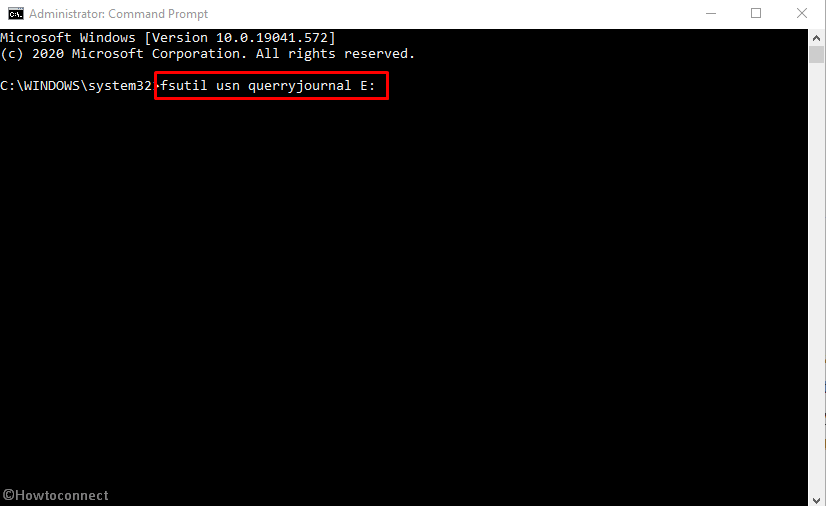
The above two command lines will free up all the space being used by USN journal in the system reserved partition. Restart your PC and check whether the Error 0x80780119 appears or not.
3] Turn on System Protection
Usually, system protection option is needed to be turned on to get rid of the windows backup failed to create the shadow copy on the storage location Error 0x80780119. This way the system will be successful to create image files in the system reserved partition. The System Protection remains enabled by default but sometimes users might disable it in order to run some shady third-party application over their system which creates long time anomalies. You can turn it on easily by following the below-given steps –
- Click the Taskbar search, type – System Protection.
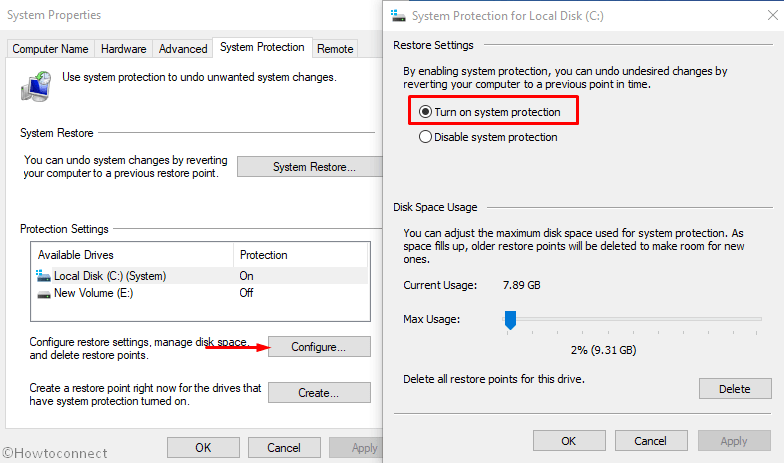
- Once the System Properties window arrives, Select the – Configure’...
- Ensure that the Turn on system protection is checked on the next wizard. If not, check it and click Apply > OK.
Now, this would have most probably solved 0x80780119, you can restart your system and check for yourself.
4] Uninstall unnecessary Language Packs
Unused language packs that take useful space over the system partition volume needlessly may cause 0x80780119 error to occur. Solution is the deletion of the pack resulting in creating a new room in the disk for the backup image. Follow the guidelines –
- Hit Win+S, type language, and then press Enter.
- After the Settings page appears, you will find some languages under Preferred Language.
- Click on them one by one and select the – Remove.
5] Update Device Driver to fix The Backup failed Error 0x80780119
Driver is a basic application in Windows that establishes communication between hardware and software. Microsoft and OEM vendors roll out updates to deal with security consequences in the drivers. However, there is an automatic process to install the updates but you need to maintain certain conditions such as active internet connection, correct configuration, and more for the same.
If something is missing you might be with outdated or obsolete device drivers which could be one of the reasons for Error 0x80780119. Hence in order to avoid such an eventuality, you must ensure that all your drivers are up to date and running as smoothly. Here’s how you can do it –
- Right click the Taskbar and select the – Device Manager.
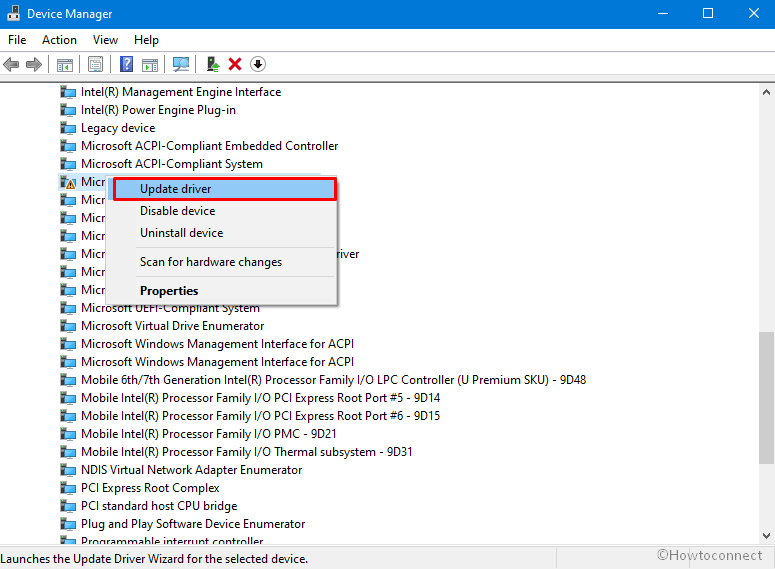
- Locate the devices showing yellow caution marks on the list after the next window comes up.
- Once found, double click to expand.
- From here, right click the driver and select the – Update Driver.
- Click the – Search automatically for drivers.
- Repeat the same procedure for all the devices showing yellow warning.
- Restart your system to incorporate all the latest changes and further check if the Error: 0x80780119 still persists or not.
6] Install the latest build for Windows 10 to solve The Backup failed Error 0x80780119
Microsoft delivers bug fixing as well as security improving updates in a scheduled manner to Windows 10 and other components. These also include OEM driver updates furthermore other necessary patches ensuring good performance of PC. Sometimes they may send a resolution of the errors reported by a wide number of users. So there is a chance that Microsoft might have released a fix for the disk that your backup is saved on doesn’t have enough space 0x80780119 in Windows 10 through an update.
- Therefore install the latest build rolled out by them in following way –
- Press the Windows logo and type the – update.
- Click the – Check for updates.
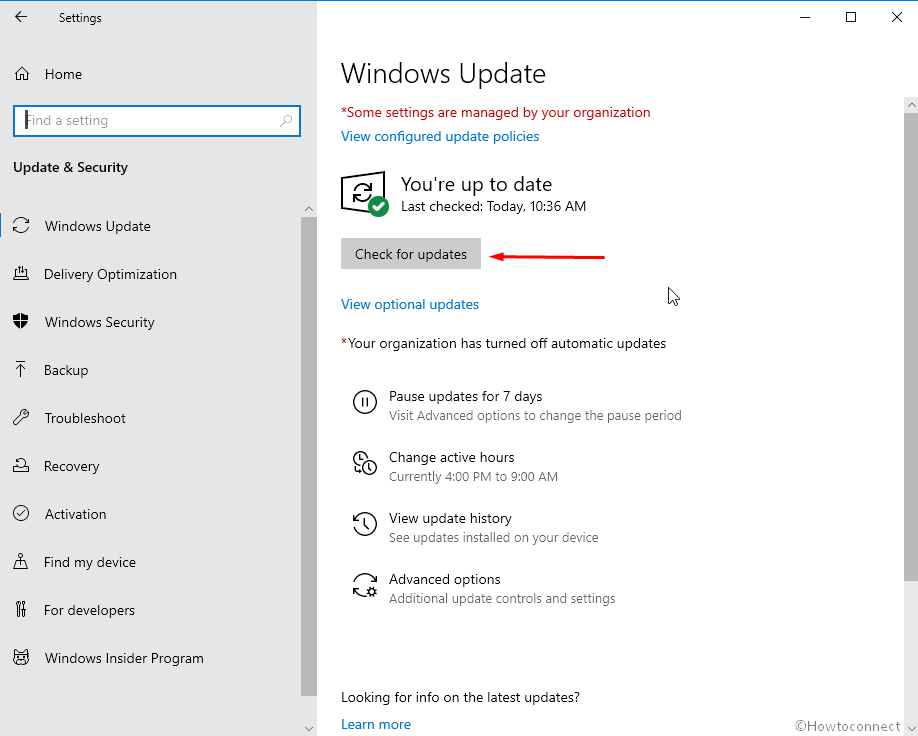
- Let the downloading complete and finally click the – Install now.
Those are the 6 ways you can try to fix The Backup failed Error Code 0x80780119 in Windows 10. I hope this article proves helpful to you all and you may find something worth your time and effort.
Methods list
1] Set the correct size of OEM partition
2] Remove the USN Journal
3] Turn on System Protection
4] Uninstall unnecessary Language Packs
5] Update Device Driver
6] Install the latest build for Windows 10
That’s all!!