System crash is a nagging problem in Windows and when occurs with Blue Screen it is almost irrecoverable. You might get What failed: usb80236.sys with BSOD in Windows 10 or 11. This error mostly appears with KMODE_EXCEPTION_NOT_HANDLED, IRQL_NOT_LESS_EQUAL, SYSTEM_THREAD_EXCEPTION_NOT_HANDLED, PAGE_FAULT_IN_A_NONPAGED_AREA, KERNEL_DATA_INPAGE, and SYSTEM_SERVICE_EXCEPTION Bug checks.
Blue Screen error usb80236.sys commonly occurs due to damaged system files, outdated device drivers, and the presence of malware in the system. Furthermore, Windows update and incompatible third-party utilities may also give rise to this issue. We are here with some working solutions to usb80236.sys BSOD.
usb80236.sys Blue Screen Error
Here is how to fix usb80236.sys Blue Screen Error / BSOD in Windows 10 or 11 –
Way-1: Uninstall Device Driver
usb80236.sys is a Remote NDIS USB Driver that allows performing remote operations of a phone on Windows. This Blue Screen indicates that there is something wrong with the driver, for example, it may be corrupted, incompatible, or obsolete. Therefore, in order to deal with this BSOD, uninstall the NDIS USB Driver using the following guidelines –
- Press the – Win+X.
- Click on – Device Manager.
- Once the app is open locate – Universal Serial Bus Controllers. Double click on this for expansion.
- Right-click on the USB Root Hub.
- Select – Uninstall.
- Click on “Uninstall” from the confirmation dialog.
- Restart the PC.
Way-2: Run System File Checker
The running BSOD might be an outcome of corruption in the Windows system files. In addition, missing components like DLL or EXE also generate this bug check and usb80236.sys error code. You can say the glitches in the system files are general reasons for any Blue screen of death. But this is not a matter of worry as System file checker aka SFC has the capability to fix this problem. You only need to run this tool through Command prompt with administrator right and it will diagnose and repair the files. In case the file isn’t repairable SFC will replace it with the same file located in the cache folder. This is quite easy and you need to follow the instructions only –
- Click the – Start.
- Type – cmd.exe.
- Select – Run as administrator.
- Type the cmd command – SFC /Scannow.
- Hit – Enter.
- The tool will start scanning for the damaged components and fix them in more or less 5 minutes.
- Reboot the machine and check if the BSOD is solved.
Way-3: Remove third-party tools
Oftentimes, it has been seen that third-party utilities clash with Windows and lead to crashes of the system. Low coding or lack of update makes the software incompatible and conflicting in nature. Once you try to open the tool, Usb80236.sys can not be served because of certain malfunctions. As a result, the system crash and bug checking start, and finally the blue screen of death appears. Hence, move with the steps and uninstall the software –
- Press – Win+R.
- Type – appwiz.cpl.
- Press – Enter to launch Program and features window.
- You will notice a list of all installed programs there.
- Right click on the third-party tool and select – Uninstall.
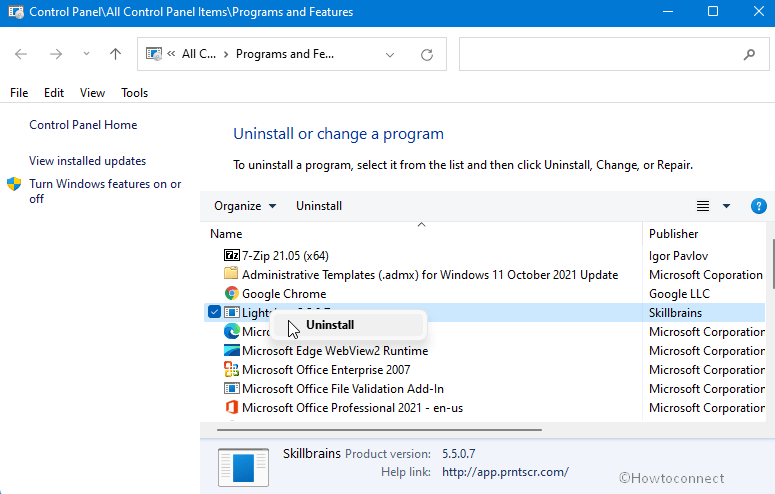
- You may see a confirmation dialog; click on Yes.
- After the removal, restart the system and see if the BSOD doesn’t appear.
Way-4: Use DISM
Sometimes, messes in Windows image give rise to blue screen error code Usb80236.sys. DISM is again a command line utility to effectively rescue from the problem. There are 3 commands in this context – To Check health Scan health, and Restore health. The command to Restore health is the handiest as it will replace the corrupted components with the appropriate one. So run the command using the below-mentioned steps –
- Open command prompt as administrator.
- Type – DISM /Online /Cleanup-Image /RestoreHealth.
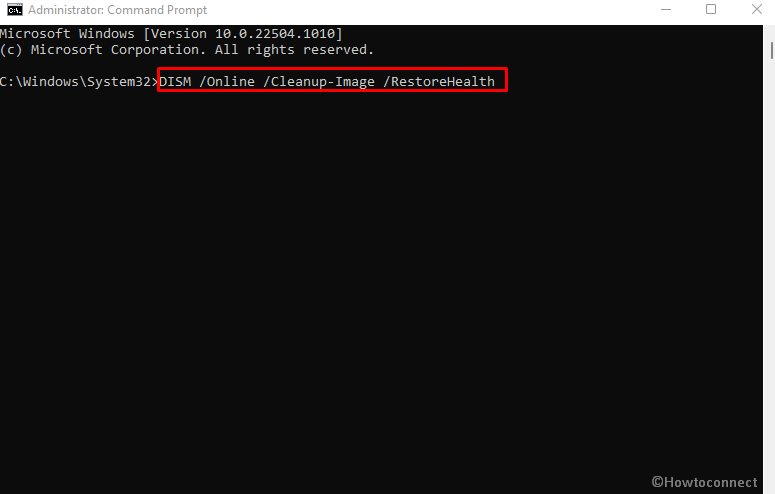
- Hit the Enter key in order to execute the command line.
- Once restoring is completed, restart the computer and see if Usb80236.sys blue screen error still persists.
Way-5: Perform Windows Defender Full Scan
Malware threats are the biggest enemy of a Windows system as they can harm the OS to the maximum degree. Once penetrated the security wall of Windows, the notorious files and codes devastate the files system and structure. In this, process, system files also get corrupted which can be fixed using the above method Way-4. However, the prime task in this condition is running a deep scan to trace out the malware using an extra powerful security tool. Windows defender is a proven weapon in this regard that can not only detect the malware but kill and quarantine them. Full scan is the most effective method, so, run this using the following steps –
- Click – Search.
- Type – updates.
- Press the – Enter.
- Select – Virus & threat protection.
- Next, click on the link – Scan options.
- Check – Full scan.
- Now, click – Scan now.
- This will eat a big amount of time so you need to be patient until the completion of the scanning.
- Once finished you will get a notification including suggestions.
- Follow carefully to wipe out the threats.
- Finally, restart the PC as it should be fine now.
Way-6: Uninstall the last received update
On several occasions, Windows updates play absolutely opposite role from the tasks they are expected from. Installation of cumulative updates or build spoil things whereas it should improve the security and reliability. This could happen due to bugs in the update which is a common reason in recent days particularly in the case of roll out from Microsoft. So when you encounter Usb80236.sys BSOD in Windows 11 or 10, Windows update might be the factor. A simple and straight solution, in this case, is the removal of the update. When you find the blue screen, at first, go to Settings > Update & security > View update history and check if your system has recently installed any update. If the answer is positive then you will have to uninstall this one using the below guidelines –
- Press the – Windows + I
- Click on – Update & security.
- On the next settings page, go to the right pane and select – View updates history.
- Next, click – Uninstall updates.
- A separate window will prompt from control panel which displays all installed updates.
- Find the one (in the shape of KB…) you are going to remove.
- Right click on the item and choose Uninstall.
- Verify by clicking on Yes.
Way-7: Install pending updates
In the previous method, we discussed uninstall updates. But you can fix What failed: Usb80236.sys blue screen of death error by only installing Windows update. When a problem occurs on a mass basis Microsoft takes this into account and deputes a team to resolve the same. As the issue is fixed the company pushes the improvement through an update. Once you install this the error will no longer occur. Follow the procedure –
- Press – Winkey.
- Type – updates.
- Hit – Enter.
- Click – Check for updates.
- Allow the system to scan for pending Windows updates and download. After a while, you will get a prompt; select Restart now on that.
Way-8: Perform System Restore
System restore is the functionality in Windows that brings your PC to the time and date when Usb80236.sys didn’t occur. As a result, the BSOD issue is fixed and the reason what was causing the error is settled. Know that this will wipe out your recently installed tools and changes in docs or settings. So before starting this method save your data in an external drive or another drive in your computer. Now go with the steps –
- Press – Windows key.
- Type – rstrui.
- Hit Enter.
- When the System restore wizard opens up, check the option – Choose another point.
- Click – Next.
- Select a point when the blue screen didn’t appear.
- Click – Next.
- Now review your selection and click Finish.
Methods list:
Way-1: Uninstall Device Driver
Way-2: Run System File Checker
Way-3: Remove third-party tools
Way-4: Use DISM
Way-5: Perform Windows Defender Full Scan
Way-6: Uninstall the last received update
Way-7: Install pending updates
Way-8: Perform System Restore
That’s all!!