The combination of Webcam and camera app allows you to capture videos and images on a Windows laptop. The application uses camera roll folder as a default location to store the photos and clips. Sometimes, the app becomes unable to identify the location and prompts an error when your try to snap on Windows 10 or 11. As a result, you might encounter error code (0xA00F424F) <VideoCaptureFileCreationFailed> (0x800703E6)..
The camera app has a history of bugs and issues and we have already covered solutions to some of these like 0xa00f4292, 0xC00DABE0, 0xA00F4289. Here, this error occurs because the application fails to recognize the location to save the video. As a consequence, when you click on video icon, the error message prompts.
0xA00F424F VideoCaptureFileCreationFailed 0x800703E6 Camera error
Here is how to fix Camera error 0xA00F424F VideoCaptureFileCreationFailed 0x800703E6 in Windows 10/11 –
Way-1: Set Drive to store videos
As mentioned above the problem starts because camera app is unable to identify the location where video will be saved by default manually setting the same will work perfectly. However, Settings app lets perform this modification but going through Camera app will take to the exact position where you need to Local disk only. Follow the steps –
- Click – Search from taskbar.
- Type – camera.
- Hit – Enter.
- When the camera app appears, click on Settings cog. This is located on the left sidebar.
- Select – Change where photos and videos are saved.
- You will come across a prompt asking to switch applications; click – Yes.
- Next, click – New photos and videos will be saved to.
- Select a drive.

- Click on – Apply.
- Now try to capture a video.
Way-2: Select Local Disk D to save photos and videos
This is a trick as multiple users report that they could resolve the issue by only changing the drive from C to D to store videos and photos. Therefore, in case, the Way-1 doesn’t work this method will rescue from the issue. Move with the steps –
- Press – Winkey+I.
- Select – System.
- From the left pane of the next Settings page, click on – Storage.
- Now select – Change where new content is saved.
- In the drop-down for “New photos and videos will be saved to”. choose D or a drive other than C.
- Click on – Apply.
- Reboot the device and hopefully Camera error 0xA00F424F VideoCaptureFileCreationFailed 0x800703E6 in Windows 10/11 will be fixed.
Way-3: Create a Video folder manually in Camera roll
Oftentimes, lack of video folder in Camera roll may trigger <VideoCaptureFileCreationFailed> error code. Hence, you need to go to C:\Users\user-name\AppData\Roaming\Microsoft\Windows\Libraries, create a video folder and save it as default.
- Press – Windows logo key + R.
- Type – %appdata%.
- Hit – Enter.
- When a directory opens up, double click on the Microsoft folder.
- Next, Double click on – Windows.
- Open Libraries by double-clicking.
- Right click on – Camera roll.
- Select – Properties.
- Click on – Add.
- Now, browse and go to Downloads folder.
- Right-click there and select New > Folder.
- Name this folder Video.
- Click on – Include folder.
- Select – Set save location.
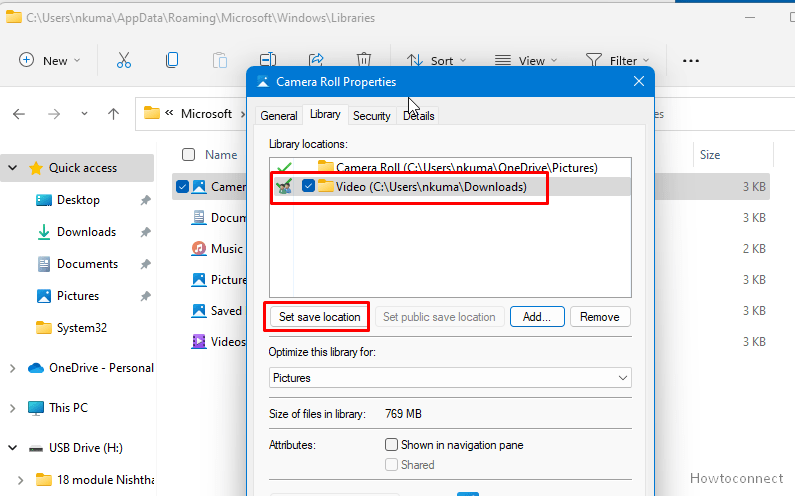
- Click on Apply and then OK.`
- Restart your PC and check if the error is solved.
Way-4: Reset Camera app
Windows 11 and 10 incorporate a reset tool for every built-in app in the Settings. This functionality will restore all the settings to default, furthermore, clear cache. The Reset Camera app will bring the original settings back and clean the appdata. This way there will be minimum chances for any issues to occur. Go with the instructions –
- Click on – Start.
- Select – Settings.
- Choose – Apps.
- On the Apps & features settings page, go to Camera app and click on it.
- Upon expansion, click on – Advanced options.
- From the next page Click – Reset.
- On the confirmation pop up, once more click Reset.
Methods list:
Way-1: Set Drive to store videos
Way-2: Select Local Disk D to save photos and videos
Way-3: Create a Video folder manually in Camera roll
Way-4: Reset Camera app
That’s all!!