Where most of the Windows 10 blue screen errors make the system inoperable and sometimes inaccessible, VIDEO_DXGKRNL_LIVEDUMP is quite opposite in behavior. This BSOD mainly evolves when the computer goes to sleep however it doesn’t occur every time. When this error takes place at some point, the motherboard and fans all start fine except the display while trying to wake the device up. Though the display starts working after performing multiple reboots, this error is somewhere annoying since it keeps appearing every now and then.
With bug check code 0x00000193, VIDEO DXGKRNL LIVEDUMP points out that a livedump caused by dxgkrnl has taken place. This BSOD has a distinct character and like others, it doesn’t force the system to reboot randomly, crash, or freeze. Also, the hardware works just fine. According to some Windows 10 users, VIDEO_DXGKRNL_LIVEDUMP blue screen error mostly appears if the custom resolution of their display is active. There might be several other reasons too that trigger the same such as – incompatible graphics driver, the existence of malware, faulty Windows update, bad memory, and many more.
VIDEO_DXGKRNL_LIVEDUMP
Here is how to fix VIDEO_DXGKRNL_LIVEDUMP Error BSOD in Windows 10 –
1] Remove custom resolution
Oftentimes you might need to use a unique resolution or refresh rate but the Windows control panel doesn’t offer such flexibility. To get this facility, you need to tweak the settings of your dedicated graphics control panel. By using the utility, you can set custom resolution as well as refresh for your display. However, the defined value must be supported by the graphics card your Windows 10 PC using. Since many people found this utility cause VIDEO DXGKRNL LIVEDUMP error, removing the same may help to resolve the BSOD.
Delete custom resolution for NVIDIA
- Press – Windows + S.
- Type in – NVIDIA control panel.
- Hit – Enter.
- Navigate the tree pane located under Display and click – Change resolution.
- Pick the image that represents the display you want to affect.
- Click – Customize.
- Select the checkbox set before – Enable resolutions not exposed by the display.
- From the appearing Resolutions box, select the custom resolution you want to delete.
- Click – Delete.
- Similarly, delete each custom resolution that exists.
Remove custom resolution from INTEL
- Open Intel® Graphics Command Center.
- Shift to Display tab.
- Click the dropdown menu to see the existing resolutions.
- Hit X icon present alongside the custom resolution.
- To confirm the deletion, click – Yes.
2] Update the graphics driver
Backdated graphics drivers often found to cause VIDEO_DXGKRNL_LIVEDUMP in Windows 10. We know how important role device drivers play to make the PC function smoothly, still, we forget to check them regularly. When you keep any of the essential drivers outdated for long, the system leads to various unexpected issues along with BSOD. Since the graphics driver is more likely to generate bug check code 0x00000193, updating the same is necessary. Let’s check out the procedure –
- Click the search icon present on the taskbar.
- Type in – devmgmt.
- Hit – Enter.
- When Device Manager shows up, double-click – Display adapters.
- From the expanded list, right-click the graphics driver and select – Update driver.
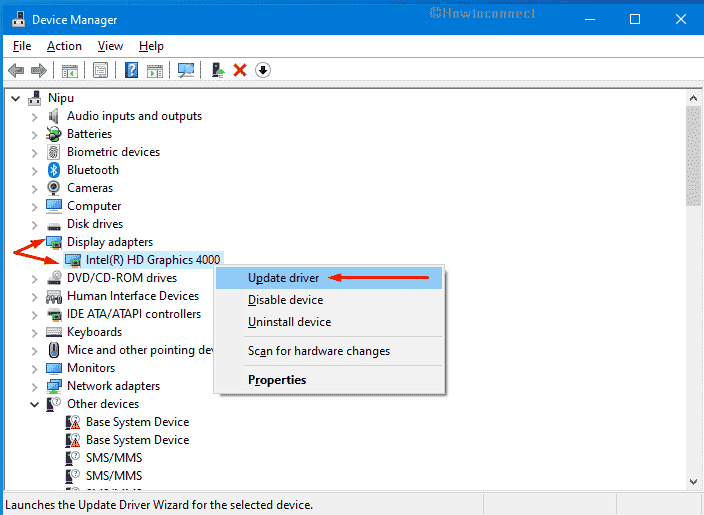
- Pick the option – Search automatically for drivers.
- If the system gets any available updates online, it will be installed automatically.
- After installing, restart the PC to check whether the Blue screen error still persists.
3] Re-install graphics driver to fix VIDEO_DXGKRNL_LIVEDUMP
If VIDEO_DXGKRNL_LIVEDUMP again appears after making the graphics driver updated, there is a high chance that the version you are using is incompatible. Though we always talk about how important it is to keep device drivers updated, what matters more is finding the correct version. If the version you installed doesn’t go with the system’s configuration, associated errors may arise. To get the correct graphics driver, follow the way –
- Press – Windows + X.
- Select – Device Manager.
- Double-click – Display adapters.
- Right-click on your graphic driver and choose –Uninstall device.
- Tick the checkbox set before Delete the driver software for this device.
- Click – Uninstall.
- Visit the manufacturer’s webpage of your graphics driver.
- Find the latest and compatible version for your Windows 10.
- Download the same and then install it too.
- Restart the device.
4] Do virus scan and eliminate malware
In this tech-developing world, you are not secure at all unless you use an antivirus program. Viruses are everywhere finding a way out so that they can break the security wall and access your PC. Once any of the threats manage access, either they encrypt all of your files and folders or affect the system elements gradually. By doing so, often the vendors steal your personal information or make your files inaccessible so that they can ask for money in return.
Not all malware are so harmful or severe, still, you shouldn’t take any of them lightly. Even if the virus doesn’t affect Windows 10 immediately, it will surely make an impact in long run. Therefore, whenever you encounter issues like VIDEO_DXGKRNL_LIVEDUMP, scan the system for malware to check whether it is the culprit. You can use any trusted antimalware program to accomplish the task, however, built-in Windows Security is safer than others. To so virus scan, follow the below guidelines –
- Press – Windows + Q.
- In the search bar, type in – Virus & threat protection.
- Hit – Enter.
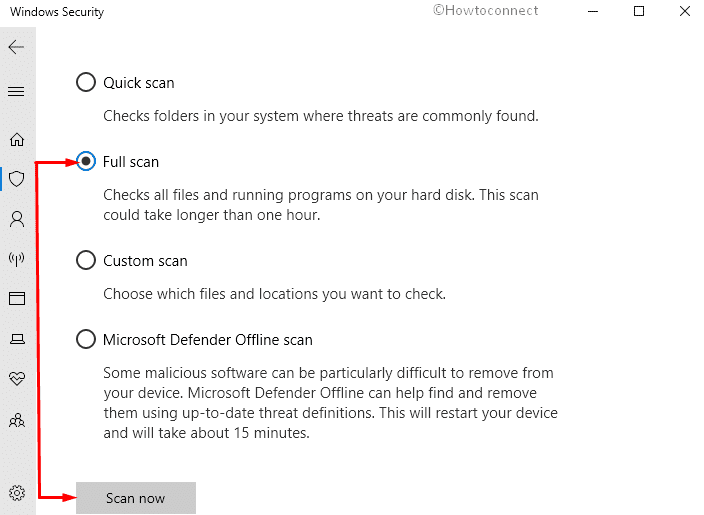
- From the right-pane of the appearing window, click the link – Scan options.
- Select the radio button set before – Full scan.
- Click – Scan now.
- If the utility finds out any malware after scanning the full system, hit – Clean Threat.
- Thereafter, click Remove followed by Start actions.
- When the removal process is done, restart your Windows device.
5] Prevent software conflict to fix VIDEO_DXGKRNL_LIVEDUMP
Though Windows 10 comes with a considerable number of built-in applications, there are thousands of apps that are available at the Microsoft Store or on the web. Since you have unlimited options to choose from, sometimes you end up installing so many unnecessary software programs that create collision moreover occupy lots of space.
When the applications installed on your system have similar congruence, they conflict with each other as they try to perform the same task. During the collision, system elements go missing or become corrupted which oftentimes leads to VIDEO_DXGKRNL_LIVEDUMP blue screen error. To avoid such a situation, keep a limited set of applications that you actually use. In order to uninstall unwanted apps, follow the way –
- Right-click the Start button.
- Select – Apps and Features.
- Move to the right of appearing Settings page.
- Go through the app list and select the one you want to delete.
- From expanded tray, click – Uninstall.
- To confirm the process, again hit – Uninstall.
- If the system shows any further instructions, follow the same.
- Uninstall other unwanted apps in a similar way.
- In the end, reboot the computer and check if the BSOD has gone.
6] Uninstall faulty Windows update
Microsoft provides cumulative updates quite regularly and these patches get installed on your system automatically if the related settings have not been changed. Due to a bad internet connection, the system may end up receiving broken setup files that give rise to unexpected error codes later. Besides, the released patch of Microsoft can include bugs in itself or an element that doesn’t go with the system. Whatever it is if you started getting VIDEO_DXGKRNL_LIVEDUMP after installing the latest build, uninstalling the same is the only way. Here are the steps to follow –
- Press – Windows key.
- Type in – view update history.
- Hit – Enter.
- Click the link – Uninstall updates.
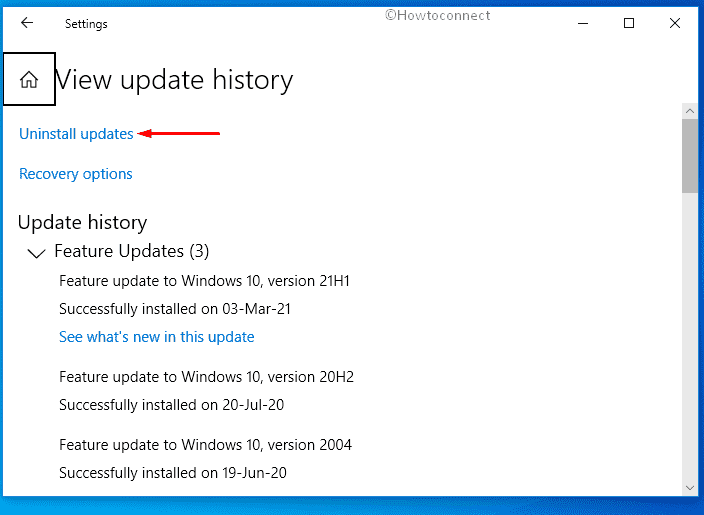
- Find the most recent build your system received.
- Right-click the same KB and choose – Uninstall.
- Comply with on-screen instructions to complete the removal process.
- Restart the PC so that the changes can take place.
7] Reconnect hardware peripherals to fix VIDEO_DXGKRNL_LIVEDUMP
External hardware accessories that are connected through a USB port often found to cause blue screen error VIDEO_DXGKRNL_LIVEDUMP. Though peripherals like mouse, keyboard, printer, or scanner are pretty much needed, give them a temporary break to check whether they are bringing forth the issue. Simply, pull out all USB cables connected to your PC carefully.
After that, restart the device and check if it’s working just fine. If the BSOD doesn’t show up, plug in the accessories one by one. While doing so, keep on looking if any particular accessory giving rise to the blue screen of death. If yes, change the USB cable that you were using to connect that hardware. In the worst case, you might need to change the peripheral too.
8] Clean up temporary files
Insufficient disk space is another big reason for which BSOD error VIDEO_DXGKRNL_LIVEDUMP may evolve. If you don’t clean up system files regularly, local disk C: will be full with lots of temporary files, shader cache, web browser data, restore points, and more. These items are totally useless after a certain period of time moreover occupy a good amount of disk space. Furthermore, Windows 10 starts performing slow and you may experience lag too. Since low disk space brings forth so many issues, making enough free memory is necessary. For that –
- Press – Windows + R.
- In the Run command, insert – cleanmgr.
- Hit – Enter.
- When a pop-up prompts named Driver selection, click – OK.
- Hit – Clean up system files.
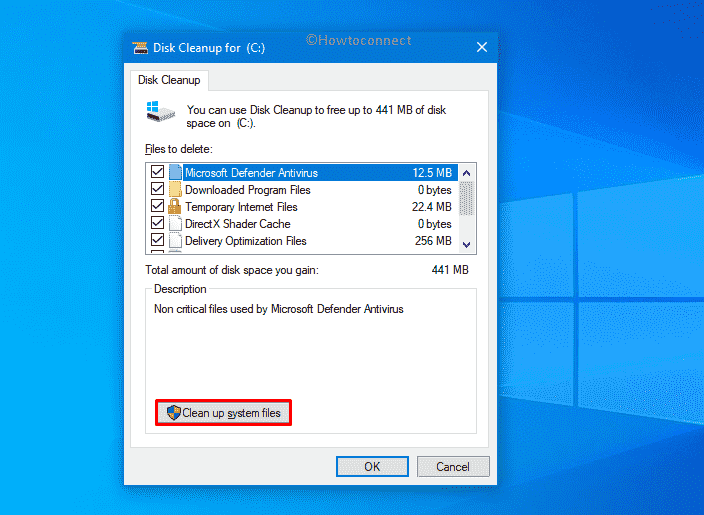
- Again, Driver selection pop-up will show up. Simply, click – OK.
- Select all the checkboxes present beneath Files to delete.
- Click – OK.
- Confirm the process by clicking Delete files.
- When the process ends, reboot the Windows device.
9] Rectify corrupted Windows image files to fix VIDEO_DXGKRNL_LIVEDUMP
The corruption that exists within Windows Image files often results in VIDEO_DXGKRNL_LIVEDUMP blue screen error. To resolve such an issue, Windows 10 has a built-in utility named DISM tool. In order to run the tool, go through the steps as stated below –
- Press – Windows key.
- Type – cmd.exe.
- Click – Run as administrator.
- To allow User Account Control, hit – Yes.
- On the Command Prompt, insert the below line and press Enter key –
DISM.exe / Online / Cleanup-image / Restorehealth
- After the scan gets over, reboot the device.
10] Run Memory Diagnostic tool to examine bad RAM
RAM holds all of the temporary files your system produce and when this memory unit becomes faulty or forms a bad sector in it, unexpected error codes may arise. Generally, RAM unit goes bad when you use it for a prolonged time. Besides, excessive heat, frequent power surges, accidental restarts, or physical damage can cause RAM issues too. To diagnosis the unit, follow the way –
- Press – Windows + S.
- Write down – mdsched.exe.
- Hit – Enter.
- From the appearing pop-up, choose – Restart now and check for problems (Recommended).
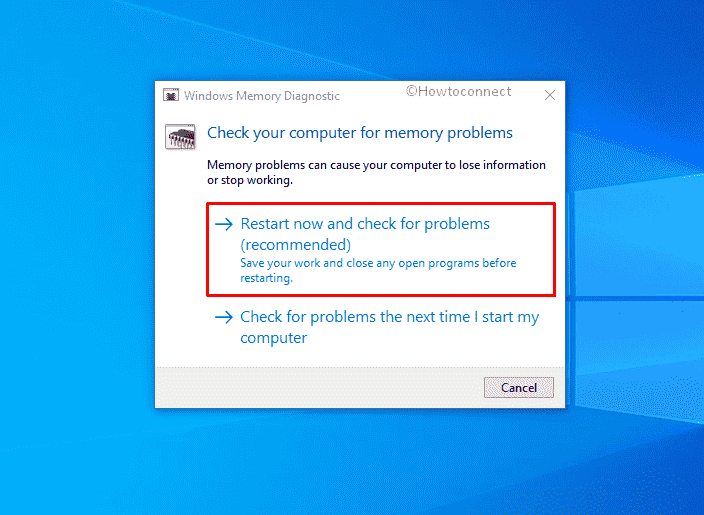
- When the system powers up finally after finishing 100% diagnosis, check the report which will be available on the notification bar.
11] Check bad areas in hard disk
Since a hard disk is considered the sole component of a system, keeping it healthy is a must. There might be various reasons that make a hard disk bad such as overheat, sudden fallout, random power surge, and malware infection. If the disk is damaged physically, you will have to change the unit to a new one. In case of software-related corruption, Windows offers a check disk utility that scans the full system to find corruption and fix them automatically. Let’s see how to run chkdsk –
- Click the taskbar search icon.
- Type – cmd.
- Press – Ctrl + Shift + Enter.
- To approve User Account Control, click – Yes.
- On the elevated Command Prompt, type chkdsk /f /r C: and then hit Enter –
- If the system finds any corruption during the scanning process, that will be repaired automatically.
- Once done, restart the computer.
12] Troubleshoot hardware problem to fix VIDEO_DXGKRNL_LIVEDUMP
Hardware and device troubleshooter helps in identifying and resolving physical as well as logical issues associated with hardware devices. If VIDEO_DXGKRNL_LIVEDUMP is caused by your display or some other equipment, this utility will review the full system and let you know. Also, an automatic fix will be provided which you can apply. To make use of the troubleshooter, here are the steps to follow –
- Open Command Prompt as administrator.
- Insert the following after winking cursor and hit Enter –
msdt.exe -id DeviceDiagnostic
- When Hardware and Devices Troubleshooter prompts, click – Next.
- If the utility presents a list of display devices that have problems, select the item you want to troubleshoot.
- Click – Next.
- When the tool comes up with an automatic repair, hit – Apply this fix.
- Lastly, click Next to allow the system to restart.
13] Resolve faulty system components
Because of software conflict, sudden power breakdowns, and virus attacks; system elements can go missing or become corrupted. Since system elements are an essential part of any OS, without them the device doesn’t perform as it should be. If the system finds any components misplaced or fails to read one while performing a task, several issues may rise up. To fix the corruption immediately, run sfc command by following the below steps –
- Press – Windows + Q.
- Type – cmd.
- Right-click on Command Prompt and select – Run as administrator
- When User Account Control shows up, click – Yes.
- In the black pane, insert – Sfc /scannow.
- Hit – Enter.
- Once the scanning process hits 100%, close Command Prompt.
- Restart the Windows device.
14] Install latest Windows update to fix VIDEO_DXGKRNL_LIVEDUMP
Outdated Windows 10 devices are more likely to cause VIDEO_DXGKRNL_LIVEDUMP, therefore, keep your OS updated to lessen the risk of vulnerability. Most of the patches Microsoft provides include fixes for issues people complained about. If Microsoft got a hint about bug check code 0x00000193, there is a high chance that they will provide a fix for the same through their recent update. To install the latest build, follow the way –
- Press – Windows + I.
- Click – Update & Security.
- From the right pane of the dedicated settings page, click – Check for updates.
- If any newer patch is available, hit – Download
- When the downloading process ends, click – Install now.
- If the system asks to reboot the PC, hit – Restart now.
15] Go back to the last known good configuration
Oftentimes, registry entries get tweaked wrongly when you install new software or while making changes in the system. As a result, issues like VIDEO_DXGKRNL_LIVEDUMP make an appearance. To restore the error-free state of the system, you can go back to the last known good configuration. Here’s how –
- Press – Windows key.
- Write down – rstrui.
- Hit – Enter.
- When System Restore wizard appears, click – Next.
- Opt for a restore point available there.
- Click – Scan for affected programs.
- Select the applications you want to wipe out.
- Go back to System Restore wizard.
- Click – Next.
- To start restoring process, hit – Finish.
Methods list:
1] Remove custom resolution
2] Update the graphics driver
3] Re-install graphics driver
4] Do virus scan and eliminate malware
5] Prevent software conflict
6] Uninstall faulty Windows update
7] Reconnect hardware peripherals
8] Clean up temporary files
9] Rectify corrupted Windows image files
10] Run Memory Diagnostic tool to examine bad RAM
11] Check bad areas in hard disk
12] Troubleshoot hardware problem
13] Resolve faulty system components
14] Install latest Windows update
15] Go back to the last known good configuration
That’s all!!!