Many times the insufficiency to get the updates installed ceases the users from utilizing all the new features. Windows 10 or 11 update error 0x80240fff is one such problem that does not affect everyone but definitely hits on devices running older versions or if the current update contains bugs and issues. While trying to update the PC through the Settings app, the aforementioned error code appears not allowing users to complete the installation. Though the error is completely unexpected, there are certain common reasons that could be a possible cause for it.
The loss of system files, the conflict between firewall and updates, bugs in the patches, poor internet connection, improper functioning of Windows Update services, outdated version, and more are some of the reasons why you get hindrance in the update procedure. So this article will share some of the applicable solutions that would help you in mitigating the error 0x80240fff.
Windows 11 or 10 update error 0x80240fff
Here is How to Fix Windows 10/11 update error 0x80240fff –
1] Run Windows Update Troubleshooter
The expert engineers suggest that applying Windows Update troubleshooter successfully deals with the Windows 11/10 Update Error 0x80240fff. This built-in tool will scan the system for possible causes and depending on it will attempt to fix them. Follow the steps given below to carry out the process –
- Press the Win logo and the I key on the keyboard simultaneously to open Windows Settings.
- Click Update & Security tab from the interface of the app.
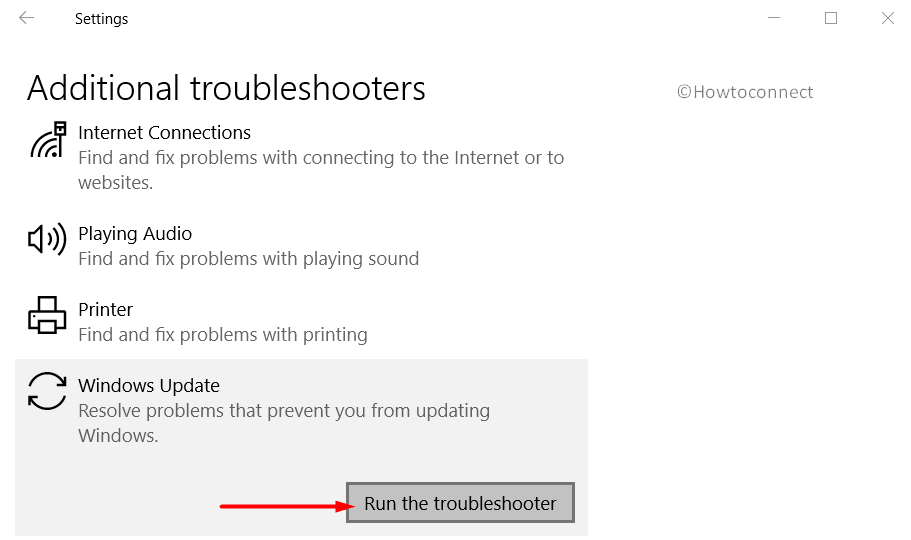
- Select Troubleshoot from the left sidebar of the available sections. Switch to the right pane and select Windows Update.
- Hit Run the troubleshooter button.
- Wait for the utility to scan and display the result, Once it gets over, reboot the PC for effective results.
Note – Make sure that your computer is connected to the internet while carrying out this task.
2] Defer Updates to Fix Windows 10/11 update error 0x80240fff
You may be one of those users who would prefer to study the entire update release and then go for it. For such customers, Windows 10 or 11 provides an option to defer updates, i.e delay the update. This feature to wait and watch, read the reports, know the pros and cons of the update could help in overcoming the Windows 11 or 10 update error 0x80240fff. More than a workaround, this acts as a preventive measure from any sort of further update issue. You can either do this through Settings, Group Policy, or Registry Editor. Though this is a temporary solution, it worked for many users and this is how you would proceed with applying this defer feature –
Through Settings App
- Do a right-click on Start and choose the cog icon.
- On the Settings app, select Update & Security.
- Switch to the right pane and click Advanced options.
- Go to the section that says “Choose when updates are installed“. Click the drop-down under feature update and select the number by which you want the updates to defer.
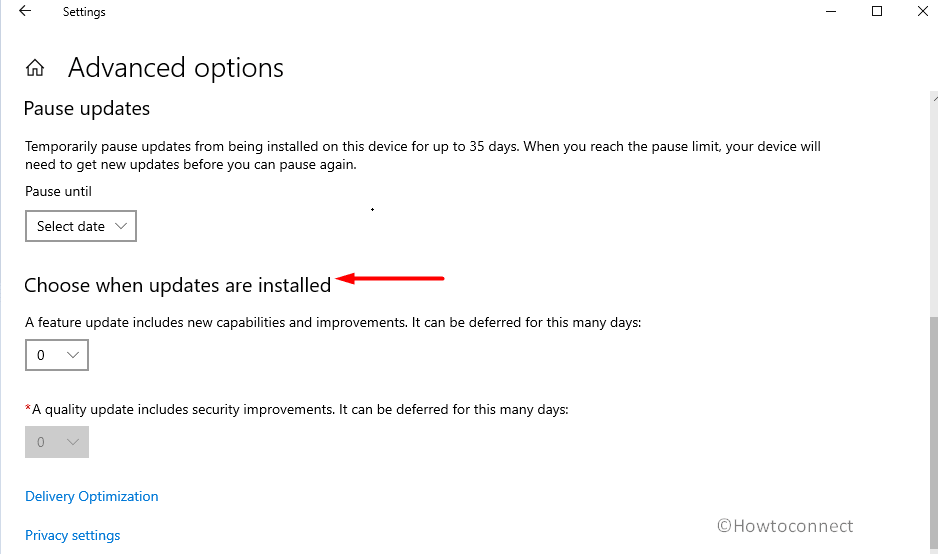
- Again click the drop-down under quality updates and choose the number of days you want to delay it.
- Once you do this, the Windows Update will wait for the chosen number of days before trying to install it again.
Using Group Policy Editor
If the aforementioned option is missing in settings to halt the update, you should try out the gpedit.msc.
- Type gpedit in the taskbar search and select the Edit group policy from the results list.
- Once into Local Group Policy Editor, navigate to the below-mentioned path –
Computer Configuration => Administrative Templates => Windows Components => Windows Update => Windows Update for Business
- Find and double-click the policy namely Select when Preview Builds and Feature Updates. Choose Enabled.
- Click the drop-down and select the preferred Windows readiness level and then insert the period for which you want to delay the updates. Click Apply and OK.
- Now, perform a double-click on the policy Select when Quality Updates are received. In its Properties box, choose Enabled.
- Assign a figure to defer the updates.
- Click Apply and OK.
3] Use Media Creation Tool
You can pretty effortlessly deploy the Media Creation Tool to install Windows 11 or 10. This action will ensure that you would not encounter any error messages throughout the installation procedure. Try it out –
- Launch any web browser and navigate to the Microsoft Official Site.
- Click the Download tool now underneath the “Create Windows 10 installation media”.
- Click Accept to the terms and conditions of the tool. Once the download gets over double click the executable file to run the tool.
- Upon the popup of the utility choose to Create installation media for another PC.
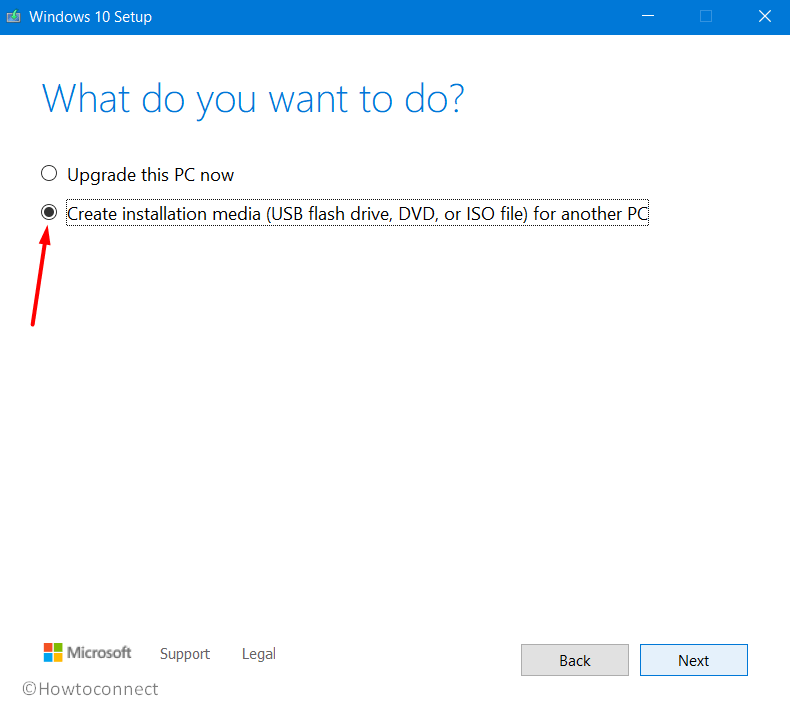
- On the following screen select the radio button ISO file. Click Next and the downloading of Windows 10 will begin.
- Once the ISO file is ready, burn it into a Disc and run it. Hopefully, this would bypass the occurrence of Windows 10 update error 0x80240fff.
4] Manually Install Cumulative Updates
The giant software company Microsoft rolls out Tuesday patches, preview builds, and more on a regular basis. These releases carry out several fixes for bugs and problems, new features to make the system more stable and healthy to use. So when the automatic update procedure fails to happen successfully, you can try to install certain small patches manually. Follow the below guidelines to accomplish the task –
- Visit the Windows 10 update history site and find out the latest release by the company.
- Locate the version installed in your system on the left pane and select it.
- After selecting it, scroll down and you will see the cumulative updates list with dates and KB number (In this release section).
- Copy the entire KB number, for example, KB4530684. Now open Microsoft Update Catalog page and search for the KB number you copied.
- Depending on your system architecture download the necessary file.
- Run the file to install the update manually and you will not encounter Windows 10 update error 0x80240fff.
5] Restart Windows Update Services to Resolve Windows 10 update error 0x80240fff
Another applicable resolution to get rid of “Windows 11 or 10 update error 0x80240fff” is to ensure that all the services related to Windows Update are functioning appropriately. Hence, the best way is to restart them. Moreover, this will clear out the buggy elements and make the update procedure operate normally. This is how you would do it –
- Go to the taskbar search box and type cmd.exe. Hover over Command Prompt and select Run as administrator from the right extended pane.
- Click Yes upon the prompt of User Account Control.
- Once the elevated Command Prompt shows up, insert the below-given commands and press Enter after each one to kill MSI Installer, Windows Update Services, BITS, and Cryptographic services respectively.
net stop msiserver
net stop wuauserv
net stop bits
net stop cryptSvc
- While proceeding ahead, you need to rename SoftwareDistribution and Catroot2 folders separately. To do so, copy and run the below commands and hit Enter.
ren C:\Windows\SoftwareDistribution SoftwareDistribution.old
ren C:\Windows\System32\catroot2 Catroot2.old
- After successfully renaming the above folders, you need to restart MSI Installer, Windows Update Services, BITS, and Cryptographic services. Execute the below commands and press Enter to accomplish the task.
net start wuauserv
net start cryptSvc
net start bits
net start msiserver
- As a final step, restart Windows 10 PC and check for the Windows 11 or 10 update error 0x80240fff.
6] Turn off Windows Defender Firewall
Conflict between certain latest updates and the Windows Defender Firewall occurs at times which further leads to several complications. Subsequently, Windows 11 or 10 fails to download and install any updates and comes across error code 0x80240fff. Therefore, the tweak that you need to apply here is to disable the Firewall feature temporarily. Perform the following task to complete this process –
- Press “Win logo and R” keys altogether to open Run dialog box. Type in control panel and click OK.
- Make the applet into a small or large view and select Windows Defender Firewall.
- On the left pane, do a click on “Turn Windows Defender Firewall on or off“.
- Select the checkbox corresponding to the option – “Turn off Windows Defender Firewall” for both private and public networks.
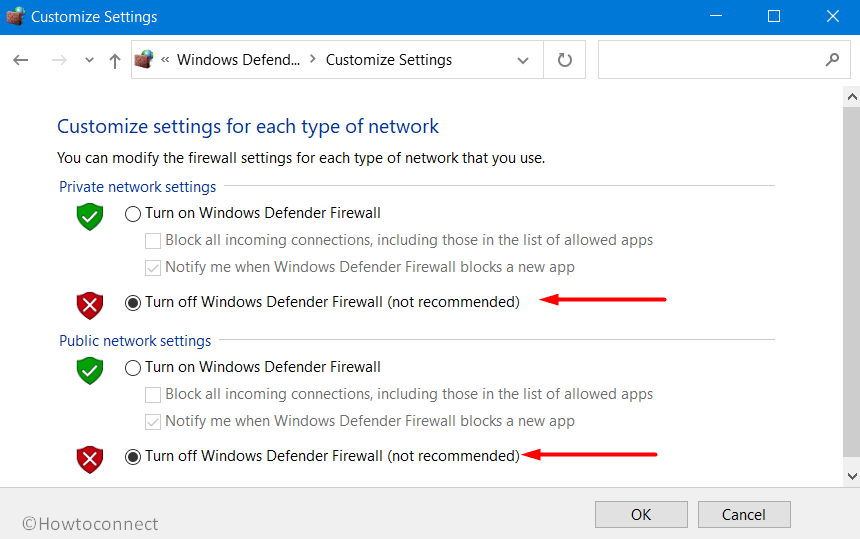
- Click OK to save the changes.
7] Fix Windows 11 or 10 update error 0x80240fff by Running System File Checker
Missing or broken System files definitely leads to throwing issues. As frequent changes in the system take place, certain important components get adversely affected. So, this can also be one of the prime causes of Windows 11 or 10 Update Error 0x80240fff. To deal with such a situation, you need to run System File Checker, the built-in tool that could scan, detect and recover the missing files. Now, explore the below-given steps to execute this utility –
- First of all, Open Command Prompt as Administrator by using any of your preferred methods.
- The simple way is to get access to the taskbar search and type cmd.
- Right-click on Command Prompt and choose Run as administrator.
- Hit Yes on the UAC popup.
- Insert the mentioned below command and hit Enter to initiate the scan.
sfc /scannow
- The tool would start detecting the missing files and retrieve them from the Windows cache folder. Once it finishes, reboot the device and check for the error code while updating the system.
8] Verify your disk for any available corruption
Bad areas in the disk may occur after its prolonged use which further leads to various issues like Windows 10 or 11 update error 0x80240fff. Hence, it is advisable for you to perform a disk check and resolve the corruption. This is how you need to proceed further to use this built-in utility –
- On the taskbar search, insert cmd. Hover over Command Prompt and on the right-pane select Run as administrator.
- When UAC shows up, hit Yes.
- Upon the appearance of the black window, insert the command in the below format –
chkdsk [Drive:] [parameters]
- In the above command, chkdsk only detects the disk’s status but it will not rectify issues from the volume. Therefore, after the drive letter, you need to add these parameters –
/f /r /x - So, the entire command that you need to execute will be –
chkdsk C: /f /r /x
- The parameter “f” in the above command guides chkdsk to repair the errors on the volume.
- Whereas “r” will trace out the bad areas in the volume and then will make an attempt to recover the readable data.
- The last parameter “x” indicates the volume to dismount before the process starts.
- Once the scan gets over, reboot the device and try to update the system.
9] Run DISM Tool
Another built-in command that works for Windows update issues is to execute the DISM tool. It scans and repairs the corrupted system files related to Windows update. Go through the below guidelines to carry out this solution –
- Get access to the Run, type cmd. Press Ctrl+Shift+Enter in one go to directly Open Command Prompt as Admin From Run Dialog.
- Hit Yes on the UAC pop-up.
- Insert the below-given command line in the black window that appears and hit Enter.
DISM /Online /Cleanup-Image /RestoreHealth
- To restore the system’s health, the above command will take some time. After it gets over, try to update the PC.
Methods:
1] Run Windows Update Troubleshooter
2] Defer Updates
3] Use Media Creation Tool
4] Manually Install Cumulative Updates
5] Restart Windows Update Services
6] Turn off Windows Defender Firewall
7] Run System File Checker
8] Verify your disk for any available corruption
9] Run DISM Tool
That’s all!!