You can carry on working without any other hardware peripheral but a keyboard is something you need always by side. In this situation, if you encounter unresponsive keyboard keys in laptop on Windows 11 it is like a disaster. Without a perfectly working keyboard, you cannot input information, run commands for troubleshooting and communicate. So, in this post, we are putting in solutions to Windows 11 Keyboard not working problem.
Keyboard is found to be unresponsive in Windows 11 devices mostly due to driver incompatibilities. However, some users have encountered this sort of problem after performing a Windows update. It can happen as some update files don’t support the default keyboard or have conflicts with the driver to make it nonfunctional. Change of settings mistakenly can also lead to an unresponsive keyboard.
Windows 11 Keyboard not working
Here is how to fix Windows 11 Keyboard not working –
In order to fix this problem you commonly carry out different troubleshooting tasks, use run commands, and other. Since keyboard is such a peripheral without which everything seems out of reach, connect either an external keyboard via USB port or enable on screen keyboard to help the resolving operations. To enable OSK, follow the steps –
- Press – Windows key and I.
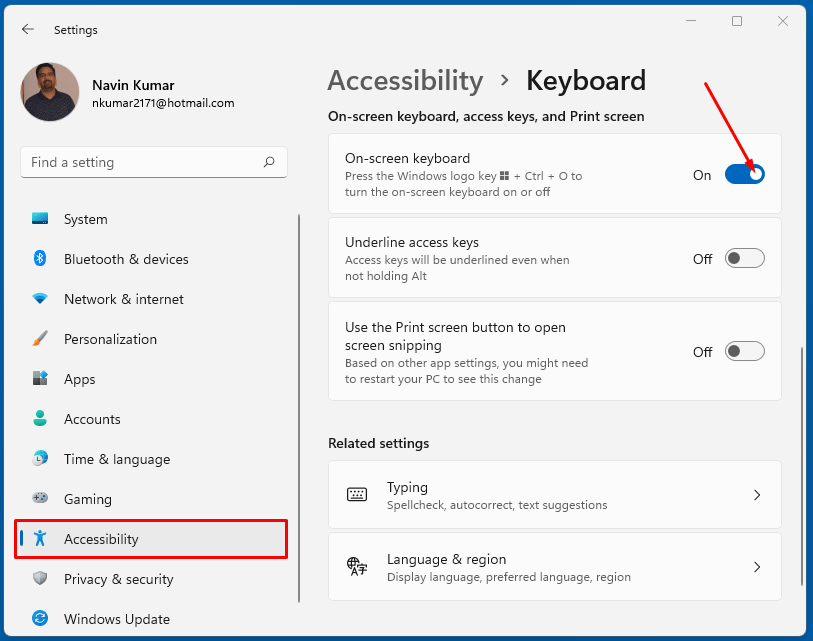
- When the Settings appears, click – Accessibility.
- On the following screen, scroll down to Interaction area.
- Choose – Keyboard.
- Turn on the toggle switch beneath – Use the On-Screen keyboard.
Immediately the On-screen keyboard will be visible on display and you can continue working using it from now onwards. Having activated the OSK, try out the below solutions to fix Windows 11 Keyboard not working issue.
Way-1: Clean the Keyboard
Cleaning is the most basic solution if you have encountered Windows 11 keyboard not typing letters. There are plenty of sources from where dirt can be deposited on the laptop and make it unresponsive. To be honest, it is not an easy task to clean the laptop keyboard since you cannot shake and tap at the back. But it’s really necessary to clean the crumbs lying under the keys. What you can do is to hold the laptop upside down, lean at 45-75 degrees from the horizontal position. Don’t forget to shut it down before doing so to avoid unnecessary damages. Now give a gentle shake at slowly tapping at the back.
It’s easier and better when you keep a keyboard vacuum or supply of compressed air for quick weeding out. In case one or two keys are stuck due to liquid spillage, pop the cap of those to wipe the inner part. Try cleaning the dried-up liquid filth using a spray bottle or alcohol solution on the cotton rag and scrub all the sticky residue with cloths. Carry out the depurating job with the utmost care, anything abnormal can lead to further damage. Once the dust and debris are away, you can get back the keyboard in normal functional state.
Way-2: Restart Windows or Shut down temporarily
Restarting the device is the first thing you have to think about in order to fix keyboard problems in Windows whether the laptop is from HP, Dell, Lenovo, Acer, or other. This is fast, easy and oftentimes comes out to be the most effective solution before going for further troubleshooting. Let’s accomplish the below steps to restart the machine –
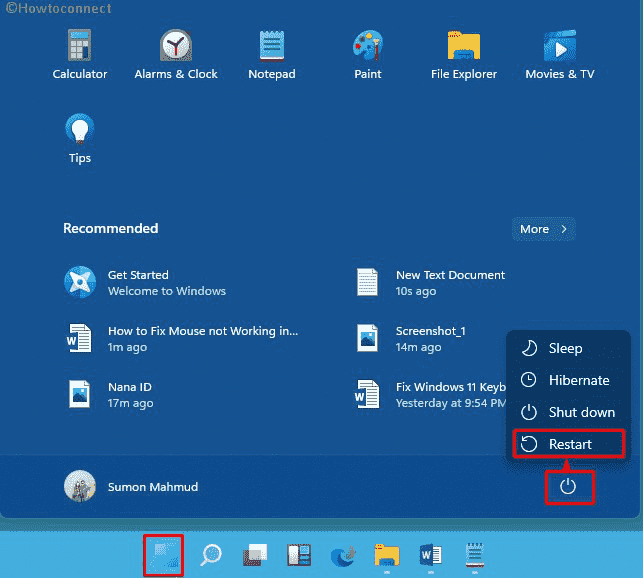
- Click the Windows logo from the taskbar.
- Hit the power icon from the bottom right corner.
- Select – Restart option.
- Let the system reboot normally.
Once the system turns back to operation, hopefully, the keyboard will be working fine and if not, proceed with further troubleshooting.
Way-3: Uninstall Windows update
Updating Windows is necessary to maintain a PC healthy state as most of the patches come with bug fixes and not to mention lots of improvements. But the aftermath of installing Windows update is not pleasant always. Due to some unavoidable reason, sometimes Windows 11 ends up receiving faulty or broken updates which later lead to unexpected issues.
Some of the Windows 11 users report that Keyboard not working on their PC since when they updated the system. Therefore, uninstall the most recent patch you got and check whether it fixes the issue automatically. Here are the steps to follow –
- Press – Windows key and R together.
- Type – appwiz.cpl in the command box.
- Click – OK button.
- When Programs and Features show up in a separate window, click – View installed updates from the left sidebar.
- Move down to the Microsoft Windows section.
- Right-click on the KB version your system has received lately.
- Select – Uninstall.
- Follow on-screen instructions to complete the removal process.
Way-4: Check Batteries and Adjust power management
Irrespective of removable or non-removable, a laptop battery always lies underneath the keyboard. If you have Windows 11 Keyboard not working issue, probably the battery has no power left or the wireless adapter is blocked. In case, it is removable, pull it out after shutting down the device. Then connect the power cable and start the machine with AC power supply. If the keyboard now works fine indicates your battery has been wasted out and you have to replace it immediately.
Another troubleshooting here is to adjust the Power Management from Control Panel. For that, follow the below guidelines –
- Press – Windows + R.
- When Run dialog opens, type – devmgmt.msc in the text box.
- Press – Enter to launch Device Manager.
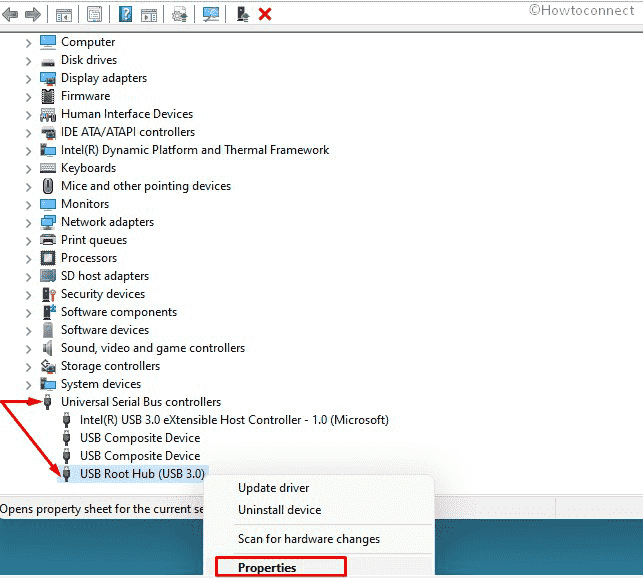
- Double click – Universal Serial Bus controllers and expand its branches.
- Right-click on USB Root Hub then select – Properties.
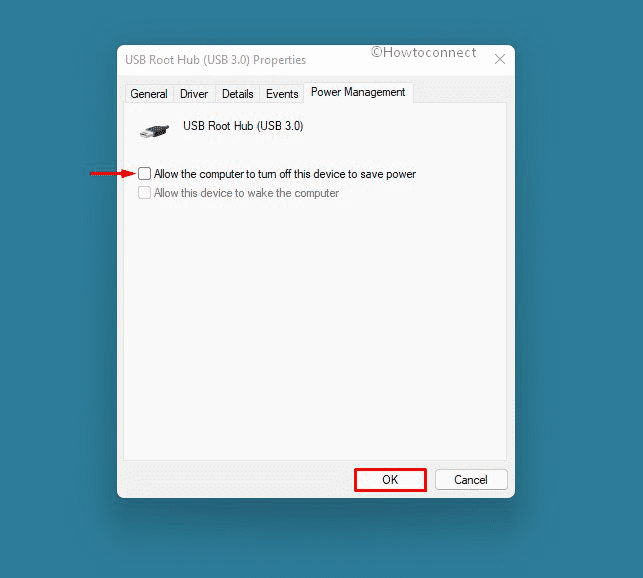
- In the upcoming popup, enter into Power Management tab.
- Uncheck the box saying – Allow the computer to turn off this device to save power.
- Click – OK button to save the changes.
Way-5: Tap keys to enable Keyboard
Before proceeding to complex troubleshooting, ensure the keyboard is not locked using keys mistakenly. The peripheral has a lock key with fn marked in it used for latching the laptop keyboard in many brands. There are other hotkey combinations like Windows + Space key for the same. Try pressing the keys and the keyboard must start working if it was locked before.
Way-6: Ensure the Keyboard is enabled in BIOS Settings
Keyboard can be locked from the BIOS Settings as well and you need to ensure it is enabled from there. Unfortunately, most of the regular users are quite unfamiliar with this matter and forget to check the BIOS Settings. This is not a difficult task and you can check whether the keyboard is enabled using the below guidelines –
- Press – Winkey and I together.
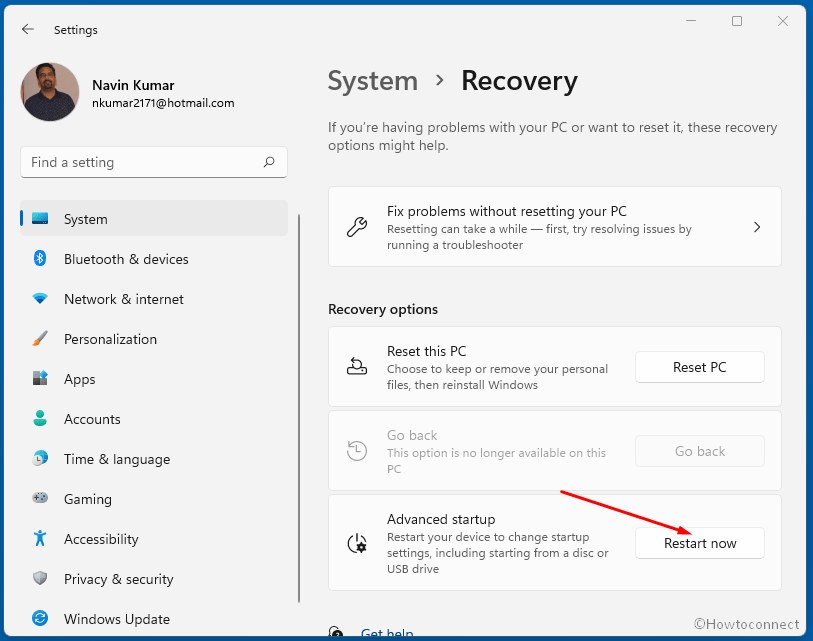
- From the Settings app, click select – Recovery from the right pane.
- Scroll down to the Advanced startup area and click – Restart now.
- When Windows restarts, you will see a blue screen with a couple of options.
- Choose – Troubleshoot => Advanced options => UEFI Firmware Settings in turn.
- Scroll to the bottom of the next screen and click – Restart.
- After Windows completes the restarting, you will be in the BIOS.
- Look for Keyboard settings and check if it is enabled.
- If you get it in the Disabled state, click the same to make it Enabled.
Way-7: Update the keyboard driver
Driver updating plays the most vital role when a hardware accessory doesn’t function normally. Drivers are the key components to control the communication between app and the specific hardware peripheral. Whenever this component is left outdated, the system will render a variety of issues. An unresponsive keyboard is more likely to be the consequence of outdated driver software.
In order to fix the Windows 11 Keyboard not working issue, update the specific driver software. Here are the instructions to accomplish this workaround –
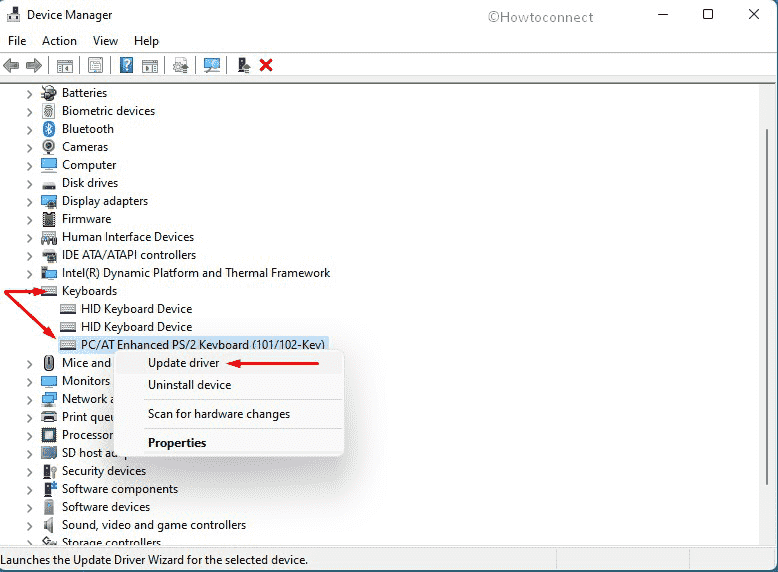
- Right-click on the Start and choose – Device Manager.
- Locate – Keyboards.
- Expand the driver list by double-clicking the device.
- Right-click your keyboard driver from the list.
- Select – Update driver option.
- From the next window, select – Search automatically for drivers.
- During the process, make sure your device is connected to an active internet connection.
- Follow the on-screen guidelines until the task finishes successfully.
- Once done, reboot the machine and check if the keyboard is working.
Way-8: Rollback buggy driver update or reinstall it
Although updating the driver is one of the most effective workarounds in case of troubleshooting any issue in Windows 11, there are exceptions as well. Sometimes a buggy update is installed while updating them as the software vendors uploaded it as defective in their official web page. Some updates are again incomplete, installing it causes vulnerability in the system. One thing is important; you have to make sure that this issue started after installing an update on your computer.
As for fixing the Windows 11 Keyboard not working problem now, roll back the defective update for that driver. However, if this doesn’t fix your issue but straightway uninstall the driver. Without reinstalling it, you cannot fix the keyboard issue for sure. To carry out Roll back driver or re-installing it, follow the below instructions –
- Press – Windows key.
- Type – device manager.
- Hit – Enter.
- Moving to Device Manager, look for – Keyboards.
- Double-click the same to unfold the driver list.
- Right-click on your keyboard driver and choose – Properties.
- On the following popup window, enter into the Driver tab.
- Scroll down and click – Roll Back Driver button.
- Reboot Windows 11 to make the changes effective.
In case rolling back doesn’t help, uninstalling will probably be the preferable solution for that. To do so –
- Repeat steps 1-7 from above.
- From the Driver tab, click – Uninstall.
- Restart the device to have the keyboard driver with the default version.
Way-9: Disable Filter keys
Filter key feature in Windows is provided to cut off repetitive keystrokes. Enabling the feature will ignore the keystroke or slow down the rate to aid users. However, some users have found this functionality restricting the laptop keyboard and causing trouble.
If you have enabled the filter key feature in Windows 11, follow the below guidelines and disable it –
- Click the magnifier icon from the taskbar.
- Type – Control Panel in the search bar.
- Select the Best match result.
- Once headed to the Control Panel, make sure the View by option is set to either Small icons or Large icons.
- Opt for – Ease of Access Center.
- Scroll down and click the link – Make the keyboard easier to use.
- Make sure that the checkbox of Turn on Filter Keys is unchecked.
- Click Apply and then OK to save the changes.
- Once the filter key is disabled, the keyboard should start working normally.
Way-10: Run Windows Keyboard troubleshooter
Introduction of troubleshooter is one of the most powerful inclusions in Windows from the Window experts. The utility can easily detect the ongoing problems and fix that using built-in resources without making much changes to the system. Day after day, the number of troubleshooters has been increasing in the Settings app which is much worthy to be mentioned.
To fix Windows 11 Keyboard not working issue, run the keyboard troubleshooter. For that, follow the below guidelines –
- Press – Windows key and I.
- From the Settings, click – Troubleshoot.
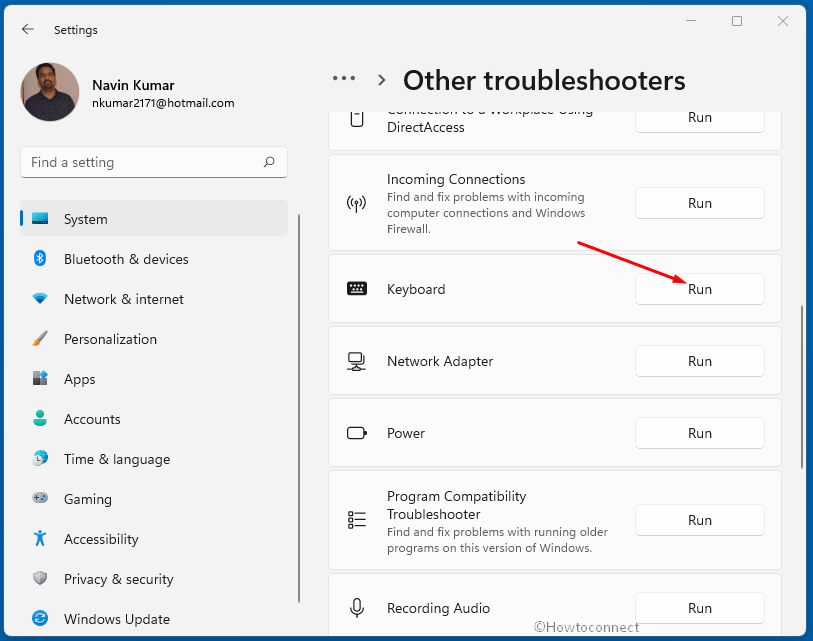
- On the next page select – Other troubleshooters.
- Scroll down to look for Keyboard and click on Run.
- Windows will now start scanning to find out the existing rouble in the keyboard.
- When the utility comes up with a resolution, click – Apply this fix.
- Follow further instructions if any until the troubleshooting is completed.
Way-11: Disable Fast boot mode to fix Windows 11 Keyboard not working
Fast Startup or Fast Boot is an extraordinary feature in Windows 11 that helps to reduce the time taken at the Startup significantly. It will also make the shutdown faster preventing the regular shutdown. However, this feature is found to cause some compatibility issues with the devices that don’t support the Sleep Mode and Hibernate.
Some of the users who have encountered the Windows 11 laptop keyboard not working issue have suggested to disable this feature. It was found out that, Fast Boot setting causes functionality issues with the hardware peripherals and driver software. In order to disable this feature, follow the below guidelines –
- Press – Windows +R.
- When the Run dialog opens, type – control panel.
- Click – OK button from the wizard.
- Pick the link that says – Power Options.
- When the following page is upfront, click – Choose what the power buttons do link from the left pane.
- From the next window, hit the link Change settings that are currently unavailable.
- Move down and remove the checkmark from the box saying Turn on fast startup.
- Click – Save changes button.
Way-12: Update Windows 11
Windows needs to keep updated always as Microsoft releases necessary patches frequently. Every new update patch is a compact package of new UI modifications, security improvements, and enhanced feature updates and carries comprehensive tools to fix bugs. If you don’t install these updates in time, there will be problems coming into the system quite frequently.
If you wonder – why is my keyboard not working – then the lack of update may be a reason. There are chances to have Windows 11 Keyboard not working issue in the system when you don’t update the Windows for a long time. Hence, follow the below instructions and install the latest patches –
- Right-click on Start button and choose – Settings.
- Once Settings app comes in, click – Windows Update.
- Move to the right of the consequent page.
- Click – Check for updates.
- If there is a stable internet connection available with the device, Windows will start looking for newly released patches.
- Downloading followed by Installation will take place automatically.
- Once done, restart the Windows and check if the keyboard starts working.
Way-13: Enable keyboard from Registry Editor
Any abnormal change in Windows Registry might cause the Windows 11 Keyboard not working issue as well. Thankfully, you can enable the keyboard through regedit with simply a small change. For that, you have to complete the below tasks –
- Open Run dialog box.
- Insert – regedt32.
- Click – OK.
- To allow User Account Control, hit – Yes.
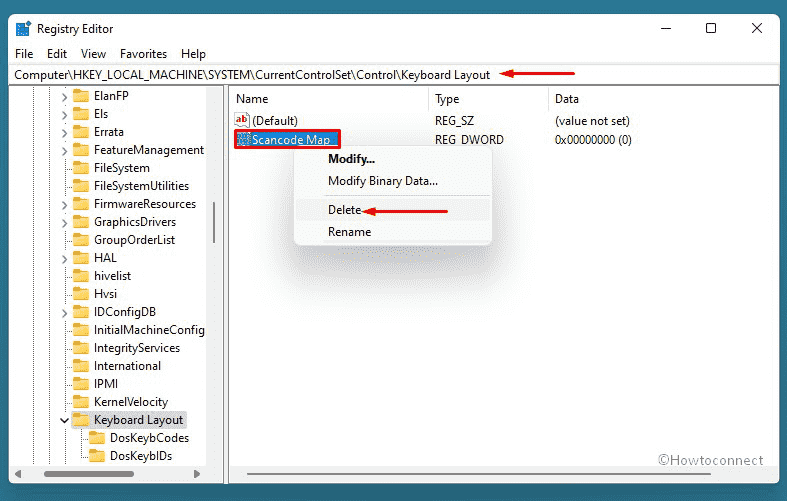
- From the left pane of Registry Editor, navigate to the below path –
HKEY_LOCAL_ MACHINE\ System\CurrentControlSet\Control\Keyboard Layout- Move to the right side and locate Scancode Map key.
- Right-click on the key and select – Delete.
- Click – Yes when a warning message pops out.
- Restart Windows and check of the keyboard is working normally now.
Note – Changing the value of a DWORD in Windows Registry is a professional task and any mistake can lead to permanent damage to the system. Hence, follow the guidelines properly or take help from technicians. In case you feel insecure, skip this workaround.
Way-14: Remove the Game Controller
Oftentimes a keyboard malfunction occurs when you connect a gamepad and keep a button pressed down (accidentally). The reason is quite unfamiliar and yet to be revealed but suspected that there might be conflicts between the drivers.
If you have encountered the Windows 11 laptop Keyboard not working properly problem with a gamepad plugged in, remove it now. Ensure that, no button is pressed down both on the keyboard and the gamepad. Hope this will fix the unresponsive keyboard and bring it back to normal operation.
Way-15: Perform Clean Boot in Windows 11
Clean Boot in Windows is a special type of booting method where the device starts with a minimal set of installed programs and services. This is a very much reputed process to identify and troubleshoot a problem very easily.
If the keyboard does not function normally, you can run a Clean Boot to check whether a third-party program is responsible for this trouble. In order to carry out Clean Boot, follow the below guidelines –
- Press –Windows key.
- Type – msconfig.
- Hit – Enter to launch System Configuration.
- Select the radio button present before – Selective.
- Uncheck – Load startup items.
- Shift to Services tab.
- Tick the checkbox set for Hide all Microsoft services.
- Click – Disable all.
- Move to the Startup tab.
- Click the link – Open Task Manager.
- When Task Manager turns up, disable all startup programs.
- To do so, right-click on each application individually and choose – Disable.
- Close Task Manager and bring back System Configuration window.
- Click Apply and then OK.
- Restart the machine.
- When PC starts in clean boot mode, try checking if the keyboard is okay.
Way-16: Run the Hardware and Device Troubleshooter
Keyboard in a laptop is a hardware device and it can render unresponsiveness anytime. With respect to this probability, Microsoft has provided Hardware and Device Troubleshooter in the Operating System. This tool can easily identify the problems with a hardware peripheral or technical issue easily and fix them accordingly. Here are the guidelines to run the tool –
- Press – Windows + S.
- Type – cmd.exe.
- Right-click on Command Prompt and choose – Run as administrator.
- Give consent to User Account Control by clicking – Yes.
- Type the below command in the black pane –
msdt.exe -id DeviceDiagnostic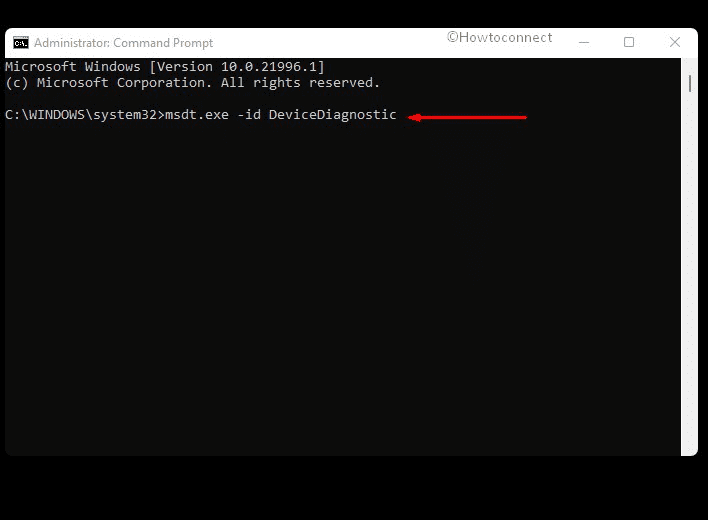
- Hit – Enter key.
- Click – Next option when the Hardware and Devices Troubleshooter prompts.
- When the utility shows a list of problematic peripherals, choose – Keyboard.
- Hit – Next button.
- After the utility traces out any issue, click – Apply this fix in order to run Automatic repair.
- Click – Next once more.
- Restart the Windows 11 device when troubleshooting ends completely.
Methods list:
Way-1: Clean the Keyboard
Way-2: Restart Windows or Shut down temporarily
Way-3: Uninstall Windows update
Way-4: Check Batteries and Adjust power management
Way-5: Tap keys to enable Keyboard
Way-6: Ensure the Keyboard is enabled in BIOS Settings
Way-7: Update the keyboard driver
Way-8: Rollback buggy driver update or reinstall it
Way-9: Disable Filter keys
Way-10: Run Windows Keyboard troubleshooter
Way-11: Disable Fast boot mode
Way-12: Update Windows 11
Way-13: Enable keyboard from Registry Editor
Way-14: Remove the Game Controller
Way-15: Perform Clean Boot in Windows 11
Way-16: Run the Hardware and Device Troubleshooter
That’s all!!!
Thank you! Point 11 helps!