To ensure better performance, Microsoft releases updates for Windows pretty frequently and they basically come with new features, improvements as well as bug fixes. Unfortunately, the process of acquiring these updates is often intricate itself. Due to various reasons, the system fails to finish downloading the latest patches or gets stuck at a certain percentage. Even if the downloading process ends successfully, installation may not take place moreover cause unexpected error codes. Windows update error 0x80071AA8 – 0x2000A is one such issue that is often found to prevent the system from receiving the latest patches no matter how many times you try.
Update error 0x80071AA8 – 0x2000A generally strikes because of corrupted system components, software conflict, and faulty update agents. The same fatal code may also take place if your PC specs don’t match the requirements that the latest patch asks for. Besides, multiple hard drives can bring forth error 0x80071AA8 – 0x2000A too, and if so, removing the extra hard disk will solve the issue immediately. Unless it is really hard to identify the exact cause and work accordingly. However, the process of resolving the mentioned error can be time-consuming but not impossible.
Windows install or upgrade error 0x80071AA8 – 0x2000A
Here is how to fix Windows update error 0x80071AA8 – 0x2000A –
Way-1: Check system requirements
First thing to do after encountering Windows update error 0x80071AA8 – 0x2000A is to check the system requirement of the device. This trouble is quite frequent when the PC doesn’t meet the minimum needs of the OS. Before launching latest Windows, Microsoft had urged the users to check the minimum system requirements but you can still continue installing the Operating System on unsupported devices.
Sometimes, the machine fails to run a new operating system even after meeting the requirements and you will obviously come across the mentioned issue. If that happens so, skip to the next workarounds.
Way-2: Ensure stable internet connection
Internet connection is the most necessary thing when you proceed with downloading content from the server. Without having a proper stable connection, Installer files available for the device can’t be downloaded. Two types of problems may occur, initially the downloading will not start at all even if you try multiple times. Or, an intermittent connection will force the process to stop at a certain percentage, and both the cases will bring forward Windows update error 0x80071AA8 – 0x2000A.
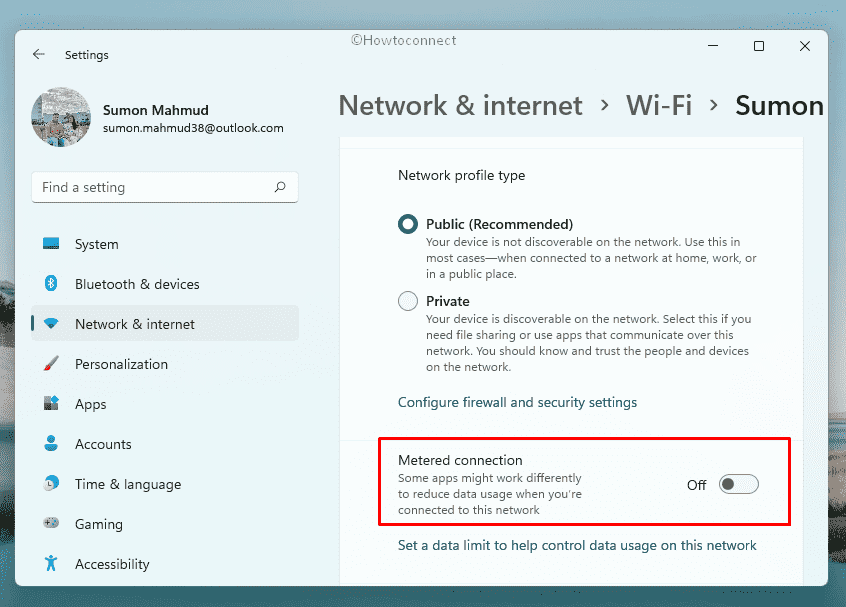
Before proceeding to carry out Windows update, make sure the internet connection is alright, there is no glitch in it. If there is an existing issue, restarting the router or unplugging the ethernet cable might help. Call the service provider for help and reset the Router settings, this would fix the problem too. Oftentimes, the network you are using may also be set to Metered as well and the downloading doesn’t start as the setting won’t allow any large files to be downloaded. Make sure the network is set to unmetered and then try checking for the updates.
- Press – Windows + R.
- In the command box, insert – ms-settings:network-wifi
- Click – OK.
- Select your Wifi connection from the right pane.
- Make sure the toggle button present under Set as metered connection is disabled.
Way-3: Disconnect unwanted peripherals
Windows Update operation fails often when you proceed to complete the task with hardware accessories connected that are not well supported. There are many USB peripherals we use for quicker navigation and carrying out other tasks in Windows. Hence, a printer, speaker, hard drive, and USB hub have become an inseparable part of the device nowadays. However, if any of these are not supported, you will end up getting Windows update error 0x80071AA8 – 0x2000A.
To eliminate the cause, try using only the necessary peripherals and try updating with basic ones. If the issue persists, also disconnect the basic accessories and carry out Windows update. However, you can connect them all once the update files are installed successfully in the operating system.
Way-4: Run Windows Update troubleshooter
Update errors are pretty common in Windows 10 or 11 as the company releases new patches a lot regularly. Sometimes the error occurs for obvious reasons like intermittent internet connection but mostly the process terminates without having a firm cause. If that happens, users cannot fix the issue easily and become deprived of the latest features. Microsoft has come up with a revolutionary solution to this trouble by introducing Windows Update Troubleshooter to the OS.
While resolving the Windows update error 0x80071AA8 – 0x2000A issue, running the troubleshooter would be the most helpful utility. This is a built-in troubleshooter and won’t affect the default setting in the operating system. To carry out this workaround, follow the below guidelines –
Windows 11
- Press – Win+I hotkeys.
- When Windows Settings appear, select – Troubleshoot from the right pane.
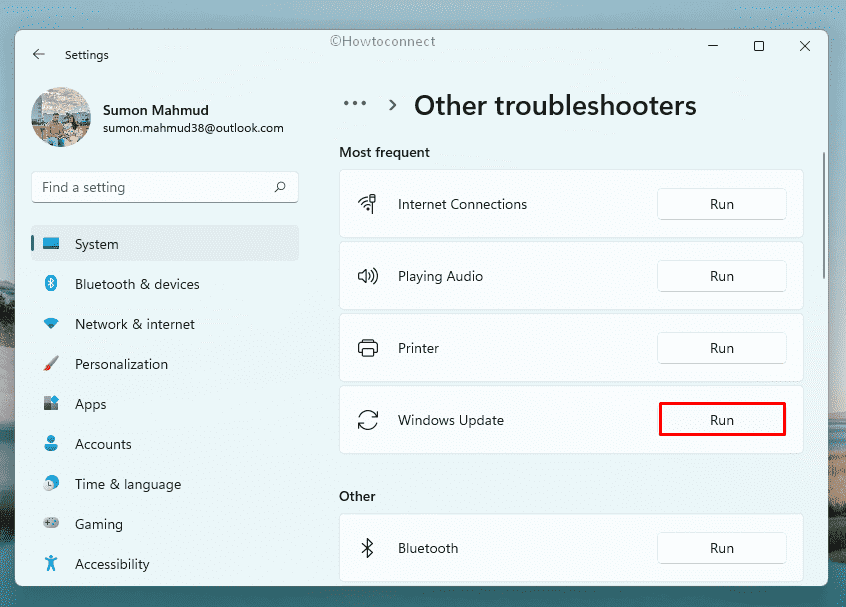
- Click – Other troubleshooters.
- Hit – Run located parallel to Windows update.
- If the utility offers a fix after detecting problems, click – Apply this fix.
- Close troubleshooter and then reboot Windows.
Windows 10
- Open Settings.
- Choose – Update & Security.
- From the left sidebar, select – Troubleshoot.
- Shift to the right-hand side.
- Click the link that says – Additional troubleshooters.
- Select – Windows update.
- From the expanded tray, click – Run the troubleshooter.
Way-5: Repair and restore corrupt system files
Corrupted system files in most cases make the platform encounter the update issues in the operating system. Initially, these components are the most important things to carry out various tasks in the device keeping it fully operational. This is the reason, malware are very much eager to damage them when there is an opportunity. Some of these items may go missing due to software collision. Furthermore, such files can be damaged when a sudden power surge or outage occurs too.
Windows image files are important components for an update and they are also very much prone to be corrupted by malicious invaders. Due to the missing and damaged files, you will face Windows update error 0x80071AA8 – 0x2000A in the operating system. To get rid of this, running SFC and DISM scans is mandatory as they can fix as well as recover the missing files.
- Press – Windows key.
- Type – cmd.
- When result appears, choose – Run as administrator.
- For appearing User Account Control, click – Yes.
- In the black terminal, insert – DISM /Online /Cleanup-Image /ScanHealth.
- Hit – Enter.
- Wait until the scan finishes.
- Following this, execute – DISM /Online /Cleanup-Image /RestoreHealth.
- After completion, reboot Windows.
- Sign back in.
- Open command prompt as admin.
- Run – Sfc /scannow.
- Once the process reaches 100%, close Command Prompt.
- Restart the PC.
Way-6: Reset update related components
Windows Update in the operating system serves the most important task of bringing the most recent security improvements, bug fixes, and updated drivers for hardware accessories. Due to some issues, the most requisite component starts malfunctioning and ends up with errors. The glitches in most cases are related to corruption in the system files and settings restricting Windows update to work properly. Fortunately, there is a suitable option to reset the components and it’s pretty helpful to fix Windows update error 0x80071AA8 – 0x2000A.
Resetting the Windows Update components includes the resetting of BITS, cryptographic installer, and Windows Update service. This operation also includes the renaming of Catroot2 and SoftwareDistribution where the critical components for Windows update are accumulated temporarily. To complete this workaround, follow the below guidelines –
- Open Run Dialog box.
- Type – cmd.
- Press – Ctrl + Shift + Enter.
- When User Account Control prompts, click – Yes.
- In the appearing elevated Command Prompt, insert the following lines sequentially and hit Enter after each –
net stop bit

net stop wuauserv

net stop appidsvc

net stop cryptsvc

Del "%ALLUSERSPROFILE%\Application Data\Microsoft\Network\Downloader\*.*"

rmdir %systemroot%\SoftwareDistribution /S /Q

rmdir %systemroot%\system32\catroot2 /S /Q

regsvr32.exe /s atl.dll

regsvr32.exe /s urlmon.dll

regsvr32.exe /s mshtml.dll

netsh winsock reset

netsh winsock reset proxy

net start bits

net start wuauserv

net start appidsvc

net start cryptsvc
- Close Command Prompt.
- Restart Windows PC.
See – How to Reset Windows Update to Default in Windows 10.
Way-7: Make sure all drivers are up-to-date
Driver incompatibilities are the primary reason for occurring irrecoverable problems in the operating system. Since these components are only media between the hardware accessories and software controlling them, the data flow gets restricted when they are outdated. Windows Update is also affected when there is an outdated driver unless you make room to update it.
Windows Device Manager is a handy platform to carry out the update of driver software. You can also trace out which one is outdated by seeing the indication in the built-in application and take necessary action. In the process, Windows update error 0x80071AA8 – 0x2000A can also be fixed. To update a driver automatically, follow the way –
- Press – Windows + S.
- In the search bar, insert – devmgmt.
- Hit – Enter.
- When Device Manager appears, find the devices having yellow exclamation.
- Expand the same by double-clicking.
- Right-click on the driver with a question mark and choose – Update driver.
- Opt for – Search automatically for drivers.
- If the system gets any available updates online, it will be downloaded and installed automatically.
- After completion, restart the PC.
Way-8: Uninstall third-party antivirus
Anti-virus software is a much-needed application since malware are always looking for a weak point in the security interface. However, Microsoft introduced Windows Security with robust construction and real-time protection feature which keeps the device protected from any foreign suspicious threats. Installing a third-party antivirus program other than the default application is not greeted always. An unrecognized app may bring disaster to the operating system when it comes to malicious invaders.
Sometimes the third-party anti-virus tools misinterpret the installer files as malicious and significantly block the downloading. As a result of that, you may face Windows update error 0x80071AA8 – 0x2000A issue. Having two similar programs would cause a software collision which is really havoc for the operating system. Hence, try uninstalling such anti-virus programs using the below guidelines –
- Press – Windows + R.
- In the Run command, insert – appwiz.cpl.
- Click – OK.
- From Program and Feature window, locate the third-party programs you want to get rid of.
- Right-click the same and select – Uninstall.
- Comply with on-screen instructions to completely remove the application.
- Following the same process, uninstall other third-party antivirus programs as well.
Way-9: Wipeout junk files
Junk files are produced automatically when the operating system carries out various functionalities and performs assigned tasks. These temporary files, shader cache, browser cache, shadow files, and recycled items can occupy large space in the disk. Some previous Windows update files may stay as leftover and cover up a few gigabytes of storage space too. Unless you opt for a System restore, there is no use for such installer files.
However, junk files will reduce the disk space and regular operation is affected. The computer starts crashing abnormally, freezes frequently, and becomes sluggish. Meanwhile, the Windows update error 0x80071AA8 – 0x2000A may also occur when you check for new updates. To clear up the unnecessary junk files, Disk Cleanup tool is pretty helpful and it can remove all of them with a few clicks.
- Click search icon from the taskbar.
- Type – cleanmgr.
- Hit – Enter.
- Make sure your system drive is selected in the appearing pop-up.
- Click – OK.
- After a new wizard shows up, hit – Clean up system files.
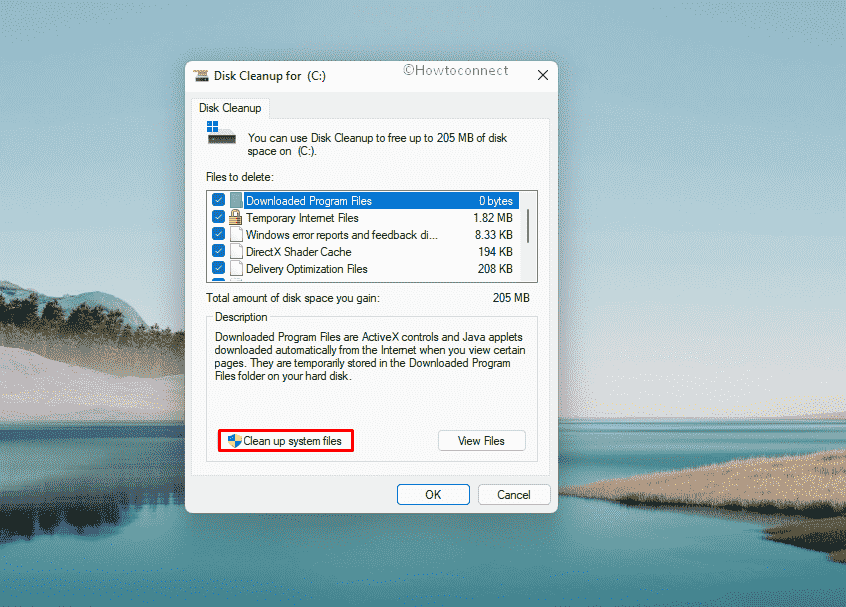
- For the drive selection prompt, again click – OK.
- When Disk cleanup finally turns up after accumulating how much disk space can be restored, hit – OK.
- For final consent, click – Delete files.
Way-10: Retry updating Windows in Clean boot
Clean Boot is an advanced startup method where the system will power up with only the basic programs and settings. This is indeed a diagnostic process to trace out which of the programs are responsible to cause a vulnerability in the system. As the device boots up with default resources only, there is a possibility to have an error-free Windows Update. Meanwhile, you can also come across if a third-party program was causing the problem.
- Press – Windows key.
- Type – msconfig.exe.
- Hit – Enter.
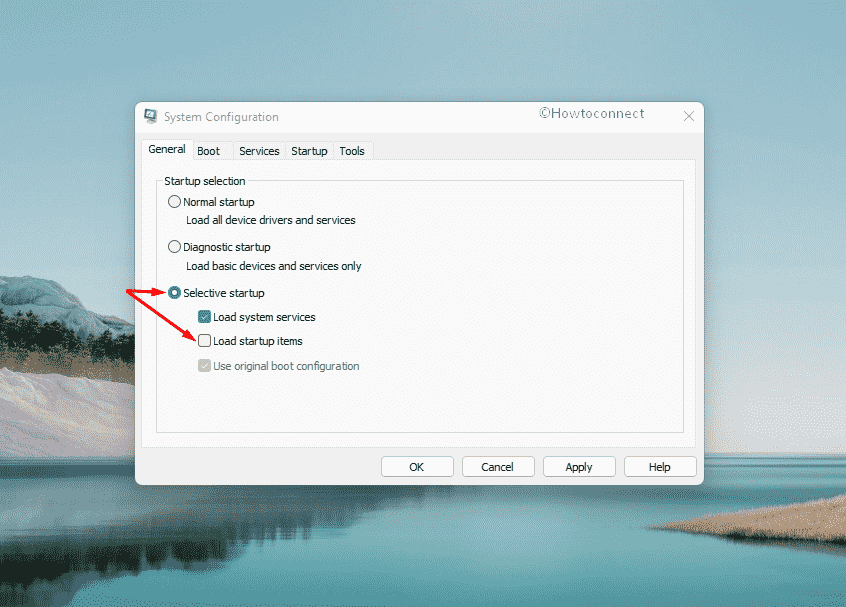
- When System Configuration wizard prompts, select the radio button set before Selective startup.
- Uncheck – Load startup items.
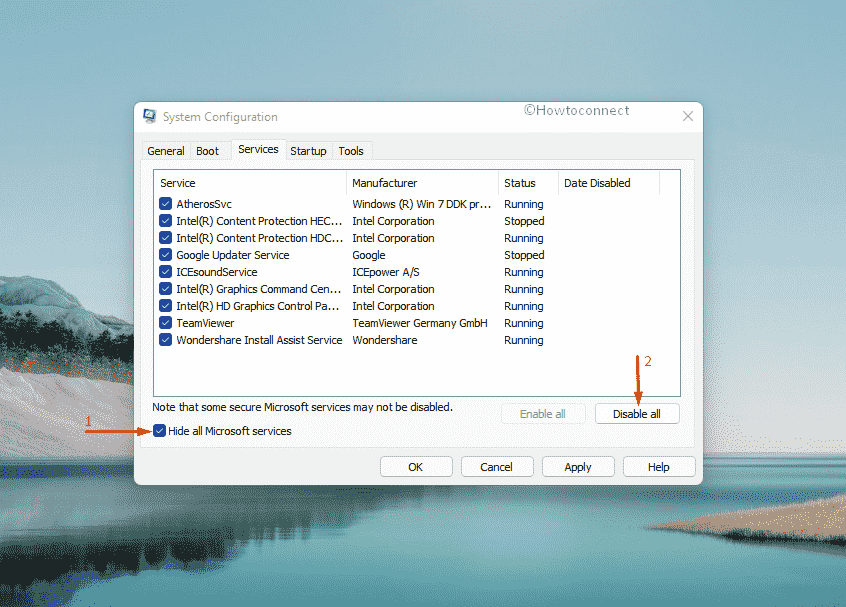
- Now, shift to Services tab.
- Check the box present by the side of Hide all Microsoft services.
- Hit – Disable all.
- Move to the Startup tab.
- Click – Open Task Manager link.
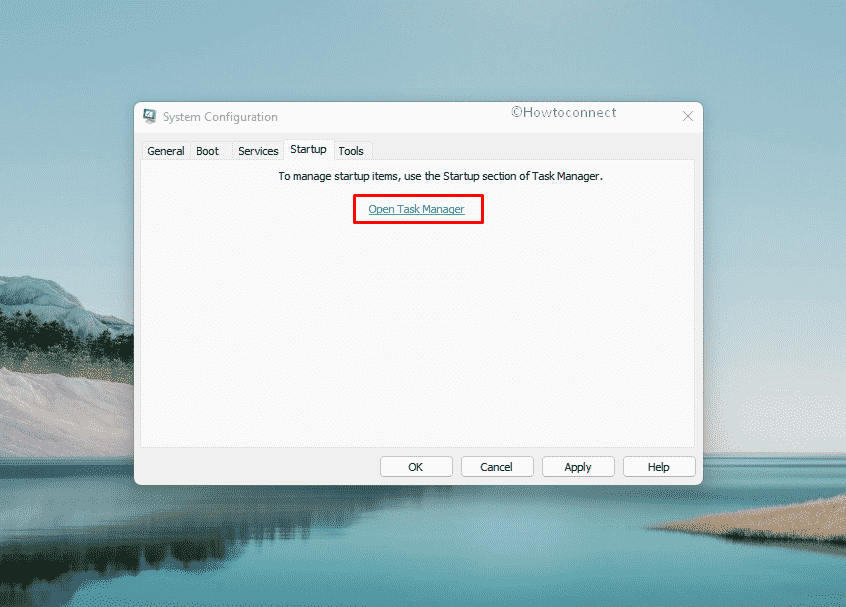
- When a window shows up, right-click on a startup program listed there and choose – Disable.
- In the same way, disable all startup programs.
- Close Task Manager and return back to the System Configuration window.
- Click Apply and then OK.
- After entering into clean boot, retry updating process.
Way-11: Turn off Fast Boot
Fast Startup is a booting method where the system collects necessary data to make the starting and shutting down speedier. While shutting down the device, it will enter into a hibernation state instead of a regular shut down. Many users have come up with a complaint that, Windows update error 0x80071AA8 – 0x2000A occurs when the Fast Boot is enabled. Hence, disabling the Fast Startup mode may help to resolve the issue.
- Open Control Panel.
- Make sure its View by option is set to Small icons.
- Choose – Power Options.
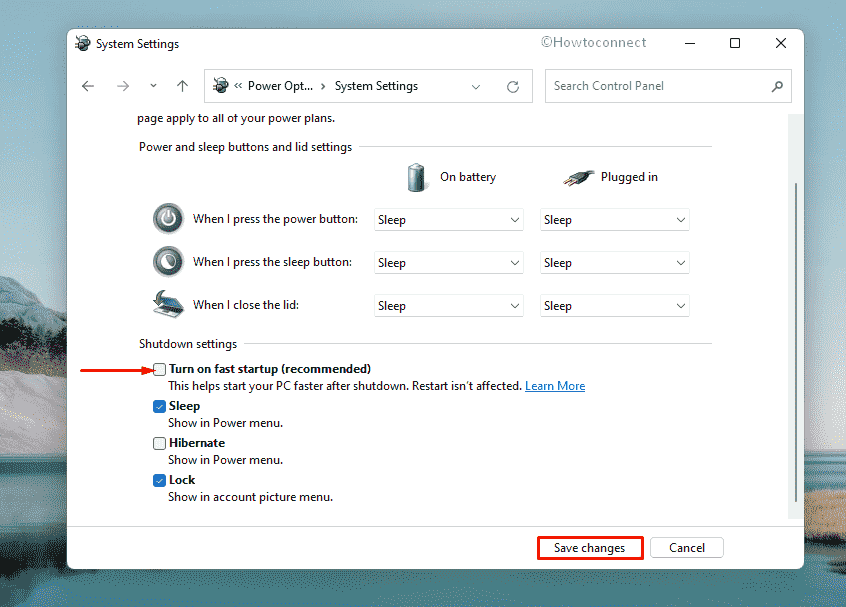
- From the appearing window, click – Choose What the power buttons do.
- Select the link – Change settings that are currently unavailable.
- From the bottom, uncheck the box present alongside Turn on fast startup (recommended).
- Click – Save Changes.
Way-12: Create a new local user account
If you have two different types of disks in the machine, can also encounter Windows update error 0x80071AA8 – 0x2000A as well. Such as, if Windows operating system is saved on a Solid-State Drive (SSD) where some other programs are in a Hard Drive, updating process terminates abnormally. In that case, creating a new local user account can resolve the issue. Steps are as followed –
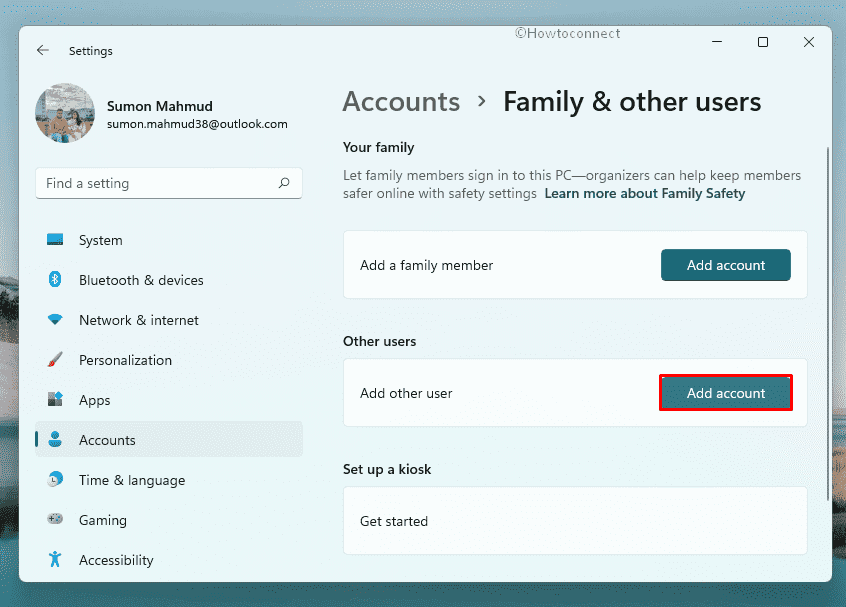
- Press – Windows+I.
- Go to – Accounts => Family & other users.
- Click – Add someone else to this PC or Add account present under Other users.
- Provide necessary information that the system requires to create a new account.
- When the process ends, the newly created account will get listed under Other users.
- Select the account you added.
- From the expanded pane, click – Change account type.
- Hit the drop-down list present under Account type and choose – Administrator.
- Click – OK
- Now, click Start button.
- Right-click on your account photo and choose – Sign out.
- When the system powers up, log in with the new admin account you created.
Way-13: Upgrade Windows using ISO file
If you are facing the Windows update error 0x80071AA8 – 0x2000A repeatedly, can also install the specific patch using the ISO files. The process is also well recognized as an In-place upgrade where you can download a specific installer file from Microsoft Website. This process is a bit safe and no error should evolve unless the patch is faulty itself.
Sometimes, downloading gets tough when you are out from the workstation in a remote place where internet service is not stable. In that case, you can download in a suitable opportunity and install them accordingly. To carry out In-Place upgrade, follow the below guidelines –
- Navigate to Software Download page of Microsoft.
- Click – Download tool now.
- Run the downloaded setup file.
- For appearing User Account Control, click – Yes.
- When the License terms page prompts, hit – Accept button.
- From the next page, select the radio button of Upgrade this PC now and then click – Next.
- Follow on-screen instructions to complete the process.
Way-14: Disable Legacy USB support
Irrespective of various PC manufacturers and models, enabling Legacy USB support in BIOS Settings restrict the Windows Updating process too. If that brings up Windows update error 0x80071AA8 – 0x2000A issue in your case, consider disabling the settings. To do so, here are the steps to follow –
- Boot Windows into BIOS.
- Once in the BIOS setup, go through the menus to find the option to enable or disable the onboard USB ports.
- Make sure all USB options and Legacy USB support options are disabled.
- Save and exit the BIOS after making the changes.
- When the system powers up next, try the Windows upgrade again.
Way-15: Perform system restore
After successively failed to download followed by installing a new patch in Windows, you may consider a critical issue occurring in the System. In that case, performing System Restore can be the most suitable way out. The process will hover back the current state of Windows to a previously saved point where there was no error or issue. The process needs a Restore Point and for that, you need previous Windows Update files on the disk. Hence to fix up Windows update error 0x80071AA8 – 0x2000A, perform System Restore using below guidelines –
- Right-click on start button.
- Choose – Run.
- In the command box, insert – control.
- Click – OK.
- In the search bar of Control Panel, type – recovery.
- Select – Recovery first and then Open System Restore.
- Click – Next.
- Choose the restore point where you want to go back.
- Select – Scan for affected programs.
- Now, the utility will present a list of programs that will be removed if you opt for this restore point.
- After making sure everything is okay, close the Window.
- Click – Next on the System restore wizard.
- Hit – Finish.
- If a pop-up prompts for final confirmation, click – Yes.
Methods list:
Way-1: Check system requirements
Way-2: Ensure stable internet connection
Way-3: Disconnect unwanted peripherals
Way-4: Run Windows Update troubleshooter
Way-5: Repair and restore corrupt system files
Way-6: Reset update related components
Way-7: Make sure all drivers are up-to-date
Way-8: Uninstall third-party antivirus
Way-9: Wipeout junk files
Way-10: Retry updating Windows in Clean boot
Way-11: Turn off Fast Boot
Way-12: Create a new local user account
Way-13: Upgrade Windows using ISO file
Way-14: Disable Legacy USB support
Way-15: Perform system restore
That’s all!!