In this article, we are going to demonstrate Hide/Show Network in File Explorer Navigation Pane on Windows 10. File Explorer is a graphical users’ interface that is particularly designed to allow system administrators to manage all categories of files and content stored in the system. File explorer includes a chunk in the extreme left of interface with the name Navigation pane. The pane offers direct links to folders that are frequently accessed; thereby you save clicks during accessing such folders.
Therefore, it is very imperative to show network in the file explorer navigation pane in Windows 10 as such technique will enable the system administrator to access the item with great ease. The system administrator can only execute the steps outlined in this tutorial. What this implies is that you must sign in as an administrator in other to have the capacity to show network in the file explorer navigation pane in Windows 10. Having said that, let’s proceed with the steps. The best way to execute this function is by implementing the regedit method.
How to Hide/Show Network in File Explorer Navigation Pane on Windows 10
Step 1 – You have to commence the process by clicking on Start icon lying on the bottom left corner of the taskbar. Now type the shortcut regedit and press the Enter key. Select Yes when a dialog prompts regarding User Account Control.
Step 2 – After opening the Registry Editor, browse the entries to get access to the ahead location –
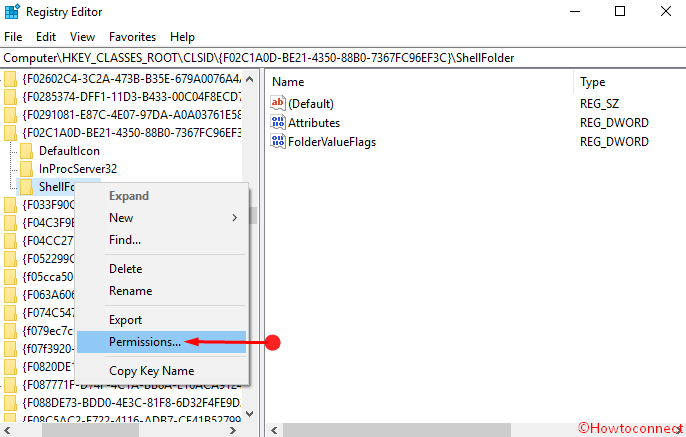
“HKEY_CLASSES_ROOT\CLSID\{F02C1A0D-BE21-4350-88B0-7367FC96EF3C}\ShellFolder”
Step 3 – In this stage, you have to change the permission of the ShellFolder registry key from the left pane. Make a right click on the ShellFolder entry and select Permission in the context menu.
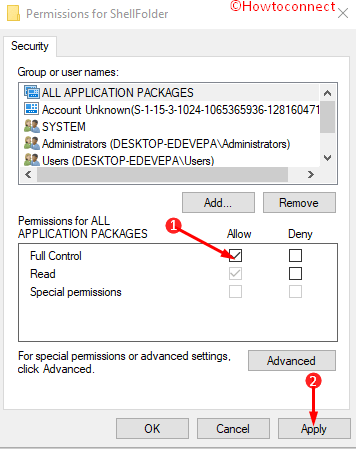
Step 4 – Locate Permission for ALL APPLICATION PACKAGES, the lower side box. Tick the checkbox for “Full control” in the “Allow” column and press Apply then OK.
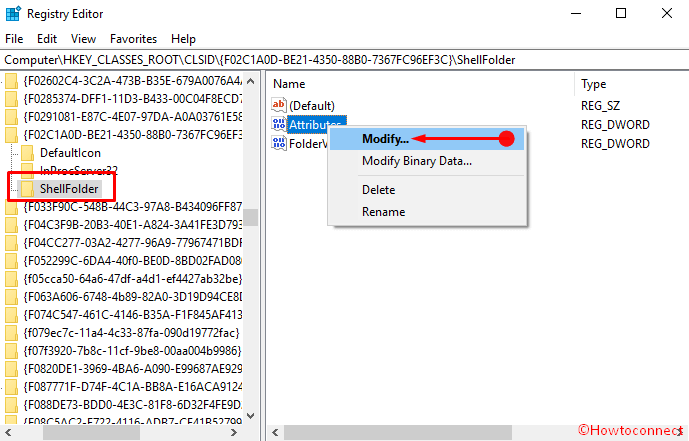
Step 5 – To Hide/Show Network in File Explorer Navigation Pane on Windows 10, all you have to do is to perform a right click on Attributes and select Modify.
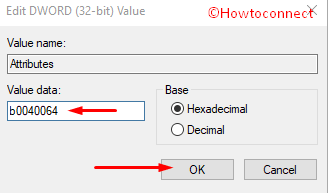
Step 6 – Type “b0040064” in the Value Data box and then click Ok. It is very important to note that this is the actual default setting. This will show the network and when you need to hide, restore it to the default value.
For 64-bit Windows 10 PC
Step 7 – If you are dealing with 64-bit Windows 10, you have to go to the following registry location –
HKEY_LOCAL_MACHINE\SOFTWARE\Wow6432Node\Classes\CLSID\{F02C1A0D-BE21-4350-88B0-7367FC96EF3C}\ShellFolder.
Step 8 – Here again change the permission according to Step 4 and modify the Data value as per Step 6. After these, exit the Registry Editor (regedit) and restart the computer system in other to apply the settings.
Conclusion
Hence these instructions include a simple and straight-forward method to Hide/Show Network in File Explorer Navigation Pane on Windows 10. This activity ensures the accessibility of this item in a single click. So if you use the Network on in File Explorer, experience fast computing.