Many users prefer to Disable Enable Automatically Hide Scroll bars in Windows 10 for the UWP applications. Microsoft introduces a new setting in the Ease of Access category that lets you choose whether you want the scrollbars to stay visible or not. Enabling the option will display the scrollbars only when you hover the mouse pointer over them. Whereas disabling the setting will continue to show them in UWP (XAML) apps in fully expanded form even if you don’t interact with them.
Start Menu also supports this Automatically Hide Scroll Bar feature if you are running Windows 10 build 17110 or higher. However, by default Windows 10 hides the scrollbars. And they will be only visible when you hover the mouse pointer over them. So, in addition to the Settings app, you can manage this through a registry hack also.
Let’s see the two ways in the following section.
Disable Enable Automatically Hide Scroll bars in Windows 10
Way-1: From Windows Settings App
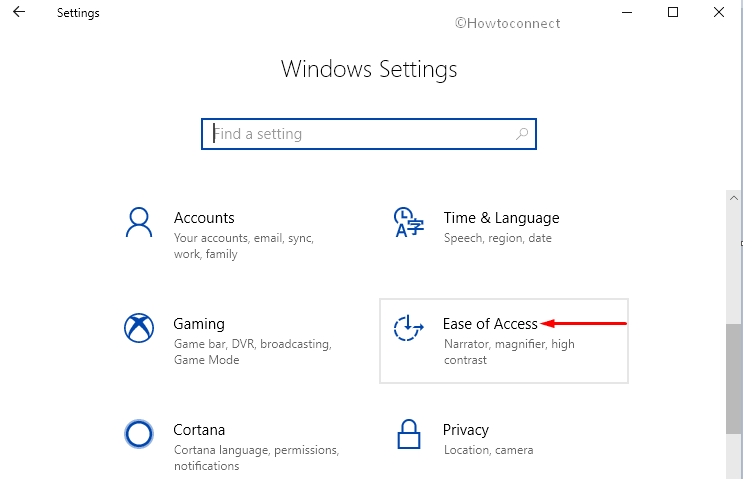
Step-1: Open Start Menu and put a click on the gear icon on the left side.
Find more 18 Ways to Open Windows Settings in Windows 10 [5 Seconds].
Step-2: Once the Settings app rolls on the screen, go to the Ease of access category and select it when highlights.
Step-3: After the next window comes in your sight, do a click on the Display section and promptly move aside to adjacent right panel.
Step-4: Scroll down to the option Automatically hide scroll bars in Windows and toggle the switch under it to Off position. By doing so, the UWP apps will continue to display the scrollbars, even when you don’t interact them. The scrollbars will persist to appear in full expanded size (see snapshot).

Step-5: When you choose to turn it On, the scrollbars will only visible when you hover the mouse pointer over them.

Way-2: Changing DWORD in Registry Editor
1. Do a combined press of Win+R hotkeys and let the system to open Run dialog.
2. Type Regedit in the text box and hit the Enter key to access Registry Editor.
3. Once the UAC asks for your permission, hit the Yes.
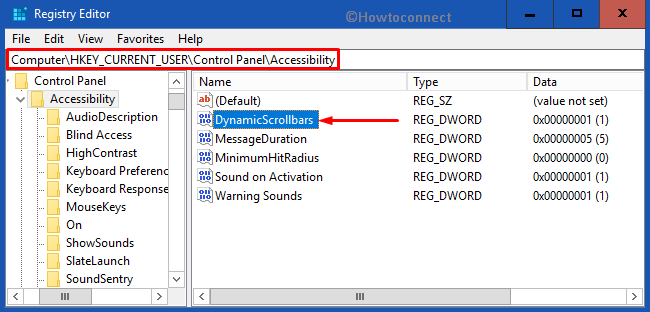
4. When the Registry Editor comes in the screen, navigate to the following path on the left sidebar.
HKEY_CURRENT_USER\Control Panel\Accessibility
5. Upon reaching to the Accessibility key, shift to its corresponding right side.
6. Here, locate the DWORD DynamicScrollbars and make a double-click on it to edit.
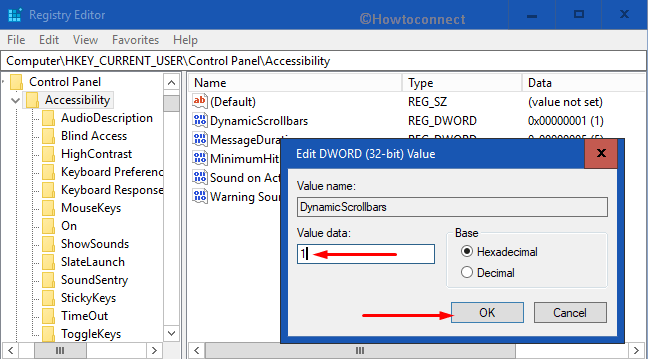
7. See the below table and set the Value data as per preference in the box provided. Finally, select OK button to Disable Enable Automatically Hide Scroll bars in Windows 10.
| Value | Action |
| 1 | Enable Automatically Hide Scrollbar in Windows 10 |
| 0 | Disable Automatically Hide Scrollbar in Windows 10 |
9. Lastly, Restart Windows 10 PC to bring the scrollbar changes into effect.
Therefore, once the changes are effective, you will see them as you wanted. These are all about How to Disable Enable Automatically Hide Scrollbar in Windows 10. Pretty easier move to get the job done, right!