The screen resolution is certainly a deciding factor while buying a monitor or laptop. It influences the purchasing decision up to large extent, thus came as the factor next to the price of the commodity, you are going to buy. The resolution has a big role in deciding the quality of the monitor and that’s why we will guide you to Change Refresh Rate Windows 10.
What does a Refresh Rate refer to?
It is the number of frames displayed per second by your PC. Moreover, it is the rate at which your computer screen is drawn up again to get the better quality. The measuring unit is Hertz, where, 1Hz means – 1 image draw per second.
How to Change Refresh Rate Windows 10 PC Screen
For the older Windows versions, Display setting option is present under the Control Panel. However, while working with Windows 10, it’s a rather complex to access the Control Panel. Instead of trying that way, you can go for it through the Settings app.
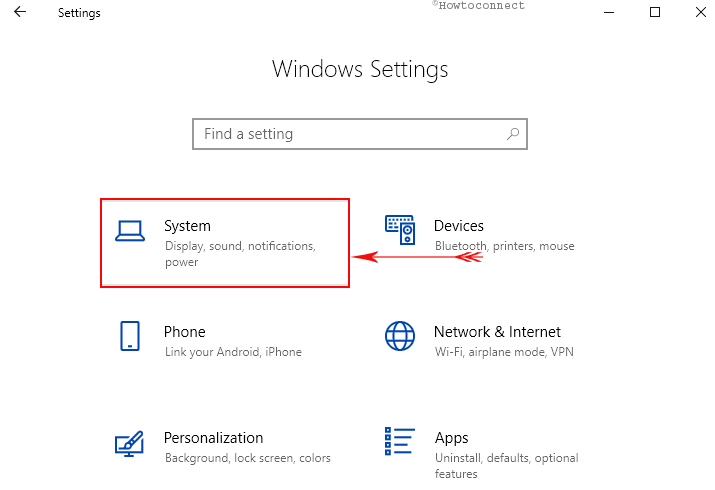
Step-1: Launch Settings program by hitting Windows + I keys together. Click the System category on the main interface of the Settings program.
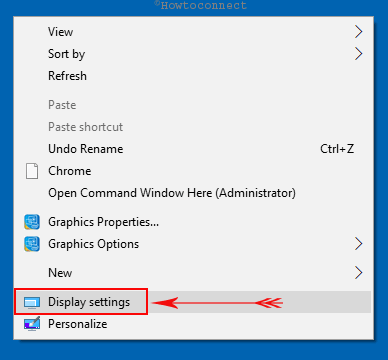
Note – An easy and direct way to access the Display Settings is by right-clicking somewhere on an empty space on the desktop. From the desktop context menu, perform a click on “Display settings”.
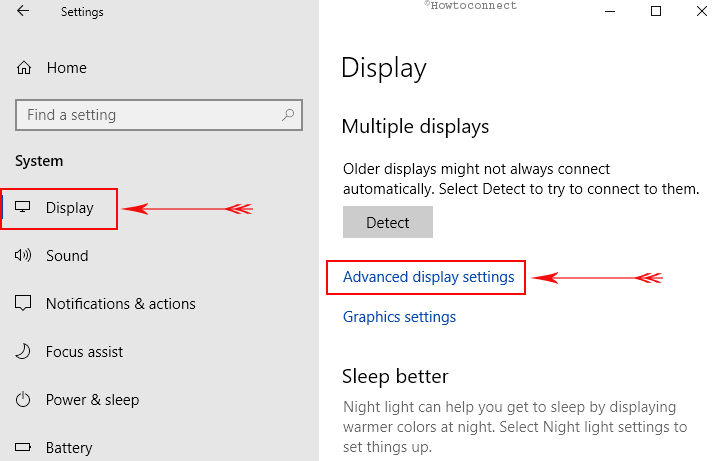
Step-2: Now, choose Display in the left pane and if you have more than one display, first select the one accordingly to Change Refresh Rate Windows 10. Moving ahead, click the link Advanced display settings as shown in the below image.
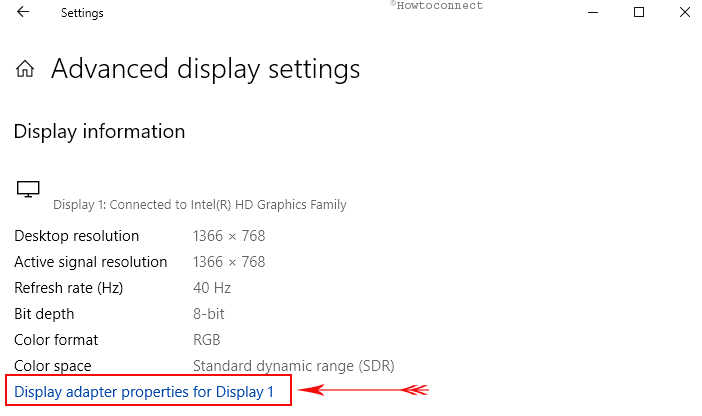
Step-3: On the following page, click “Display adapter properties” (see the given figure).
Step-4: This will immediately open up “Monitor and Graphics Card Properties” on the PC screen, switch to the Monitor tab. Here you can notice the option “Screen refresh rate” under the section of Monitor Settings.
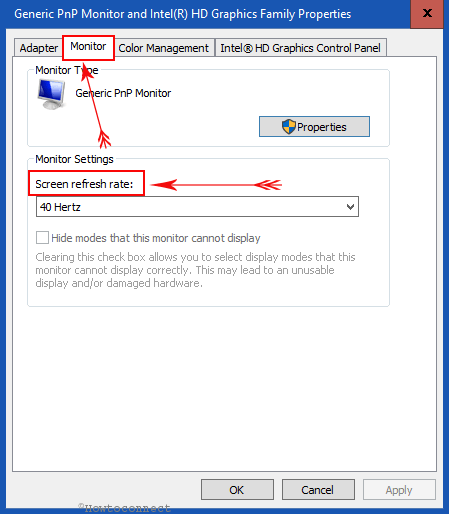
Step-5: Click the drop-down and Change Refresh Rate Windows 10 accordingly. If you are experiencing flickering screen, it is best to pick up the highest rate possible. If in case, you are already using the highest level but now the PC is having problems, then go with the lowest rate.
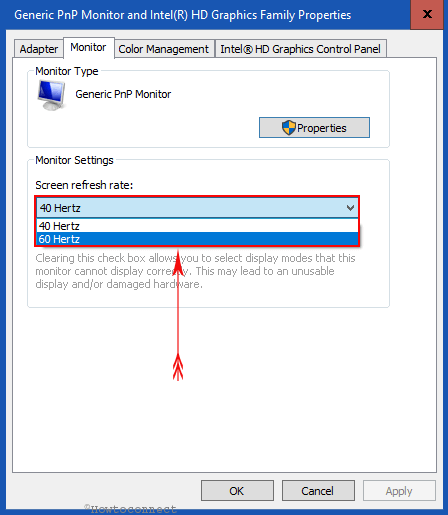
Windows 10 also provides you an option to select display mode along with Screen Refresh Rate.
Step-6: In order to set the screen resolution, switch to the Adapter tab and click “List All Modes” button as shown in the given figure.
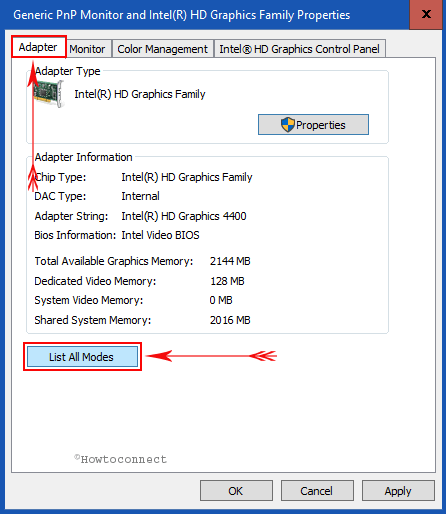
Step-7: Given there in the list of modes, get the option of the screen resolution and in the meanwhile refresh rate will set correspondingly. Finally, click the Apply and OK buttons to successfully Change Refresh Rate Windows 10.

Step-8: If the selected screen refresh rate suits you, hit Keep changes button on the dialog that pops-up.
Why is this important?
By default, there is an optimum level of setting given; hence you hardly need to change the setting. But to encounter and fix the problem of flickering on your PC screen, you will need to know more to dig into it. In order to Avoid Eye Strain and ensuring a clear visibility on their PC, it is important to know the way to raise or reduce Screen Refresh Rate in Windows 10. However, most people set high-frequency rate of it so as to create less strain on their eyes. So, they need to fix up the things right to maintain the best outcome.
Moreover, the fundamental objective of this will remains the same on either version of Windows.
That’s everything about how you will Change Refresh Rate Windows 10 PC Screen and have the fast gaming as well as display experience.