Normal temperature of a processor is 30°C and anything higher than this might have a bad impact on your PC in several ways. Generally, high CPU temp for a long is more likely to slow down your system furthermore cause frequent restart without any prior information. Therefore, it is quite necessary to know how to find CPU Temp in Windows 11 and 10 so that you can always keep the level under the limit.
Bad temperature often makes the CPU self-throttle and it starts regulating its own activity in order to reduce the excessive heat. Sometimes, the processor may shut down entirely to prevent any further damage that can be caused by high heat. As Windows 10 doesn’t have any built-in service neither a tool to check CPU temp, either you can keep track of the temperature in BIOS or you need to install a third-party app for the same purpose. No matter which procedure you prefer, it’s recommended to keep monitoring CPU temp at regular intervals.
Table of Contents
Check CPU Temp in Windows 10 and 11
Here is how to check CPU Temp in Windows 11/10 –
1] Using BIOS/UEFI
In Windows 10 and 11 devices, BIOS has been replaced with an updated counterpart known as UEFI. However, both are same and include your system’s firmware configurations. Though they are used for the same goals, the procedure to see CPU temp might be slightly different in BIOS and UEFI.
Check CPU temp in BIOS
If the Windows device you are using is old enough, you need to access BIOS to find the temperature of CPU. To do so –
- Close all ongoing tasks.
- Once in the desktop area, press – ctrl+alt+Del.
- From the drop-down list, select – Restart.
- Click – OK.
- Press the key that can give you access to BIOS. You will get to know about the key during its boot up process. Generally, this is F12, F2, Esc, or Delete. Alternatively, you can take help of – How to Access UEFI (BIOS) Settings.
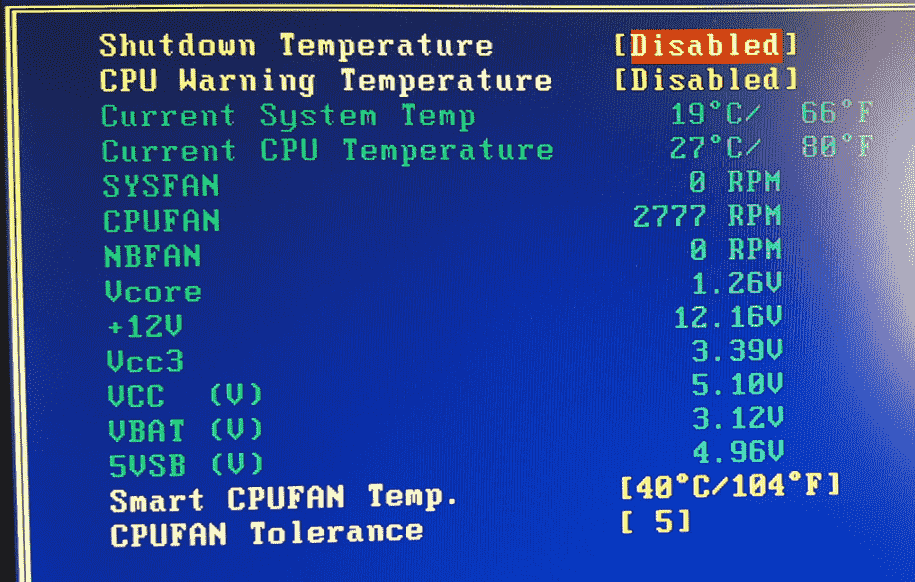
- Use the arrow key and select – Hardware monitor or PC Status.
- Press – Enter.
- Read CPU Temperature.

Check CPU Temperature in UEFI
If you are using modern version of Windows, go through the below steps –
- Press – Windows key.
- Click – Power cog.
- Hold the Shift key and select – Restart.
- When the system powers up, choose – Troubleshoot => Advanced options => UEFI Firmware Settings.
- Check the CPU temperature.
2] With third-party apps
The above procedure is not much user-friendly as you need to stop working and restart the PC to check the temperature. Additionally, you are unable to monitor the same over time because UEFI displays a one-time snapshot. That’s why most of the users prefer to use third-party tools.
1. CoreTemp
There are many apps available on the web such as Speccy, Open Hardware Monitor, MSI Afterburner, Core Temp, HWInfo, SpeedFan, etc. Among all, Core temp is the most suitable one as it’s pretty convenient and straightforward. To get the app –
- Click – this link.
- Download Core temp app.
- Double-click downloaded setup file.
- Hit – Run.
- For appearing User Account Control, click – Yes.
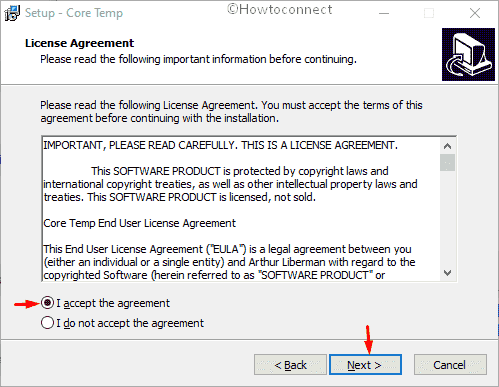
- Once in the setup wizard, hit – Next.
- Select the radio button present before I accept the agreement.
- Click – Next.

- Later, you will have to hit Next twice in succession.
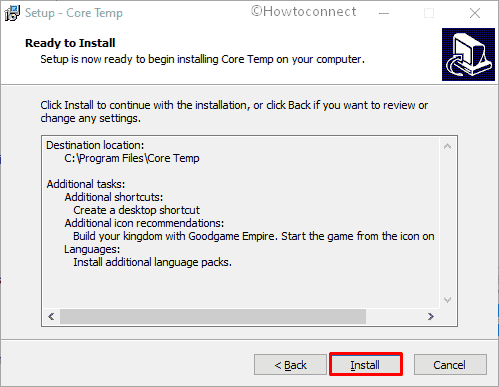
- Click – Install.

- After completion of the installation, hit – Next.
- Lastly, click – Finish.
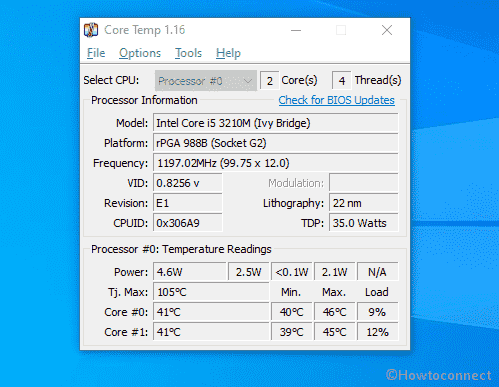
- Core Temp app will launch automatically from where you can See CPU Temp in Windows 10 and 11.

2. Speccy
Speccy is one of the most trustworthy apps when you are looking for how to check CPU Temp in Windows 10 or 11 including various information. Furthermore, the utility provides detailed reports of all PC Specs such as RAM, Hard Disk, graphics cards, motherboard, BIOS, etc. Continuous tracking of the temperature of processor is pretty easy with Speccy as it shows the heat of all the cores in real-time.
2. HWMonitor
This is a hardware monitor program that also includes the support of AMD Ryzen processors lineup. You can sniff round temperature, fan speed, and voltages using this utility simply on the interface.
Methods list:
1]Using BIOS/UEFI
2] With third-party apps
That’s all!!!
