Microsoft makes a spectacular presence with such applications which meet with users needs. Recently, It has come with cloud storage service integrated into Microsoft Office 2013. That means Office 2013 documents would be available to users wherever they need it.
In Office 2013, default settings contains users privacy function. Working with other interfaces we deal with such privacy settings, but it can be fixed after applying certain changes. To assist in case of privacy management in Office 2013, I am about to discuss the method of disabling privacy option.
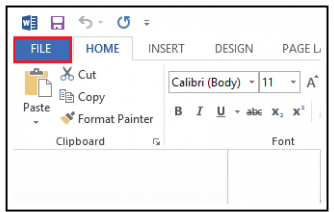
- Open MS Word 2013 and click on ‘File’ menu.
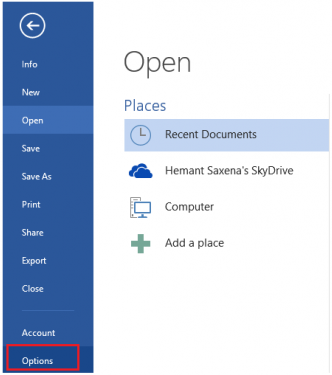
- Then go to ‘Options’ menu in left side bar panel.
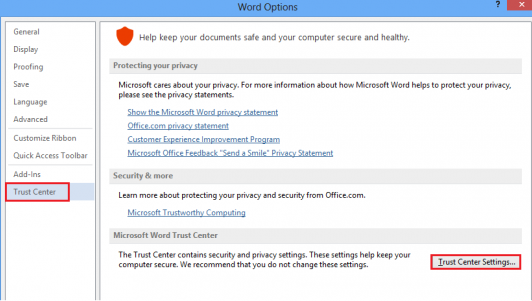
- It opens new windows having ‘Word Options’. In similar window navigate ‘Trust Center’ tab. Then after click on ‘Trust Center Setting’ button.
- Above act leads to ‘Trust Center’ window. Here, you need to click on ‘Privacy Option’ and remove the check mark from unwanted activated options. At last, save all settings after clicking Ok button.
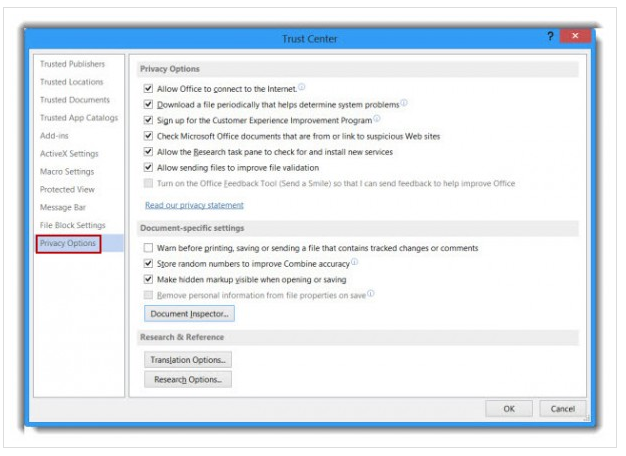
Options need to deactivate state on the upper part of Trust Center Window. You will have to remove check mark simultaneously from these options:
Allow MS Office to connect to the Internet,
Download a file periodically…,
Sign up for customer experience improvement program,
Check Microsoft Office documents that ….,
Allow the Research task pane to check ….,
Allow sending files to improve file validation.
Once you removed check marks from above-mentioned options, you will be able to protect privacy issue in Office 2013. So let apply these settings on Office 2013 application and stand on the safer side.