Microsoft renovated the search experience by introducing several changes in the taskbar search box. The giant software gives you the ability to Search with a Screenshot in Windows 10. This new innovation will help you to search for content with the help of a snapshot.
Previously this change was only available for US users but currently, it is already enabled via servers for Windows 10 version 1903 and higher. With this new feature, you can search the web for the picture captured at the moment on the screen. So go through the below section and experience another way of searching content through images. Let’s begin –
Search with a Screenshot in Windows 10
Here is How to Search with a Screenshot in Windows 10 –
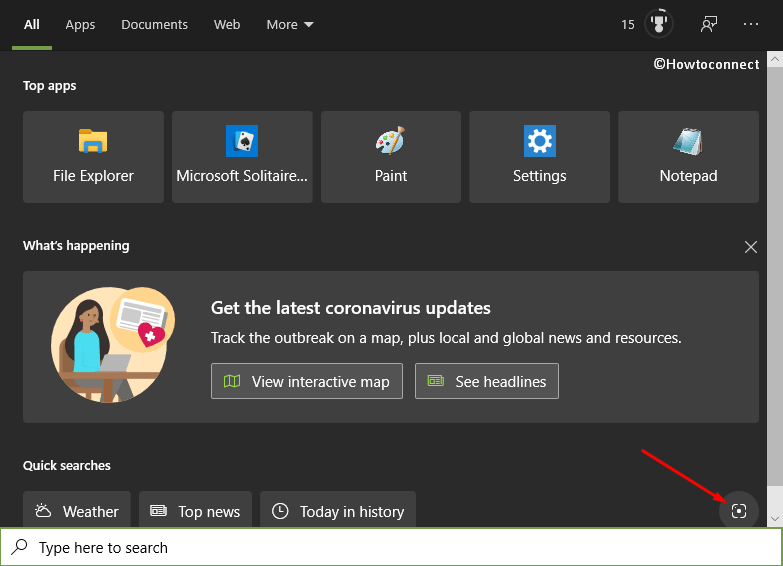
- Click the search icon on the taskbar and hit the Search with a screenshot button.
- As soon as you click it, the built-in Snip and Sketch app will open up on the PC screen. Use that tool and crop the picture that you prefer to search.
- The system will upload the screenshot all by itself empowering the Bing search engine to initiate the search.
- You will immediately view the results on the expanded right pane of the taskbar search. So go through them and enjoy this new way of searching.
More posts on Screenshot –
1] How to Take Screenshot Showing Cursor on Windows 10
2] Windows 10 – How to Use Snipping Tool – Capture Screenshot
3] Windows 10 – How to Take Screenshots Using Default Tools
4] Windows 10 – How to Move Screenshot Location, Restore to Default
5] How to View Remote Desktop on Network and Capture Screenshots
6] How to take Webpage Screenshots from OneNote Interface
7] How to make Full WebPage Screenshots Step by Step
8] How to Turn On / Off Screenshot Tool in Firefox
That’s all!!!