Windows 10 permits you to Set Equalizer in Groove Music to experience the best sound by fine-tuning the available frequencies. With this music streaming app of Microsoft, you can actually adjust the audio hardware to produce excellent sound. So, having an equalizer on this built-in application will provide you sliders to manage the amplitude of audio signals. And of course, it also includes a bunch of presets to choose from. However, to gain the ability of this new feature, you should be running Windows 10 Build 17083 and app version 10.17112.1531.0 or higher.
How to Set Equalizer in Groove Music on Windows 10
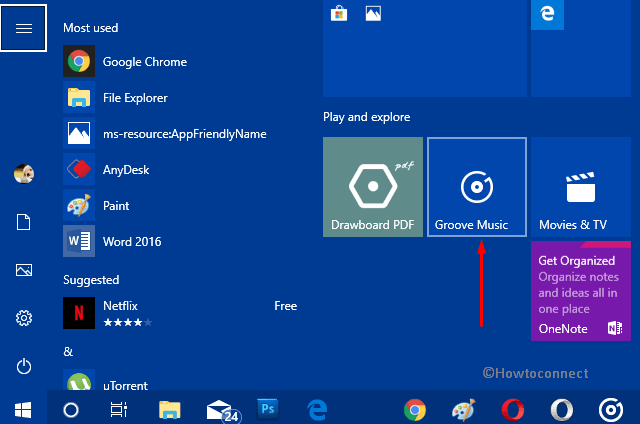
01. Launch Start Menu and click the Groove Music pinned tile that by default resides on the right portion (see snapshot).
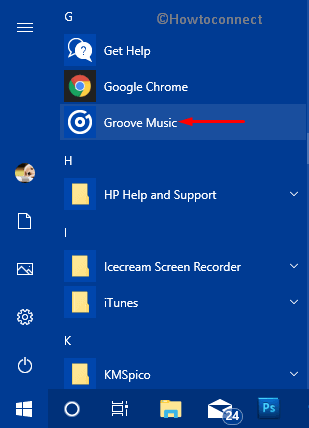
02. If you cannot see it there, navigate to the G section and select Groove Music.
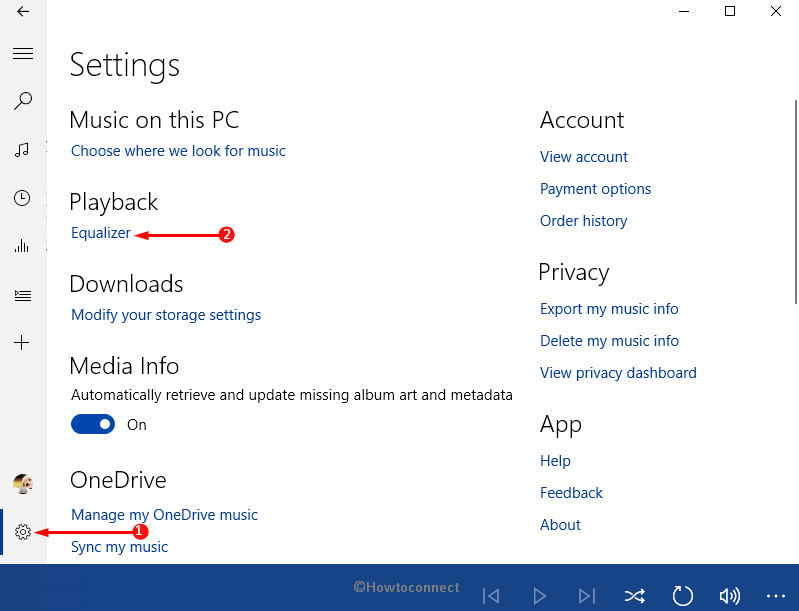
03. On the left pane, click the tiny gear icon to open the application’s Settings. Shift to its corresponding right side and click Equalizer that appears below the Playback section.
04. This will immediately display a small box on the screen. Now, click the drop-down and pick up any of the available presets. For the time being, following are the presets that the app offers you to select.
Presets in Groove music Equalizer
Flat – Choosing this will disable the equalizer.
Treble boost – It basically fine-tune the higher frequency sounds. For example, violin notes or electric guitar.
Bass boost – To lower the frequency notes, go ahead with this preset.
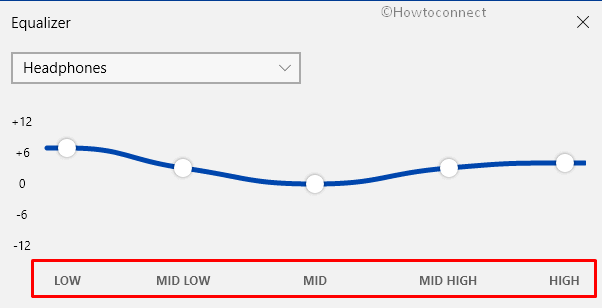
Headphones – This preset lets you equalize your headphones. Doing so will help your device’s audio to adapt your headphones specifications.
Laptop – For speakers of laptops and PCs, choosing this will provide a system-wide equalizer directly to the audio stream.
Portable speakers – If you are producing sound through a Bluetooth speaker, then this preset comes handy to use. By selecting this, you can make minor tweaks to the sound by adjusting the available frequencies.
Home stereo – Helps you make the frequency chart setup very effectively of the stereos.
TV – When using Groove Music in television, adjust the sound quality and frequency.
Car – If you are on Android or iOS or Windows phone and want to experience the best music while driving, this preset suits will suit you.
Custom – Go ahead with this when you prefer to manually adjust the frequency levels for the available bands.
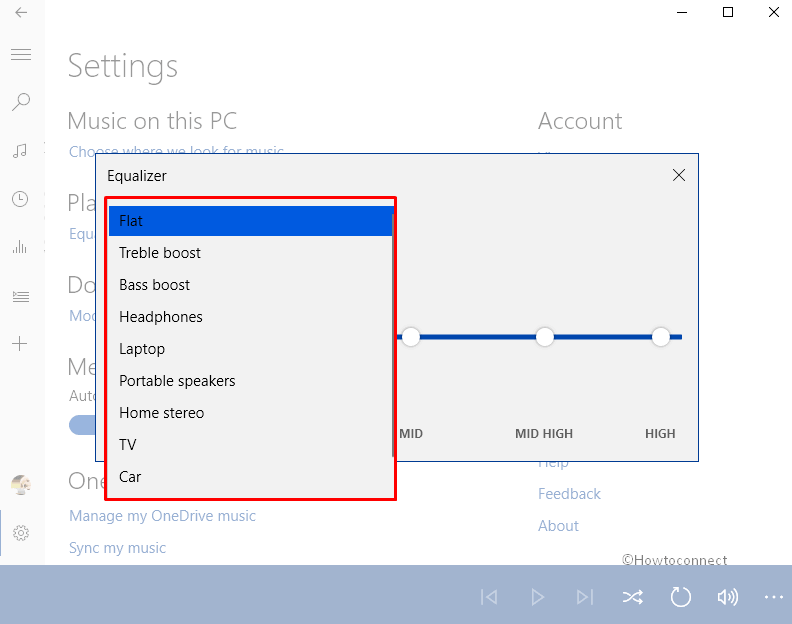
05. So, from the drop-down, choose the preset as per preference and Set Equalizer in Groove Music in Windows 10.
Note – When you modify the settings for a preset, the application automatically switches to the Custom option.
06. Next, adjust the following frequency levels accordingly.
07. It provides 5 equalizer options – Low, Mid low, Mid, Mid high, and High. Hold the knob and drag it towards up or down to adjust levels between -12 and +12 decibels. So, choose the desired value for each band as per preference.
Here, you may like to Share Music from OneDrive to Groove to Play on Windows 10.
Ending note
So, that’s all about on how you will Set Equalizer in Groove Music in Windows 10 and enjoy the best music from your audio hardware. Microsoft is continuously improving this built-in Windows 10 music streaming app, Groove Music. Starting from Fluent Design makeover, to let users set the equalizer, this app is slowly coming up with various new and exciting features. These are some of the common features that are pretty available in all the music streaming services. But with recent developments, the company has added Equalizer into the Groove.