Several Users are confronting a common and irritating complication associated with volume after they have upgraded their machines to Windows 10. The volume is remarkably low in Windows 10 when compared with its former editions. This is due to the mixture of old and new settings. Taking this matter into consideration, this article will focus on the steps to increase low volume after upgrade to Windows 10.
The workout for this issue is very simple. All you need to do is to get back the former version of sound driver or change the sample rate and bit depth in share mode or uninstall the driver and install again. And to make it happen, you need to get into the Device Manager. Along with this, small modifications in the speakers also work great. Let’s proceed for How to Increase Low Volume After Upgrade to Windows 10 and you are incapable of fixing after a hard effort and making change everywhere in sound Settings.
Increase Low Volume After Upgrade to Windows 10
Here we are writing 3 ways to fix the low volume issue. You need to follow one by one successively. Either of these 3 will help you to increase volume depending upon the requirement of your system.
1. Roll Back Driver
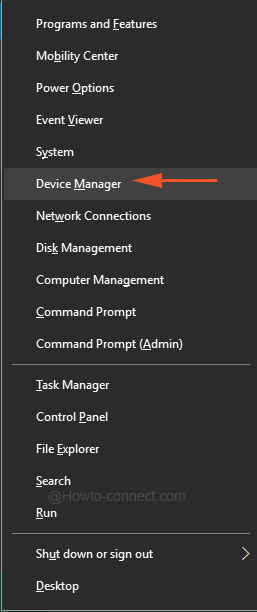
- Do a right click on Start and from the list of options take up Device Manager.
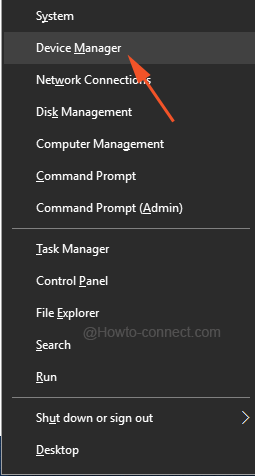
- The above action will fire up the Device Manager on screen.
- A huge list of drivers of all areas can be visible, search for Sound, video and game controllers and double click to stretch it.
- Figure out which driver you are presently using. Well, the most used one is High Definition Audio Device. Hence, double click on it to make its Properties box appear on the screen.
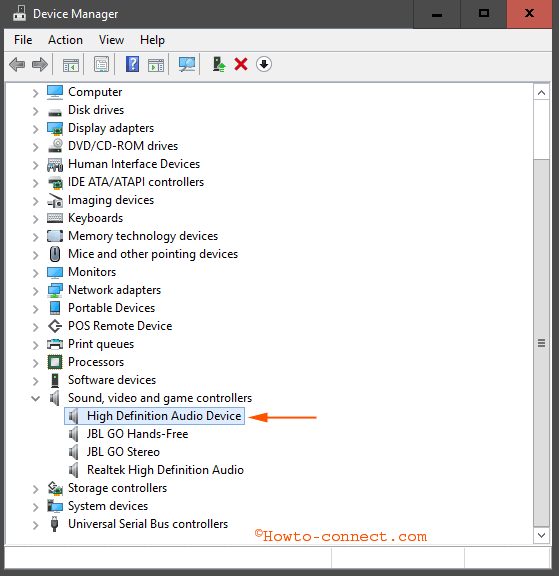
- Upon the arrival of the Properties box, make your presence into the Driver tab.
- Click on Roll back driver button.
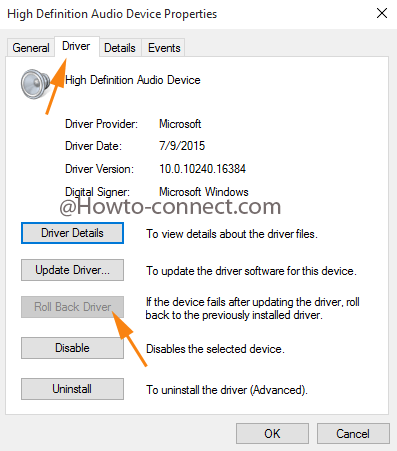
- After rolling back, select Driver Details button under the Driver tab of the Properties box and see the Provider as Microsoft.
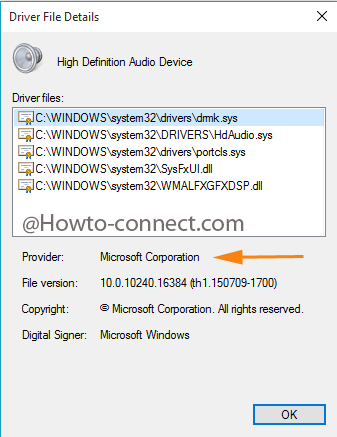
- This will fix up the low volume issue.
Change the sample rate and bit depth in share mode
- Increase Low Volume After Upgrade to Windows 10 Take attention to the right end of the taskbar and a Speaker shaped symbol can be visible. Execute a right click on it and continue by specifying Playback Devices.
![]()
- The outcome will be the emergence of a separate Sounds window. Usually, you are taken to the Playback tab.
- Twice hit on the working device. Though, in most cases it is Speakers.
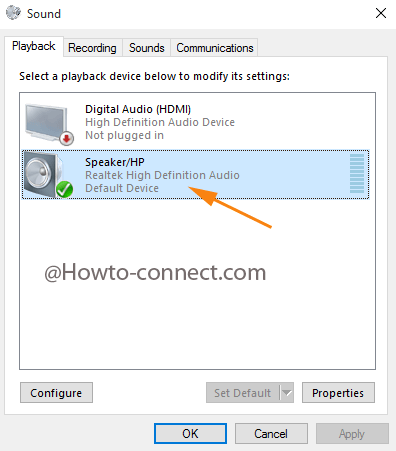
- This will bring up the Speakers Properties dialog box on the screen. Jump to the last tab, Advanced and pull down the menu to set the bit rate to 24 bit/44100 Hz or 24 bit/192000 Hz. Both the options are visible as per the device’s capability.
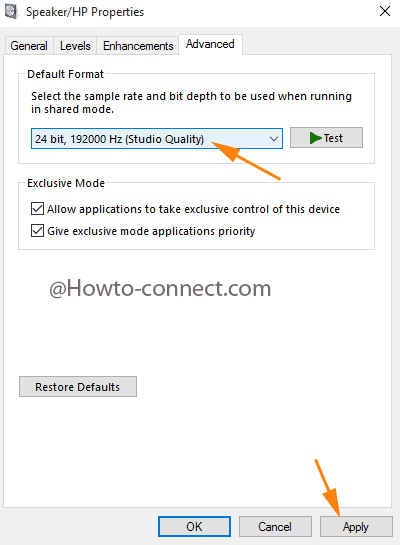
- Make sure to apply the changes.
Uninstall the Sound Driver and Scan
- To Increase Low Volume After Upgrade to Windows 10 Carry out a right tap on Windows symbol at the extreme left of the taskbar and choose Device Manager from the arrived list.
- Come down to the Sound section and expand it.
- Right click on the active audio driver and conduct a hit on Uninstall.
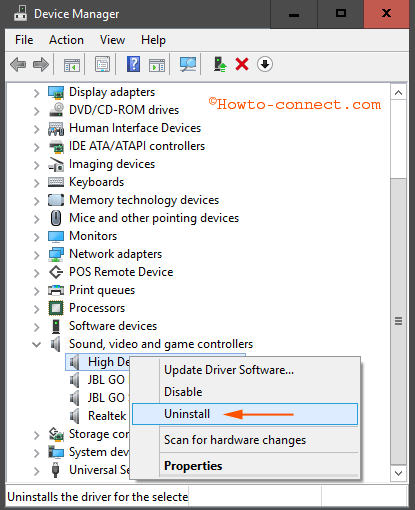
- Once the uninstallation process gets over, one more right click needs to be performed in order to Scan for hardware changes.
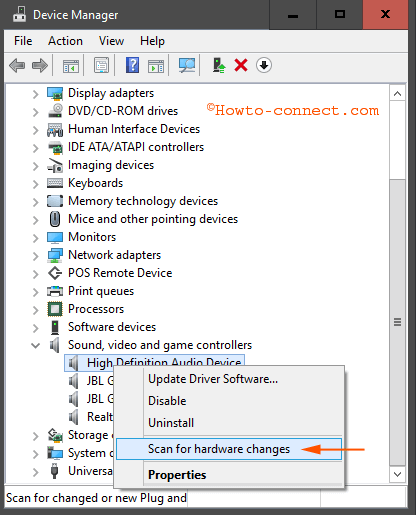
- Your hard work is over as the updated audio driver will get activated.
- Play audio and let the roofs shake with the improvised sound.

very helpful.