Windows 10 provides to organize Speech Recognition to help users control a system with voice. This feature allows to open apps, Programs, click menus, make hands free type in document, send email and a lot more. All these processes run following user’s verbal expression with the help of a microphone, either built-in or external. But before starting you need to configure a few things like Mic, Computer, and associated settings.
After you organize Speech Recognition you can use voice commands and order the Windows 10 operated computers to type certain texts. For instance, if you want to fill up a form or type a letter, you don’t need to type anymore. Using the speech recognition, you can get your job done by your voice command only. Windows 10 allows the users to input any text anywhere on the desktop without involving typing. We will get to know about ways to Manage Speech Dictation in Windows 10 in the description below.
How To Organize Speech Recognition in Windows 10
In order to Organize Speech Recognition in Windows 10, managing you will need to set up Mic and then configure its settings. Hence we have some tasks to do with a view to avail this feature. Here are the stepwise works:
Set up Microphone
While ordering the computer using speech, the command should have sufficient clarity. Nowadays, laptops, tablets are available with built-in MIC. If it is not available after having a good MIC in hand, go through following steps in order to set up a microphone:
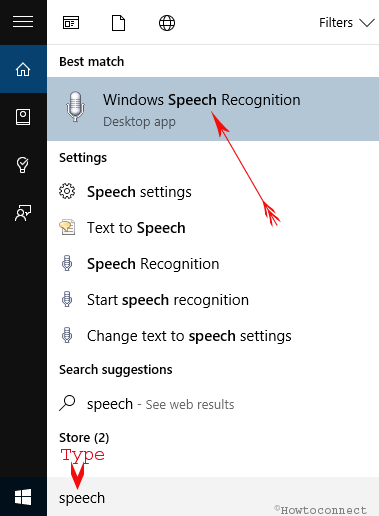
Step-1: Go to the search box beside Start menu from your computer and type speech and depress the Enter key.
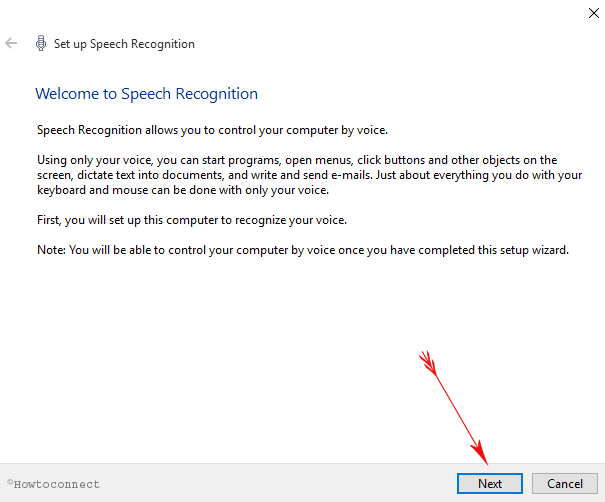
Step-2: Above command will guide you directly to the Set up a Speech Recognition wizard. Click on Next.
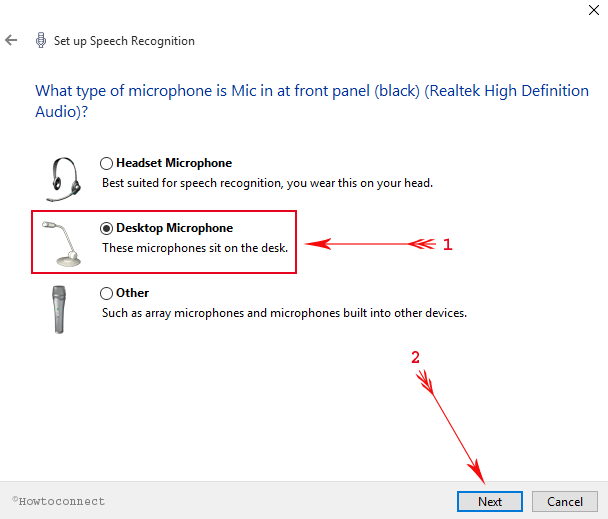
Step-3: From the following options, select Desktop Microphone and again perform a click on Next.
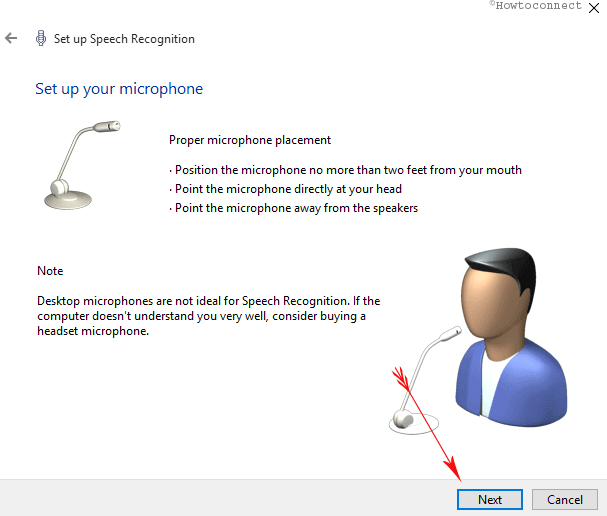
Step-4: The subsequent window suggests you set up a microphone and place in proper place So take care of the hardware if you are using external one and do a click on Next.
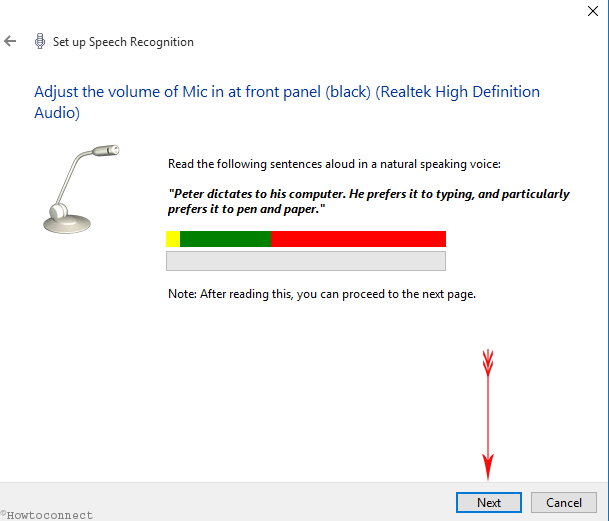
Step-5: Adjust the volume of the microphone in at front panel and speak the text written italic bold format. Once the Next button is highlighted, make a tap on it.
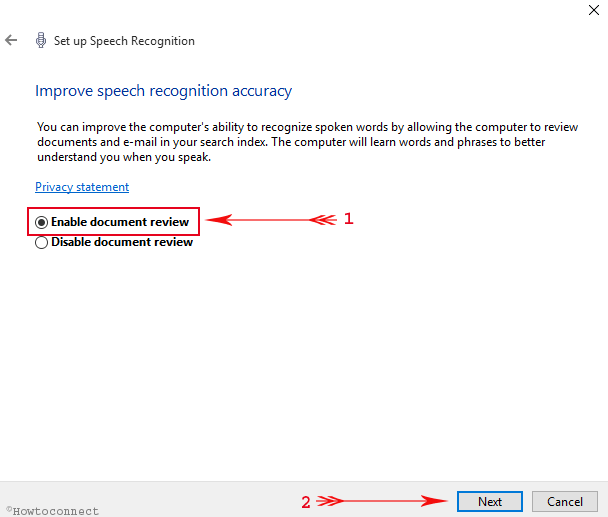
Step-6: Check the Enable document review option and once more hit Next.
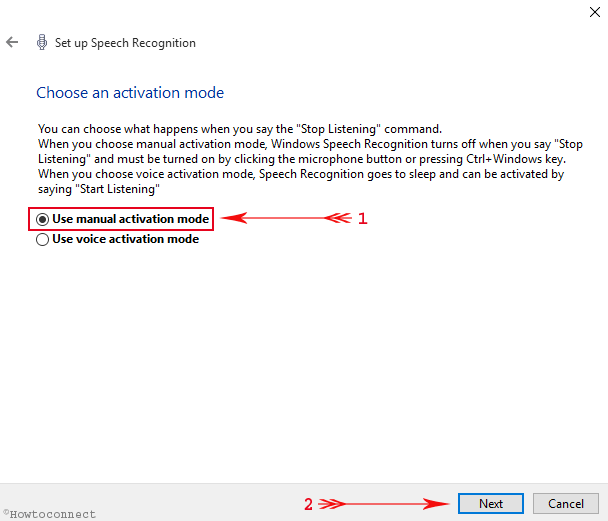
Step-7: Choose the activation mode from the coming window. Pick Use manual activation mode if you want to enable as per your need in future by searching and opening. But when you want to activate it by voice check the second option. click on Next.
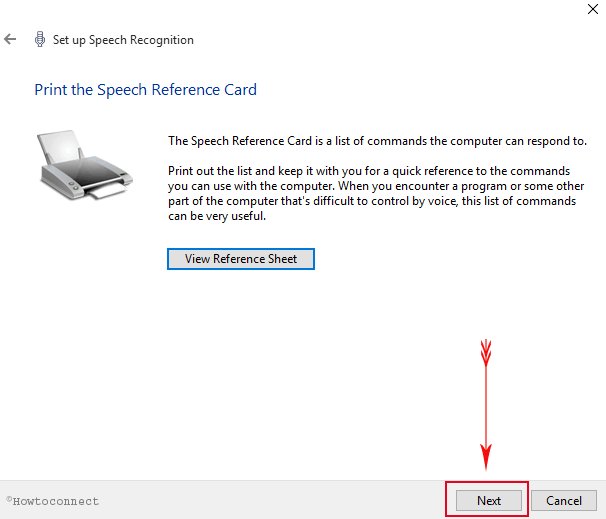
Step-8: In case, you want to read the card that helps you use Speech Recognition in Windows 10 then choose View Reference Sheet, otherwise click the Next button.
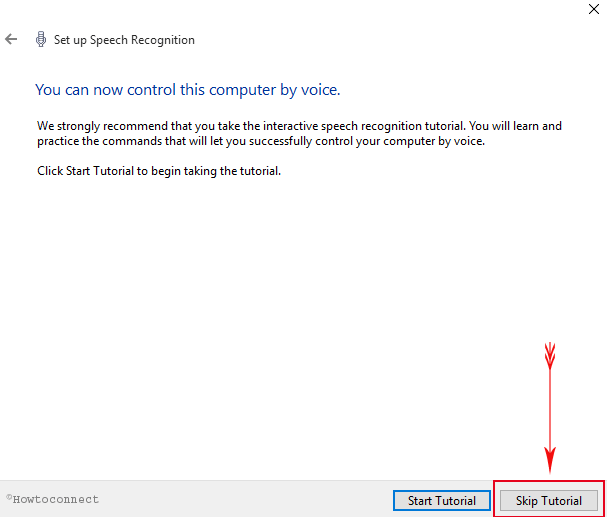
Step-9: If you see the tutorial for using the tool then you can select the “Start Tutorial else hit on Skip Tutorial.
As you finish the configuration of the microphone Windows Speech Recognition tool will appear on the top edge of your computer screen.

Speech Recognition Configuration
You can configure the remaining settings to Organize Speech Recognition in Windows 10. These options will be very useful time to time for the tool’s customizations.
Step-1: Make a right click anywhere on the Windows Speech Recognition tool and select the settings one by one to customize meeting with your preferences.
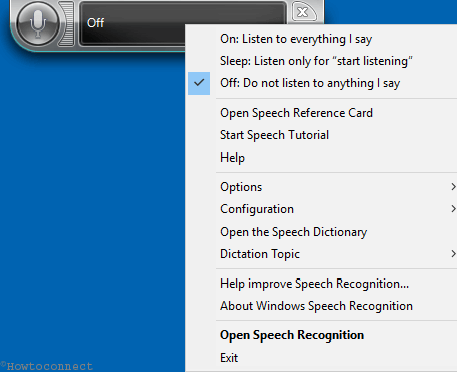
On: Listen to everything I say -This option will enable the Windows Speech Recognition tool to hear your voice precisely and thoroughly.
Sleep: Listen only for “Start Listening” – The tool will be available but it will not work until you orate Start Listening. Once speak this phrase Windows Speech Recognition will awake and perform the usual work.
Off: Do not listen to anything I say – The utility will go to turn off state.
Open Speech Reference Card – Selection of this option will send to the Microsoft web page where you will find tables that list commands to use Windows Speech Recognition.
Start Speech Tutorial – This choice will access a tutorial page for the tool.
Help – will send you to the helpful information about Windows Speech Recognition.
Options – When you hover Options, an extended menu prompts showing 3 choices –
1. Play audible Feedback – The option ensures the system sounds like the ding playing for occurrences.
2. Run at Startup – makes Windows Speech Recognition running at the boot of your computer.
3. Enable Dictation ScratchPad – Open scratchpad to type the dictated text.
Configuration
1. Set up my microphone – This option takes you to the Microphone Setup wizard where you can configure the settings.
2. Improve Voice Recognition – From here, you navigate to Speech Recognition Voice Training wizard.
3. Open Speech Recognition Control Panel – This choice will carry you to the Control Panel\All Control Panel Items\Speech Recognition section.
Open the Speech Dictionary – The option lets you add a word or prevent one from being dictated. A separate window opens up where you have to manually modify your dictionary.
Dictation topic – When you launch, the Windows Speech Recognition sets itself to the default Narrative thesaurus. In addition, you can manually pick another vocabulary each time.
Help improve speech recognition…. – It allows you Share data with Microsoft to enhance the experience of dictation.
About Windows Speech Recognition – You find the version and profile of Windows Speech Recognition running on your Windows 10.
Open Speech Recognition – Simply launches the application.
Exit – Obviously, closes Windows Speech Recognition tool.
Train your Computer
After you set up the MIC and organize speech recognition in Windows 10, you need to undergo for voice training your PC. This part is necessary as the accent you are using may not match with the accent of the computer. In order to do so, the steps are as follows:
Step-1: Follow the above-mentioned steps to reach up to Speech Recognition.
Step-2: Hover on Configuration and select Improve voice recognition.
There are training tasks where you can read the on-screen text to the computer in order to have a better understanding and good communication you and your PC. Read the Training text offered as task. It will increase the proficiency over commands as well as command clarity.
You will see another important option Speech Reference Card at the bottom of the page. This card shows all the available shortcuts you need on a small side screen. This one is a great help for the beginners to Organize Speech Recognition in Windows 10 who are stepping into voice control arena.
Conclusion
Speech Recognition is definitely a game-changing feature in Windows. In this era of advanced technology, we really don’t want to rely mostly on text typing. This special feature reduces the effort for typing and only voice command is enough get the work done. This is interesting as well as productive too. We have learned about the ways to Organize Speech Recognition in Windows 10. Make your life easier using this amazing feature.