Ways to Personalize Desktop Background on Windows 10 – When it comes to personalize your computer, the first thing to strike your mind is to change the look of the computer. We came across many users who customize every bit of their computer but leave out the desktop background to the default Windows wallpaper. Microsoft provides a wide range of beautiful wallpapers when it releases the new operating system. So, in this article, we will show you how to Personalize Desktop background on Windows 10.
Before we jump to our main topic, let us gather some knowledge about the wallpaper. Wallpaper is the background image or design furnished like a desktop user interface on a computer. It is seen against the desktop icons and other displayed items. A wallpaper picture can be in a GIF or JPEG file format. Generally, a wallpaper picture can be set in the centered, or stretched, or tiled.
Personalizing the desktop background in Windows 10 is an effortless process. So, in this article, we will see the personalization of the desktop backgrounds and also peek into the things which are present on your computer.
So read to know How to Personalize Desktop Background on Windows 10, have an ingress in the Personalization, apply either pic for this purpose, alter whereabouts Wallpapers and span.
How to Personalize Desktop Background on Windows 10
1. Access Personalization in Windows 10
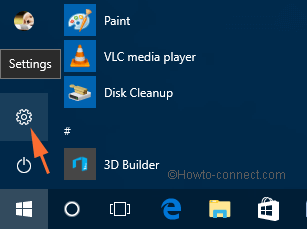
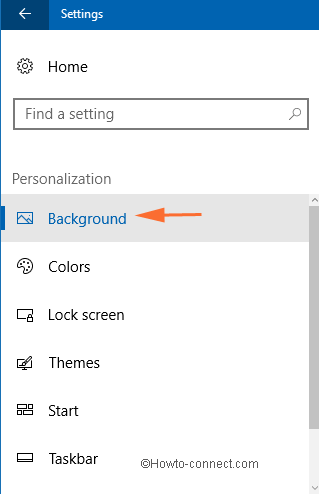
- Make your Start Menu visible on your screen so that you can fire up the Settings app on your screen.
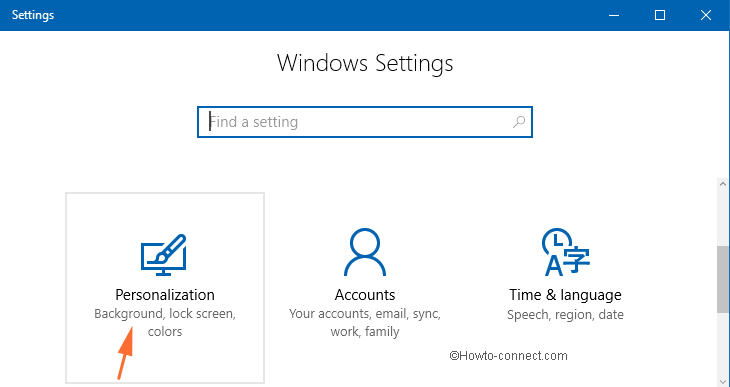
- In the following Settings app window, you will confront different categories. But your move will be to the Personalization.
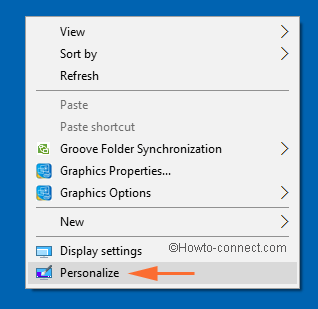
- Well, another quickest way is also there. Execute a right-click on your Desktop and pick up Personalize.
2. Put any image as Desktop Background in Windows 10
If the available themes on your computer are no more interesting, you can go with the images saved on your hard drive.
- Following the above steps, be into the Personalization category of the Settings app.
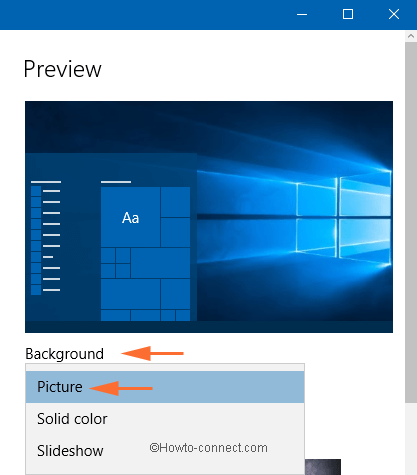
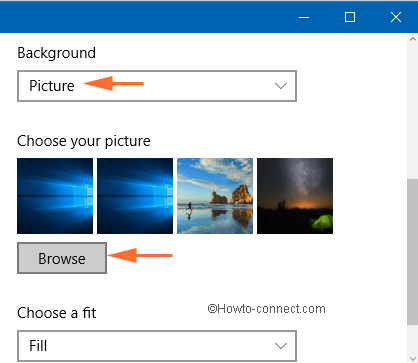
- Pick-up Background, the first segment on the left column of Personalization.

- On the right, you can see a preview of your present background image and a heading called Background just below it.
- Pull down the menu of Background and choose opening option Picture.
- You can see five lately used backgrounds. If none interests you, click Browse button.
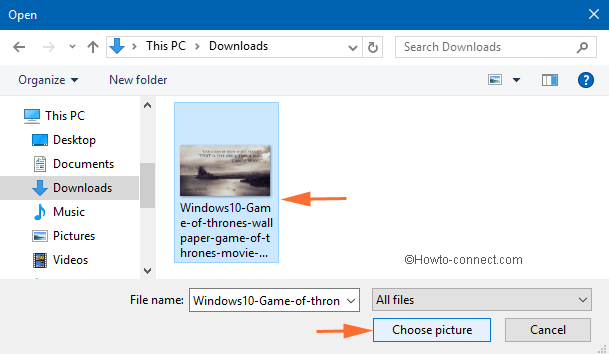
- Head to the location where your image is saved. Pick up your suitable image and click Choose picture to confirm.
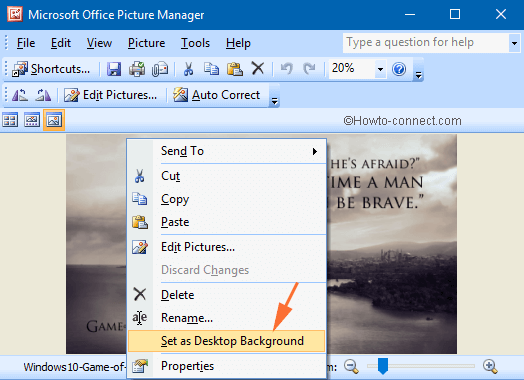
- Alternatively, open your preferred image. Right-click on it and choose Set as desktop background.
Till now it was all about a single image. But what if you wish to have a slideshow of pictures on your desktop? It’s very simple!
- Again pull down the Background menu and specify Slideshow.
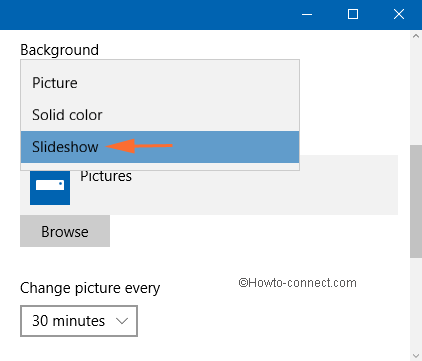
- Click Browse button.
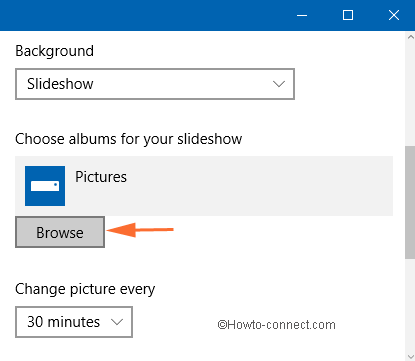
- Head to the folder where you have stored the photographs you want to see in the background.
- Select the appropriate folder and click Choose folder option.
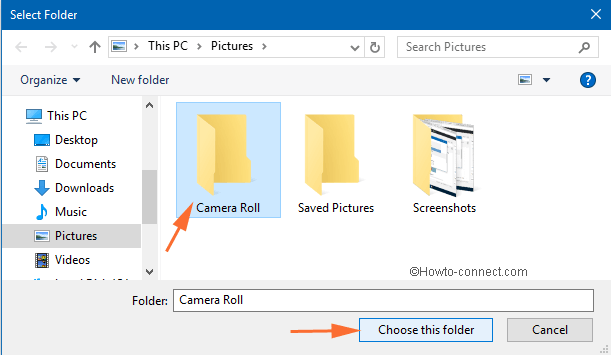
Note: If your picked up folder does not hold all the favorite photographs, you need to set up a separate folder and save all the required images in it as you can use only one single folder for the slide show.
3. Put any Solid Color as Desktop Background in Windows 10
Now, Windows 10 also empowers you to put any solid color as your desktop background. Read out the below steps –
- Be into the Background of the Personalization category.
- Click the drop-down menu of the Background on the right pane and pick up Solid Color.
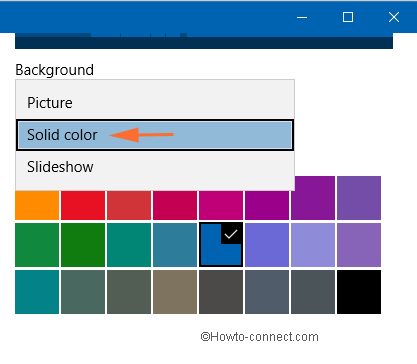
- Now, you will see a list of background solid colors.
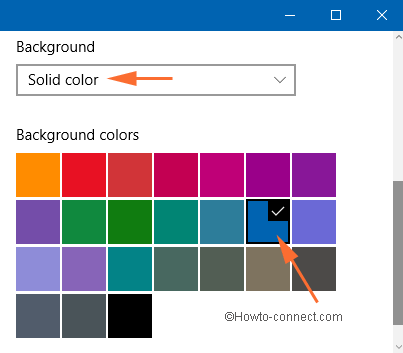
- Choose your required one.
- Done!
3. Customize Position of Wallpapers and Change Duration in Windows 10
In this section, we will grasp how to customize the position of the wallpapers in the desktop and also at what time interval the slide show will change the wallpaper. To do so, be into the Personalization of the Settings app.
- The position of the wallpapers is possible for the Picture and Slide show options only.
- So, you can see Choose a fit section with a pull-down menu attached to it.
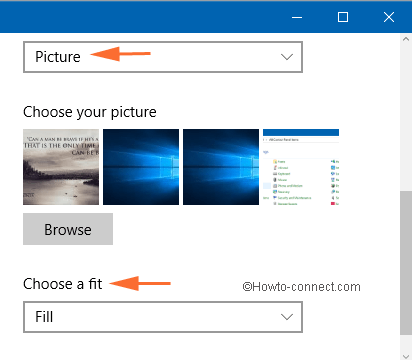
- Extract the pull-down menu of Choose a fit and pick up the desired one.
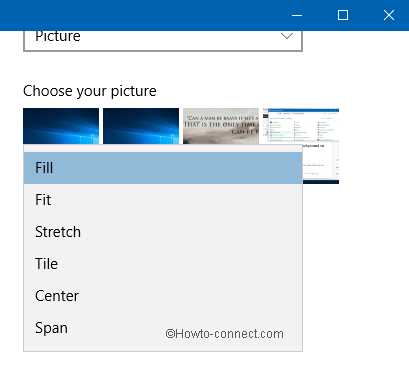
- To get a clear idea of what these options provide, read their description below.
Fill: The name of the option itself tells you its purpose. The image will either expand or shrink to fill the Desktop. It means the desktop will be entirely covered with the image.
Fit: Here the image is not cropped and it enlarges your image to the extent so that it fits into the display screen.
Stretch: It elongates your image to the dimensions of your screen. It might look unattractive if the size of the screen and the elongated image does not match.
Tile: The same image will be displayed multiple times, in the form of tiles.
Center: The selected image will be placed just at the center of the screen. You may also see the image in the middle surrounded by a blank space all around.
Span: Span your selected wallpaper across monitors in Windows 10.
- You can also select the time interval for every slide show. Select your preferred time span and the images will be changed accordingly.
- For that, make a point to opt Slide Show alternative from the Background pull-down menu.
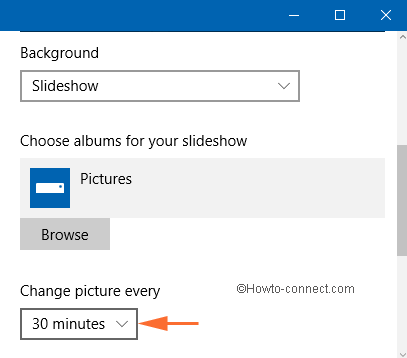
- A section Change picture every with a pull-down menu can be seen now.
- Fetch the menu and your preferred time span.
Old Method to Personalize Desktop Background on Windows 10
Launch Control Panel in the form of small or large views so that all the icons can be viewed clearly. Click Personalization.
In the Personalization window, the first section lists you the themes as “My Themes”. Each theme is a mixture of desktop backgrounds, colors of the taskbar and windows, sound schemes and screen savers.
Note: To start the and Personalize Desktop Background on Windows 10, the best way is to first pick a particular theme as each theme has a bunch of wallpapers to pick up from. So, when you change the theme, the desktop background changes, colors of the windows and taskbar changes to match the selected theme, sounds, and screen saver also gets change as per the selected theme. If the built-in themes don’t attract you more, Microsoft has loads of themes for you. Download them from their website.
Now, this Personalization window that you used to launch from Control Panel for all changes does not have any settings section at present. You will get it in the Settings app.
Wind Up
There is no hard and fast rule to use only the built-in desktop backgrounds for your computers. Try out to Personalize Desktop Background on Windows 10 and apply the changes and see how beautiful your desktop will look with your own set of creativity. We recommend you to see our other articles related to the customization. Experiment with the slide show option and share your experience with us. Also, let us know if you hold some extra information about this topic.