How to Change and Configure Screen Saver on Windows 10 – When the computer becomes inactive for a certain time period, animated moving images or patterns are seen. It is called a screen saver. It is basically a software program that empties the screen or occupies it with animated pictures or patterns. You can set up the built-in screensaver for your computer which comes with Windows. Users apply screen savers on their computer for entertainment purpose, and few use it as a method of security when away from the computer.
If you are moving away from your computer for some reason and don’t want others to take a sneak of it, simply tap the Windows & L keys on your keyboard. This activates the Lock screen and stops the strangers from accessing the PC.
Now what, if you think to Change and Configure Screen Saver on Windows 10, or maybe wished to fully deactivate the screen saver. Or may you want to customize the way your screen saver performs? Well, in that case, there is nothing to worry about. We will walk you through the steps you need to perform to do the above activities related to screen saver on Windows 10.
You may like to Read:
How to Personalize Desktop Background on Windows 10
Table of Contents
How to Change and Configure Screen Saver on Windows 10
1. How to Access the Screen Saver Settings on Windows 10
Let us start the article by learning how to open the screen saver window on Windows 10. The screen saver is accessed through the Personalization category of Settings app.
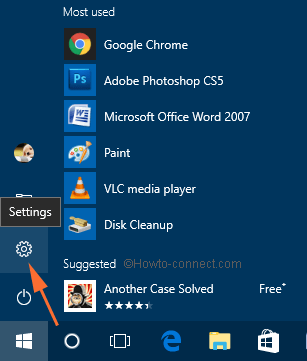
- First of all, welcome the Settings app on your screen from the reborn Start Menu.
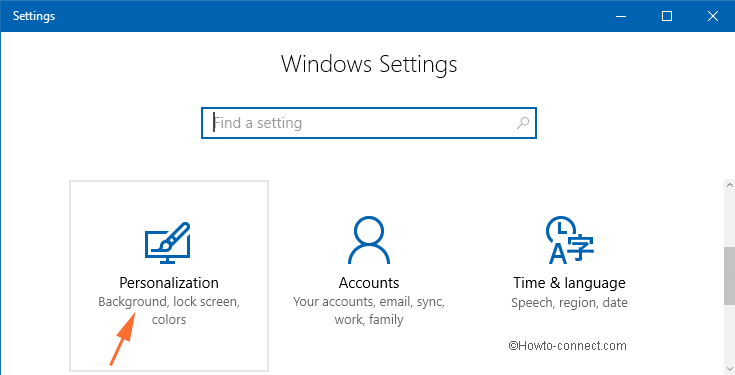
- Upon the emergence of Settings app, click Personalization category.
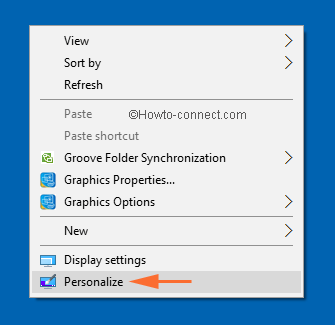
- an alternate way is there to fire up the Settings app window on your screen. This is in fact rather easy. Be into an empty space on your desktop, execute a right click there, click Personalize.
- The Personalization category of Settings app is observable on your screen.
- Make your way to the Lock screen segment on the left pane of options.
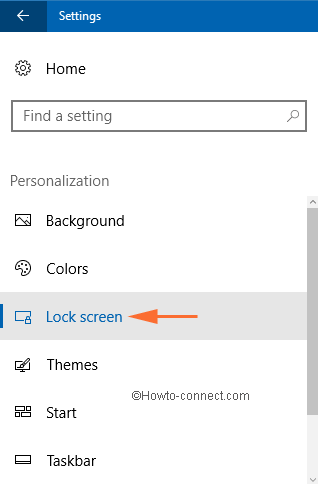
- On the right lane, come to the extreme end of the window and click Screen saver settings link.
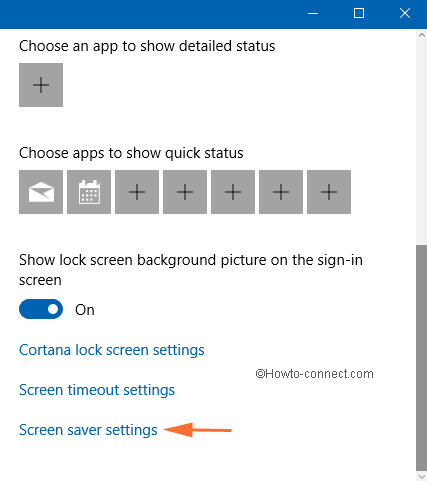
- A separate tiny window of Screen saver settings will pop up.
2. How to Change the Active Screen Saver on Windows 10
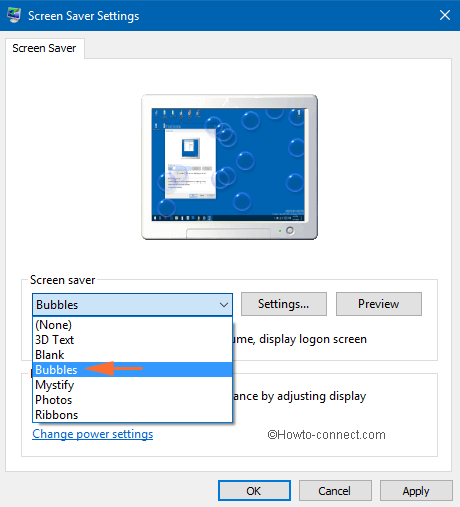
- Open the Screen Saver Settings window and click on the drop-down menu of the Screen saver. A list of screen savers is displayed for your Windows theme. Pick up the desired one.
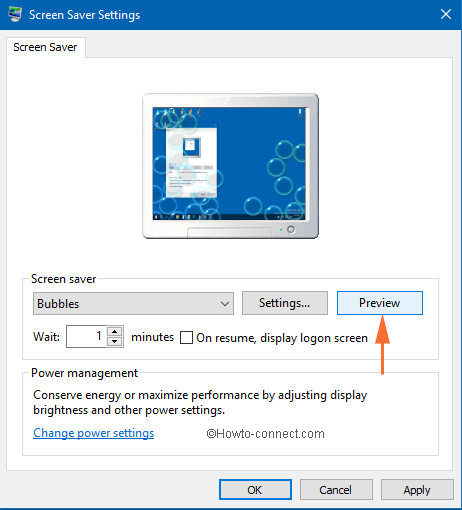
- As you have selected your screen saver, click on the Preview button and you can see the preview of the screen saver on your entire screen. Of course, the small box on the settings window continues to display you the preview of the selected screen saver.
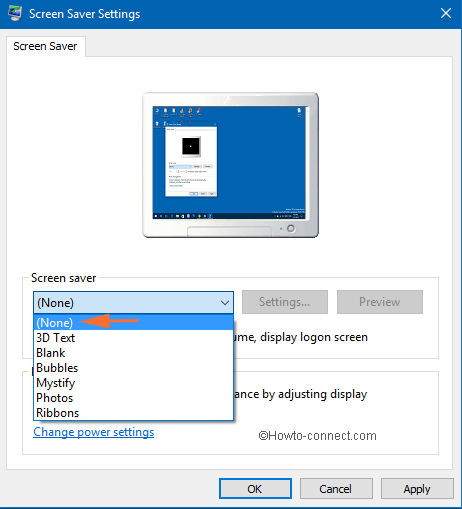
- In case, you don’t like to use the screen saver, choose the None option as opting this also means you disable the screensaver for the current Windows theme.
3. How to Configure the Active Screen Saver on Windows 10
- Take a close look at the Screen Saver Settings window and a Wait option with a box is seen. You can set the number of minutes after whose expiry the screen saver will start.
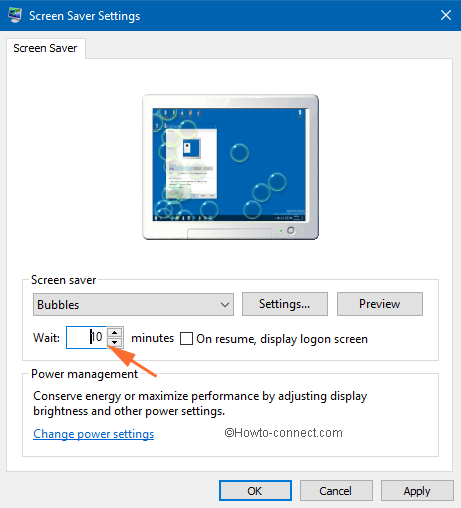
- Also, you have a provision to exhibit the login screen when you commence your Windows computer. Select the checkbox of On resume, display logon screen to avail this feature.
- For the selected screen saver, you can have extra settings. To see them click on the Settings button.
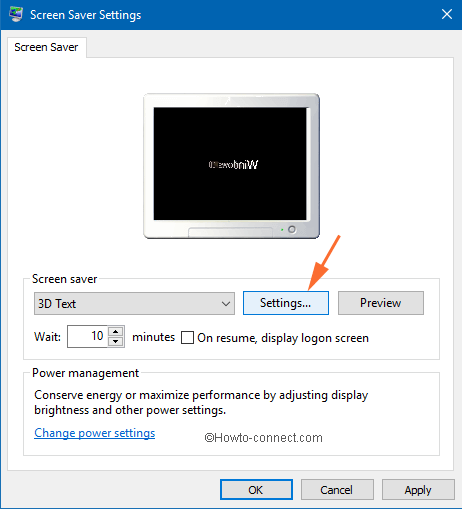
Note: You can also Configure Screen Saver on Windows 10 through the settings only available for the 3D Text and Photos.
- Settings button of the 3D Text brings up a 3D Text Settings window. The window has three sections in it. The first section has Text, Resolution, and Size. The Text part has two options: Time and Custom Text. The time will display you the set time of the computer in the screen saver. Choose the Custom Text and type your desired text in the field. The resolution slider allows you to adjust the resolution. Set the size of the text by moving the provided slider.
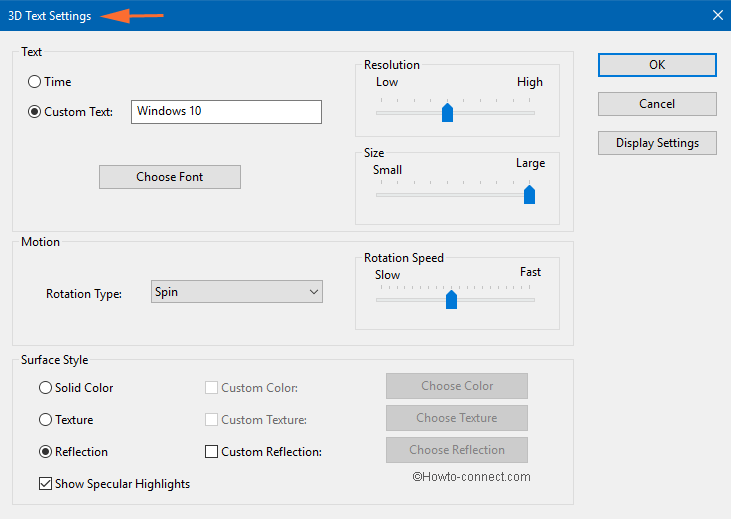
- The second half exhibits you the Motion and Rotation Speed options. Click on the drop-down menu of the Motion and select the type of motion. Also, set the Resolution Speed between slow and fast. Coming to the last half, select the Surface Style by choosing any of one option: Solid color, Texture, Reflection. Select the custom of the selected surface and choose its custom related things.
- Another screensaver that allows you the customization option is the Photos. Click on the Browse button of The Photos Screen Saver Settings window and pick up the desired folder where your preferred images are stored. Also, click on the drop-down menu of the Slideshow speed and select the speed of the slide show. You can also select the Shuffle pictures check box to play the slideshow randomly. At last, click on the Save button to save your changes.
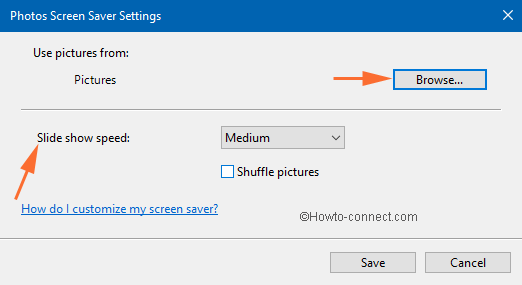
- For the rest of the screen savers, the below window pops up when you click on their Settings button.

4. How to Save the New Windows Theme in Windows 10
- After you finish your customization of the screen saver, based on your current theme, a new Windows theme is created by the Windows. It is the Unsaved Theme. To save the theme, right-click on it and select Save theme option.
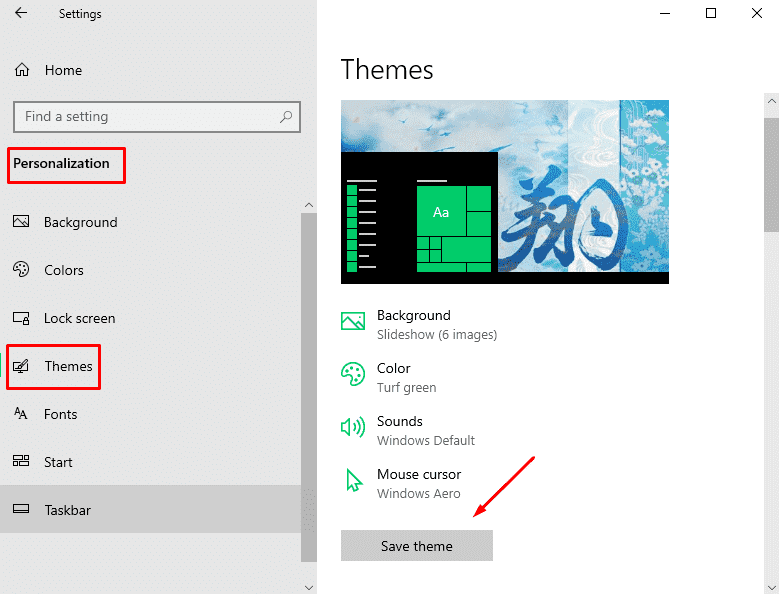
- Provide a name in the box provided and click the Save button.
Final Touch
At the end of this article, we realized that to Change and Configure Screen Saver on Windows 10 is straightforward. Do the experiment and see how it works on your computer. Try it and let us know if you come across any difficulty. We will be glad to help you out.
johnny griffin
says:help me change my screensaver and wallpaper
Jim Pierce
says:After the screen saver is active, I used to be able to just move the mouse to restart using the PC. Now I have to depress the power key for a second, wait for the PC to go into sleep mode, then depress the power key to open it back up. How do I get back to just moving the mouse to reactivate?
sunita
says:Hey Fritz, Photos is an option in the Screensaver Dropdown, select it.
Fritz
says:How do I use photos that I have saved as a screen saver?
mustang_of_fire
says:What file extensions are supported by “photos”? C:\Windows\System32 PhotoScreensaver.scr