When you lend your Windows 10 computer to any of your friends or colleague, you expect them to return it with the same settings you had set for your system. But unfortunately, most of the time you retrieve your system with many modifications applied to it along with the display settings. This is the most irksome condition when anyone meddles in our way of settings. Hence, we have brought a way out to this annoying situation. In this article, we will present you the steps which will Prohibit Change Display Settings in Windows 10.
Control Panel – the universal hub for all the settings now holds a few items in it as most of them were relocated to the Settings app. And currently, these are the two chief places from where you can handle your display alterations. So, in order to prohibit change display settings in Windows 10, you need to hide the Display tab and disable the Display in Control Panel. These alterations can be carried out from the Local Group Policy Editor.
Related:
How to Stop Changing Color and Appearance in Windows 10
Hence, let us move forward towards the procedure to prohibit change display settings in Windows 10.
How to Prohibit Change Display Settings in Windows 10
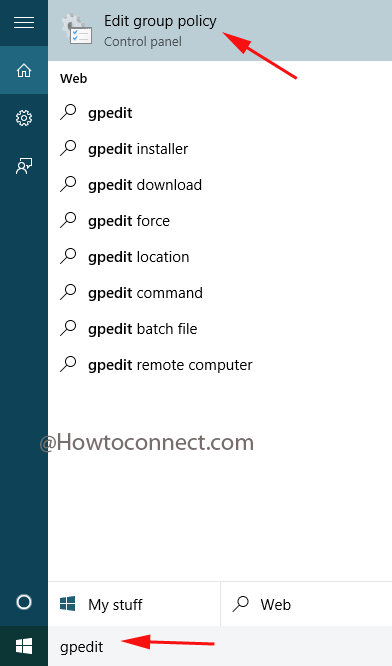
- The taskbar search bar will be unfolded with the Edit group policy as an outcome when you will type gpedit in its text field. Click on it to open.
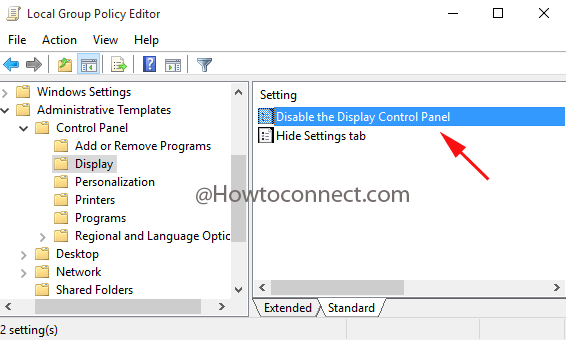
- Now, go to this mentioned path to proceed further:
Local Computer Policy => User Configuration => Administrative Templates => Control Panel => Display.
- The right facet of Display showcases two settings. Double click the first one, Disable the Display Control Panel.
- On the left top of the freshly opened window, Not Configured is set by default. You need to select the round cell of Enabled option.
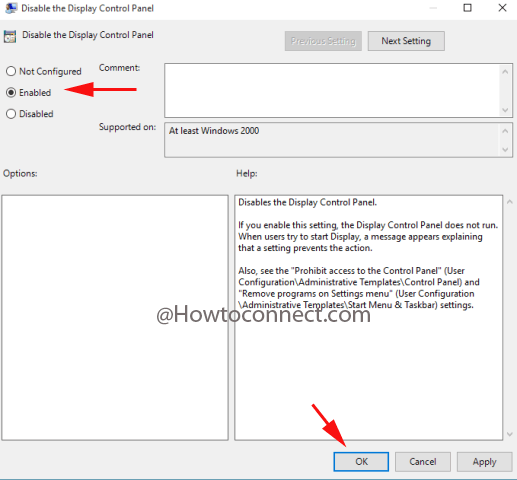
- Tap Apply and Ok buttons in order to preserve the changes.
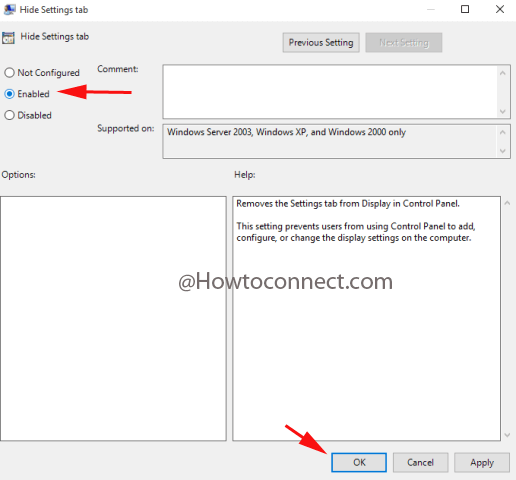
- Now, again in the Display category, double click the second setting, Hide Settings tab.
- Upon the arrival of its respective window, click Enabled radio box followed by hitting Apply and Ok buttons.
- Restart your system.
Below mentioned are the listed display settings that no one will be able to amend once you activate the hide Settings tab and disable the Display in Control Panel:
- Screen brightness cannot be fine-tuned either through Settings app window or through the Action Center icon.
- Unable to modify the size of the texts, apps and rest of the items.
- Orientation will also be grayed out.
- Cannot modify the Resolution.
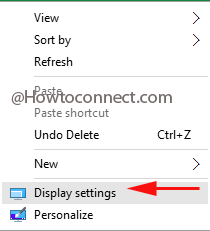
- Now, administer a right click on Desktop and go with Display Settings.
- In the Display segment of Settings in the right side underneath Customize your display you see an alert written in red color font Some settings are managed by your System administrator.
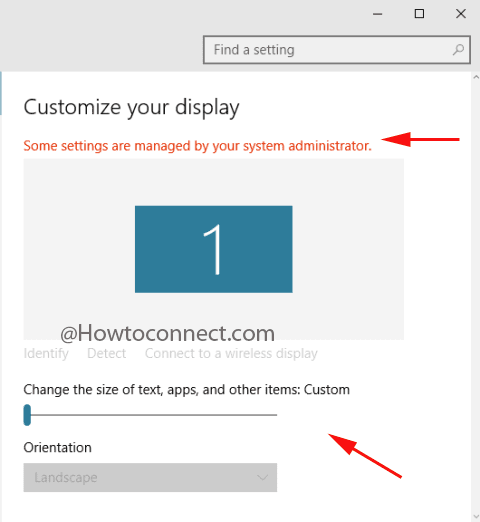
- You will notice everything is grayed out.
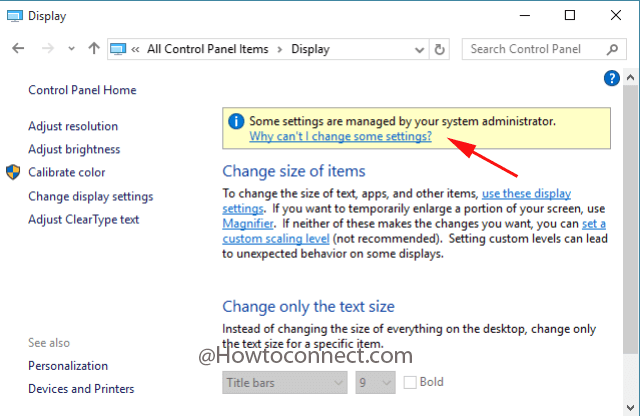
- Now, extract Control Panel Display icon. It will also exhibit you the same notice.
- Done!!!
After you Prohibit Change Display Settings in Windows 10 it will keep you secure when you offer your computer to anybody as they won’t be able to tamper any display settings until you set back them to the original again.
Thank you very much to the writer for the complete and step-by-step instructions for prohibiting display settings. This informative article is very helpful for those who need to share their PC with their colleague or friends and family by prohibiting display settings.