You can Schedule Disk Cleanup in Windows 10 OS and keep the PC free of clutter by automatically eradicating the irrelevant files. The unnecessary files are the temp files, old files, system files, old Windows Update and so on. Well, the OS does not provide any direct option that can cleanup the disk time and again. But using Task Scheduler and Command Prompt you can allow the OS to remove those extra gigabytes from your PC.
Task Scheduler provides a decent range of options to trigger the task such as weekly, one time and so on while you Schedule Disk Cleanup in Windows 10. So, depending on what time frequency you select, the task will happen at that time. This is for the regular users who do not prefer to mess with the advanced setup. To offer basic security to your PC, follow How to Schedule Windows Defender Full or Quick Scan on Windows 10. But if you are a techie guy, Command Prompt may interest you as it allows you to select the areas you wish to cleanup. Hence, stick to this guide and maintain your PC’s performance by frequently running Disk Cleanup.
How to Schedule Disk Cleanup in Windows 10
1. Through Task Scheduler
Step 1 – Type Taskschd in the search box and choose the result when it appears in the Best match section.
Well, also try to Use Z-Cron Task Scheduler for Windows.
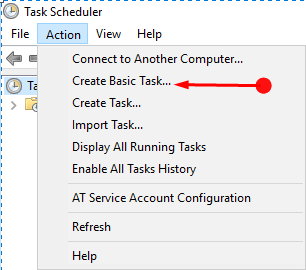
Step 2 – In the Task Scheduler click the Action tab at the top left. Now from the list of options choose the second one Create Basic Task.
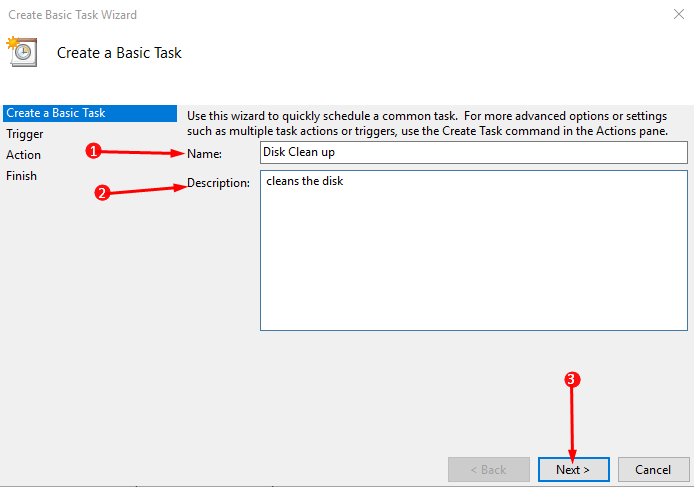
Step 3 – Here, provide a relevant Name and Description of the task you are creating as shown in the given image. Well, you can easily locate the task in the main window of Task Scheduler whenever there is a need. Click Next after naming and describing the task.
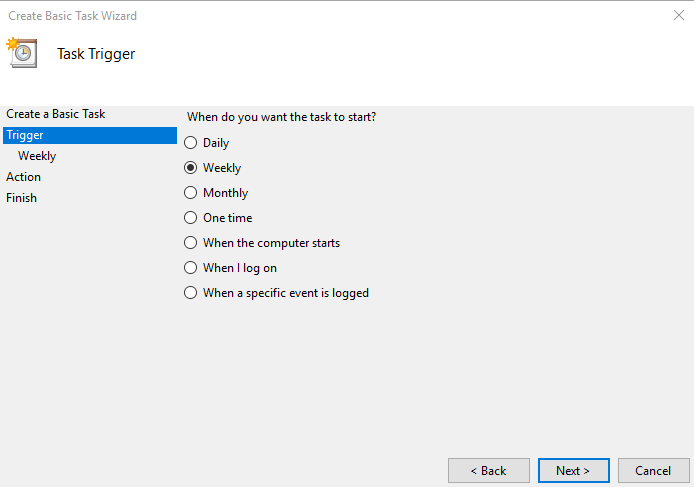
Step 4 – Moving ahead, select the frequency of the disk cleaning process in the Task Trigger screen. You can select when to start the task such as Daily, One time, Weekly and so on. Well, this is completely your choice as it depends upon your disk utilization.
For example – If you prefer to run the disk scan once a week, choose the Weekly dot and henceforth click Next.
Step 5 – Now, select the interval in terms of day and time that suits the best. Also, select the option namely Recur every and set its value as 1. This ensures that the task occurs every week on the set date and time. Click Next once you select the time frequency.

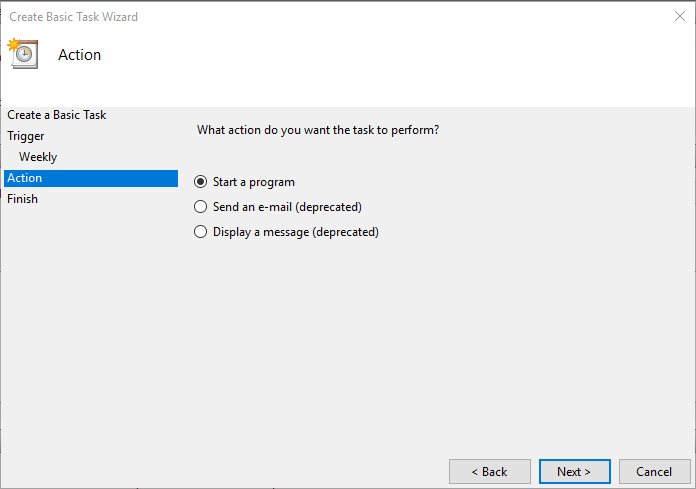
Step 6 – Select the dot Start a program in the following Action screen.
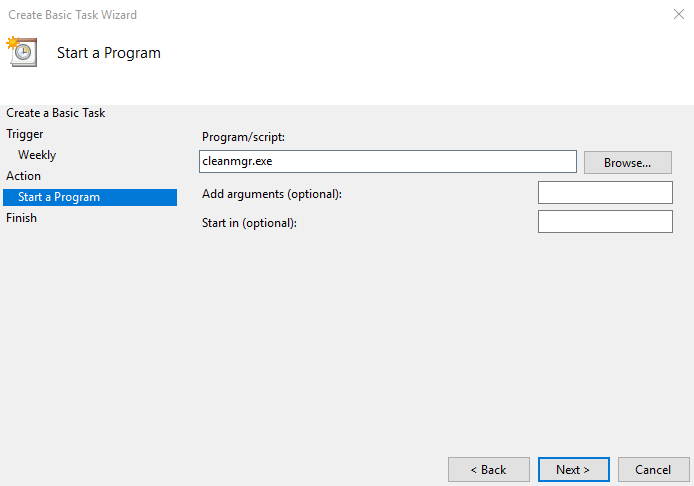
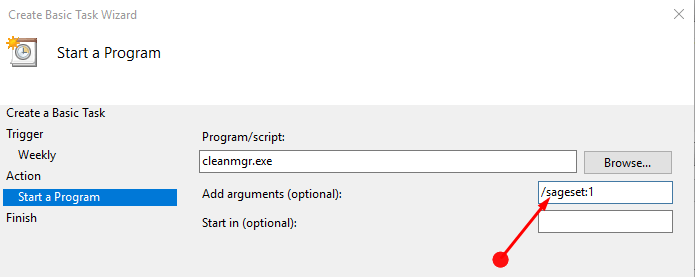
Step 7 – Moving ahead, type the cleanmgr.exe command line in the box under Program/script field. After entering the command, here also, press Next.
Note – In addition, you can also click Browse and go to C:\Windows\System32\cleanmgr.exe. Manually browsing the file shows its entire path in the Program/Script field.
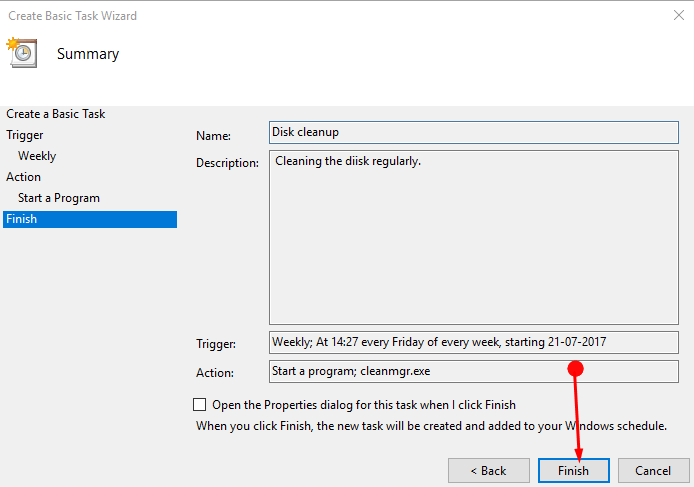
Step 8 – Now the Summary screen displays the entire configuration of the task you are created so far. If you perfectly Schedule Disk Cleanup in Windows 10, then Finish to wrap up the process.
Lastly, on your set time period, Task Scheduler will perform its task, letting you choose the drive you wish to clean.
2. Using Command Prompt
If there is no intention to interact with the Disk Cleanup option then try using the Command Prompt.
Step 1 – Type cmd in Cortana search to Schedule Disk Cleanup and choose Command Prompt when it appears in the Best match section.
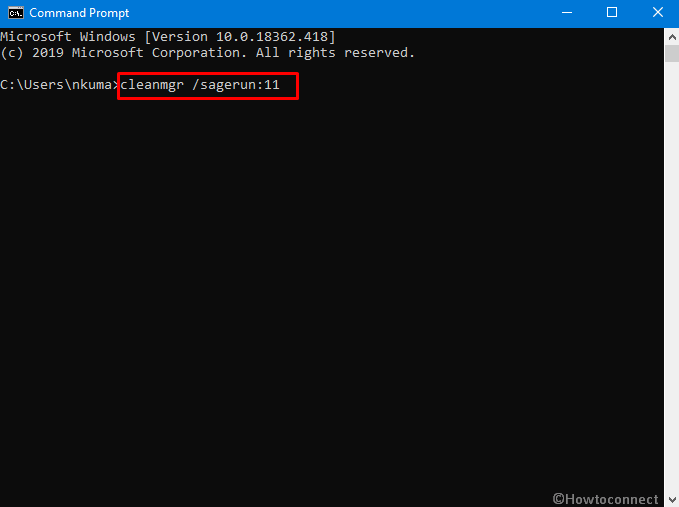
Step 2 – In the black panel of the Command Prompt type the following data.
cleanmgr /sagerun:11
Step 3 – Disk Cleanup Setting comes into view, so select the items as per preference for deletion. Here you can see a lot more options to clean up files than the previous ones.
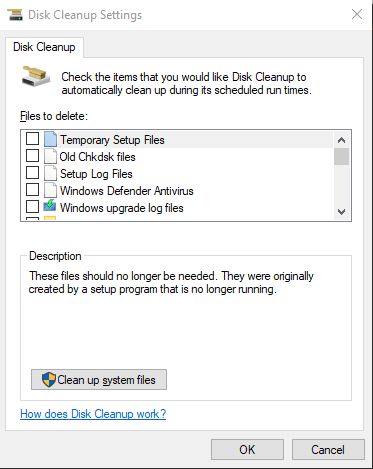
Step 4 – Click OK to move out of the box once the selection of the files for deletion in Disk Cleanup Settings is over.
Note – The /sageset:1 command in the above data actually forms a registry key to store the entered settings.
Step 5 – Now again reach out to the Task Scheduler and use the same method as above to create a new task. The only difference is that in the Add arguments box type /sageset:1.
In the end, it will operate all by itself and keep your PC free from unwanted files.
Concluding Words
These methods will help you to maintain the device and keep a track of the hard disk. It also helps you to get a clean disk as it wipes off the unnecessary data time and again. The command prompt method is the advanced version of this technique but Task Scheduler performs the same. Hence, follow the methods to Schedule Disk Cleanup in Windows 10 and if you are aware of more tips, write to us.
Thanks, Kooky. The step is now updated.
Step 5:
Add arguments box type /sagerun:1.
(Not /sageset:1)