Minimum and maximum processor state resides in the form of dropdown in Advanced settings of Power options in Windows 10. These Power options help to determine the percentage of performance states aka p-state used by Windows. Setting up the options changes the CPU clock speed moreover voltage and FSB speed to fulfill the OS need.
Either you can increase them to meet the workload requirements or decrease to reduce power consumption at the same time heat output. Though reduced percentage results in notable better battery life, lower performance will also be significant. This context describes how to set Minimum and maximum processor state in Windows 10. If you want to specify the range of CPU speed that Windows 10 will use, these settings are the only way.
Minimum and maximum processor state
Here is how to set Minimum and maximum processor state in Windows 10 –
Set Minimum process state
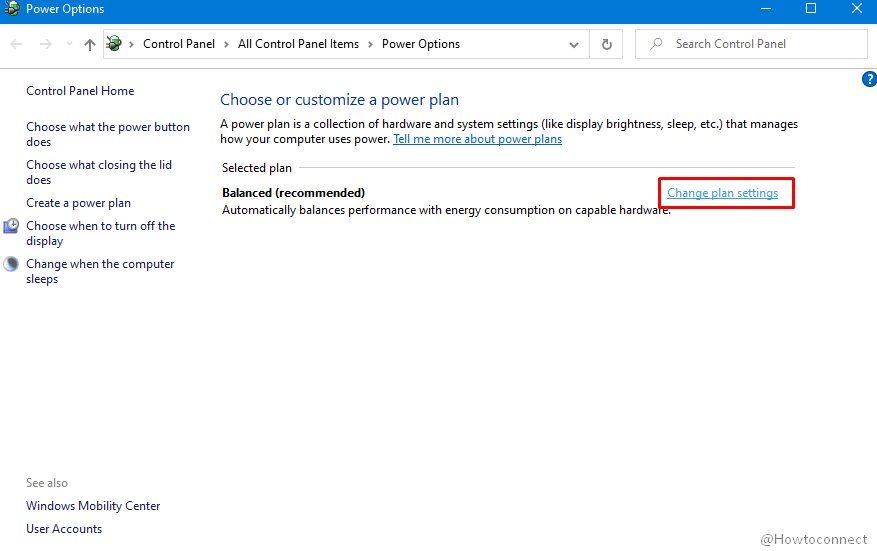
- Right-click on battery icon present on System tray.
- Choose Power Options.
![]()
- When the dedicated window shows up, click Change plan settings link you will get in the right-pane.
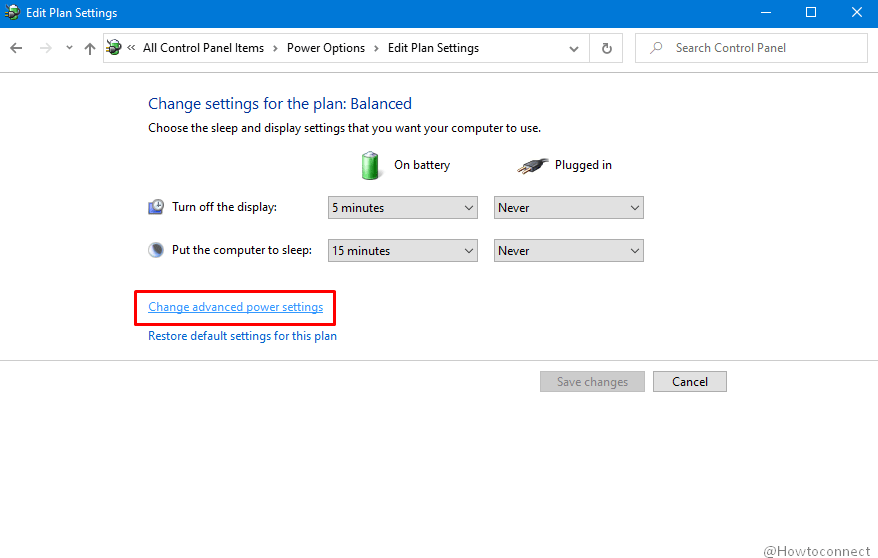
- From the consequent page, hit the link says Change advanced power settings.
- Once a new wizard named Power Options Advanced Settings becomes visible, scroll down a bit and click Processor power management.
- After expansion, click on Minimum process state.
- Change the setting to 100% for both On battery and Plugged in.
- Click Apply and then OK to save the changes.
Set Maximum process state
- Open Power Options in a similar way we showed above.
- Once in the wizard, move down to Processor power management.
- Click the same to stretch out the options it holds.
- Double-click on Maximum processor state.
- Set the value to 100% for both On battery and Plugged in settings.
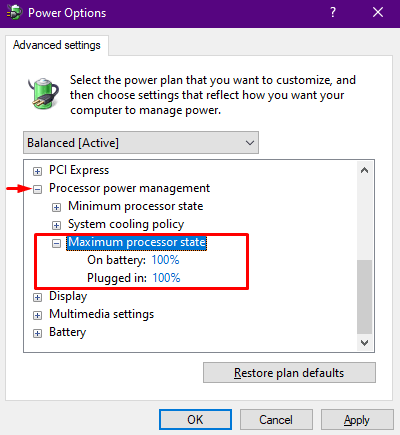
- Finally, click Apply followed by OK.
1] How to Customize System Unattended Sleep Timeout on Windows 10
2] How to Change Reserve Battery Level in Windows 10
3] How to Customize Closing Lid Settings in Windows 10
4] How to Optimize Video Quality While On Battery Windows 10
5] How to Customize Screen Timeout Settings in Windows 10
That’s all!!!