How to Take Screenshot Showing Cursor on Windows 10 – You might have experienced missing cursor in screen captures when on Windows 10 (including the previous versions). In fact, default tools of screenshot can’t capture cursor image on this OS. So, for capturing Screenshots highlight Mouse Pointer, it becomes essential to get the support of a third-party utility. So, in this below guide, see the method to take Screenshot Showing Cursor with the support of a third party utility.
Concerned with Taking Screenshot Showing Cursor on Windows 10, a tool titled Sharex competes properly and effortlessly. It’s simple UI assists you to capture screen and highlight cursor in seconds. Sharex offers multiple options that can be used for selecting a region, full screen, scrolling, web page, and text. Furthermore, you can grab its extended software for screen recording. Sharex works very nicely on Windows 10. A lot of more options and menus are available here to perform various tasks.
Screenshot Showing Cursor on Windows 10
Download the Tool
Step 1 – First of all, download Sharex from the link provided at the last of this guide. Install the application following the guide suggested on-screen suggestions.
Optimize Sharex
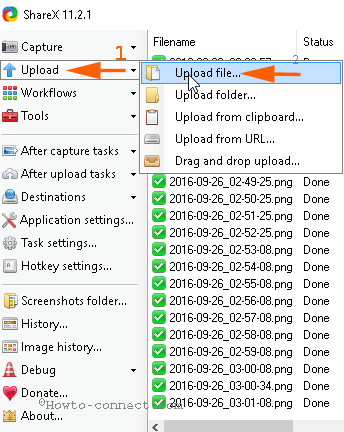
Step 2 – Before starting the capturing we recommend click Upload and uncheck Upload File. It is enabled by default and if you leave the option checked then the captured snaps will be itself uploaded to Imgur.
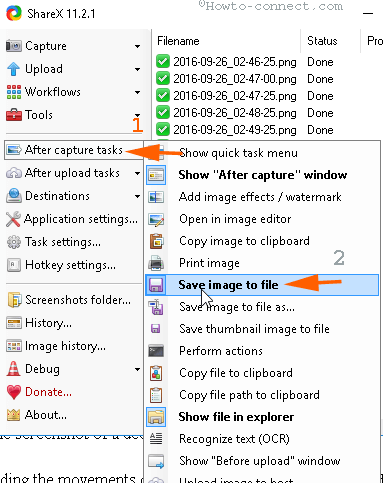
Step 3 – For determining a new location, click on After capture tasks. Find the option Save Image to File in the Drop-down menu and check it.
Step 4 – To collect the captured files in the desired folder click Application Settings => Path.
Take Screenshot Showing Cursor in Windows 10
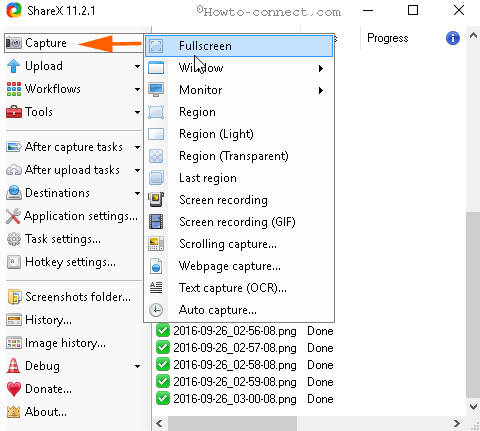
Step 5 – Now click Capture which will open a list of options.
Step 6 – On the menu, select the option accordingly need, such as
To snap overall screen – Full screen
To take screenshot with cursor visible of a decided segment – Region.
For recording the movements on system’s screen – Screen recording.
In addition few more options
To draw the snap for only write up of a web page – Text Capture (OCR)
To snap the complete web page – Webpage capture
Record screen for Animation – Screen recording (GIF)
are available. So, click on the option suitable for you.
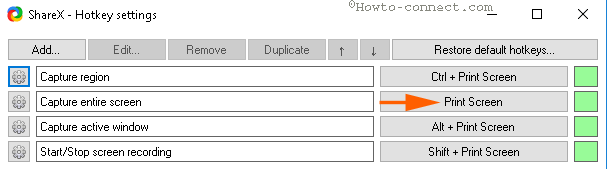
Step 7 – Noteworthy is you can also grab screenshots using Sharex simply by pressing the Prt sc key.
Save and See Screenshot
Step 8 – Once you snap, Sharex – after the capture window appears, click on Continue here. As soon as you click Continue the screenshot is stored in the determined location.
Step 9 – You can see the list in the middle and preview on the right side of Sharex. From the list, you can also go to the screenshot saving location and open it.
Step 10 – In case, you are doubtful concerning location on your computer simply click Screenshot folder.
Conclusion
Therefore, these are the procedures and steps to take Screenshot Showing Cursor on Windows10. Sharex tool works like a charm too make the mouse pointer apparent. Don’t stop yourselves if you have questions concerning this method and tool through comment.