In Windows, there comes a free Virtual WiFi hotspot creator which converts a laptop or PC into a Hotspot. This WiFi creator is MyPublicWiFi. Using this feature of Windows one may connect his smartphones, tablets, or other PC to this hotspot. Before creating WiFi through with this, one should know that he needs to have a WiFi adapter for PC also for that laptop which doesn’t have an inbuilt WiFi adapter. It is an easy-to-use software that converts a laptop/PC into a WiFi access point. Those who are nearby can also surf internet using this software.
When you install this application in your PC and then click on its icon to start it, the user interface would look like the below screenshot.
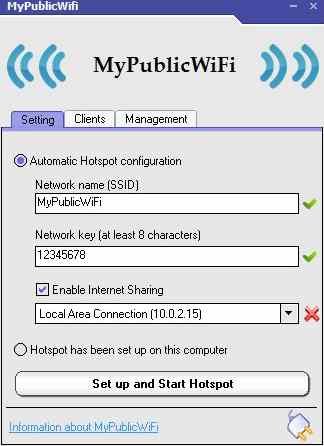
In the above screenshot, you can see that it has certain settings like Network Name, Network Key, and you also have to check the box consisting of Enable Internet Sharing if you wish to share your things on the internet. Note that you can give any name to the Network Name, however, the network key should consist of at least 8 characters. You can also manage its other features using Management button. There is another option on this application and that one is the Clients shown in between the settings and Management options. Clients are the key using which we can know those users connected to us. This application is based on WPA2 encryption.
Features Of MyPublicWiFi
This application is really amazing and nice. It has a lot of exciting features. Some of them are mentioned below.
- It is a freeware program and can be freely used by you if installed in your laptop.
- It lets you keep an eye on all those pages opened by the users who have been using your Hotspot.
- It also allows you to set the Password for this network. One who wants to use the internet by connecting to his WiFi Hotspot must know the Password.
- Using this application, you can also block the usage of certain sites on your WiFi Hotspot like torrent etc so that it cannot be accessed by the users who are using the connection being made by you.
How to create the Network using this application
Creating network using this software is very easy and simple. In the above figure, you have to go to the Management option and click it there. As soon as you click on that, a new window pop-up will come like the screenshot shown below:
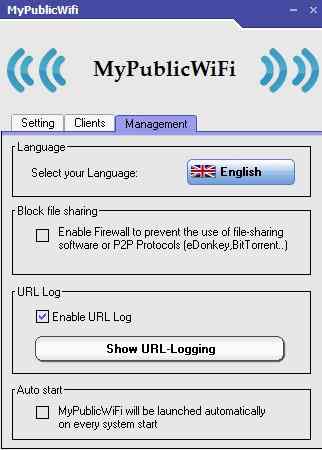
In the above shown figure, it is quite clear what you have to do for creating a new network. Check the first box in the above figure for whether you want to block or not the P2P protocols or file sharing software. You can also tick on the URL Log so that you could see which person is opening which URL. Now, once you are done with all these settings, you can start the Network.
Note that, you won’t have to do all the same things day by day. You can tick on the last option and it would create this every time your systems open. This is truly dependent on one’s own wish.
How to get this Software
You can download this software by visiting MyPublicWiFi . It came for all the different versions of windows and yeah for different bits too.
Hi,
I downloaded “mypublicwifi’ on my Windows 7 32bit laptop. I have created the network and connecting my iPod Touch 5th generation it. The problem is, the wifi doesn’t actually work. It connects, it just doesn’t load any pages… Please help, I really do need this to work.
Thankyou