Reinstallation of a keyboard driver is an all in one solution to any issue that occurs with the device on Windows 11 or 10. Being an important part of the OS, if the software fails to perform, you get various problems. This may be Keyboard not working, hanging, Right Click on Desktop Taking Too Long and other. So you will find here the ways to Uninstall and Reinstall Keyboard Driver in Windows 10 easily.
One such driver that users are frequently complaining about is the keyboard. If the keyboard driver goes bad, it most certainly results in faulty operation of the keyboard. Drivers operate quite closely with the system and they are integral to the efficient functioning of the device it is responsible for. In many circumstances, when your keyboard stops functioning, uninstalling and reinstalling the driver resolves the issue. Also, you might want to reinstall it if you accidentally uninstalled the keyboard driver. The process is quite simple and would hardly take a few minutes. So, let us delve into the procedure and see how you can do this in Windows 10 and 11.
Uninstall and Reinstall Keyboard Driver in Windows 11 and 10
Here is how to uninstall and reinstall Keyboard Driver in Windows 11 or 10 –
Step-1: Right-click the bottom-left corner (over the start button) of the screen. Alternatively, you can press Windows logo key along with ‘X’.
Step-2: Win+X menu will show up, select the option namely “Device Manager.”
Step-3: Once Device Manager will appear, you can view all the devices which are installed on your system. Click on the small arrow that you see alongside Keyboard to expand.
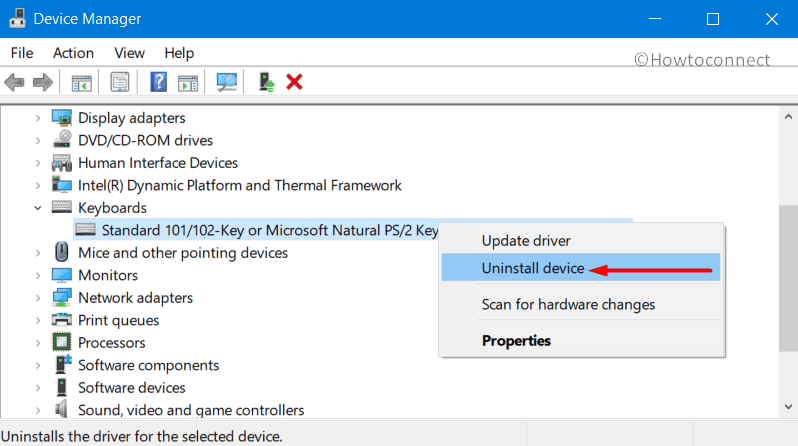
Step-4: Find the driver that you would like to uninstall and right-click on it.
Step-5: Click on the Uninstall device option. A dialog box will pop up asking to confirm if you want to uninstall the driver.
Step-6: Hit the Uninstall button in the dialog box. This will remove the driver from the system.
Step-7: Restart Windows 10 PC and the system will automatically reinstall the Keyboard driver to your system.
How to Roll Back to the Previous Driver
Though new device drivers almost always improve Windows 10 performance, there are cases when it does just the opposite. This can be the case, especially if you update or install drivers from unreliable sources. If you believe the problematic functioning is due to the new driver, you can roll back to the previous driver. To do this:
- Open Run dialog box by jointly hitting Win logo + R hotkeys. Here, type in devmgmt.msc and click OK.
- When Device Manager shows up, click on the small arrow that you see alongside Keyboards.
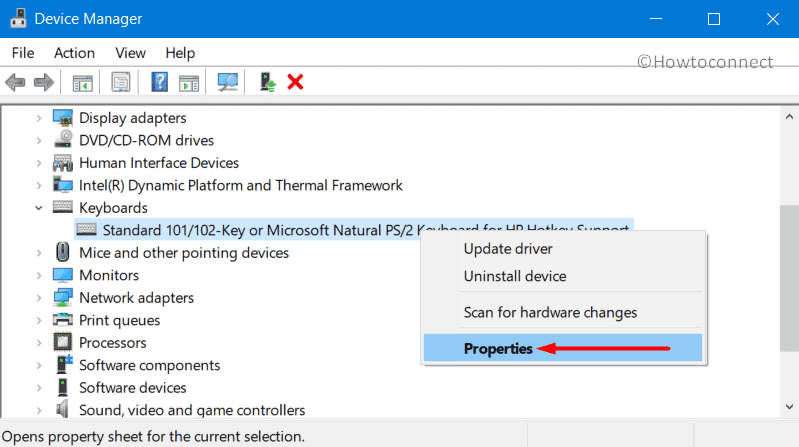
- Right-click on the driver as before. Select Properties.
In the Properties window, click on the Driver tab. Then click on the Roll Back Driver button (see snapshot).
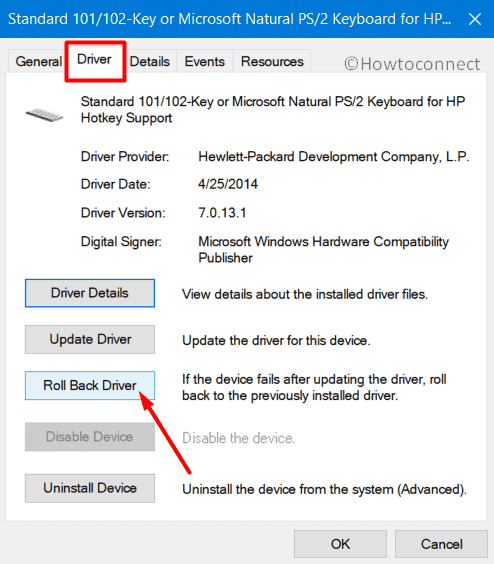
A dialog box will appear warning about roll-back and asking for your confirmation. Click on OK/Yes.
That’s all!!!