People nowadays look for budget smartphones rather use a highly expensive one. Who do want to cost much if you can get all handy features at a cheaper price? Well, you might be thinking of using a mid-range phone and we can assure that Samsung J8 Plus is the best available till now in the market. It’s cheap, handy and it’s a combo that can satisfy all your need. Here in this context, you will get a detailed guide to set up and use the Samsung Galaxy J8 Plus Android Phone. Before we jump to the set-up process, let’s have a brief intro for your good acknowledgment.
Samsung brought this brand new medium-range smartphone providing all the updated features and Android functionalities. It has a powerful Octa core, 1.8 GHz, Cortex A53 processor, a large six inches display, 720 x 1480 pixels screen resolution. While talking about the operating system, it has the latest Android 8.1 Oreo Version. It’s a great phone in consideration with Camera abilities as having 16+5 MP Rear camera that can capture great photos. This one has a pretty decent battery life of 3500 mAH. Besides, the phone comes with the Proximity sensor, Light sensor, Gyroscope, Accelerometer, Compass and so on. You can have a perfect gaming experience too here and Samsung provided Adreno 506 GPU inside. 4 GB ram and 64 GB ROM will give a superb performance out of a comparatively lower price.
Use Samsung Galaxy J8 Plus Android Phone
Here is How to Setup and Use Samsung Galaxy J8 Plus Android Phone –
The initial set up
Step-1: Insert your SIM card in the SIM tray. (To open the SIM tray, use the ejection pin that comes with the package)
Step-2: Once you securely insert the SIM card, turn Samsung Galaxy J8 Plus phone on by pressing the Power key (the key on the left side).
Step-3: Select the preferred language. Tap on the arrow sign or Next button.
Step-4: Connect to a Wi-Fi network. Alternatively, choose to use Mobile data (if you have inserted an activated SIM).
Step-5: Follow along with the further on-screen instruction. The set up would include setting a screen-lock method to secure the device. You can tap on ‘No thank you’ if you don’t want a screen lock or would like to set it later.
Registering your Samsung account
Having a registered Samsung account enables you to access and utilize several services. With this, you can not only keep your data up-to-date and secure but also track, lock and remotely reset your stolen or lost device. To get more details about the services availed by Samsung account, visit the Samsung Website.
All you need to register is an e-mail ID and the process is quite simple. To set up your Samsung account –
- Go to Settings on your Samsung Galaxy J8 Plus Android phone
- When it appears, go to Cloud and accounts. Tap on Accounts and then select Add account.
Tap on Samsung account and then on Create account (if you don’t already have one) or Sign In (If you have an existing ID). Follow the instruction you see on screen to register your new Samsung account.
To Remove your Samsung account
In order to remove the registered Samsung account from the device for any reason, follow these steps –
- Go to Samsung account option like we showed earlier and then tap on the three dots from the top corner.
- Tap Remove. You’ll have to enter the Samsung account password and then finally tap on Remove account.
Transferring data from your previous device
You can simply use Smart Switch android application or Samsung Cloud to restore/transfer data to your new J8 Plus phone. To know more about Smart Switch, visit www.samsung.com/smartswitch.
To use Smart Switch –
- Open the Settings application in the old device.
- Tap Cloud and accounts. Then, select Smart Switch.
- Simultaneously, open Smart Switch app in your previous device. In case you don’t have the app, you can easily download it from Galaxy Apps or the Play Store.
- Tap on Wireless and then Send in your previous device. On the new device, tap on Wireless and then Receive.
Thereafter, simply follow the on-screen instructions to transfer data to your new device.
You can use Smart Switch computer version to transfer data via computer. However, direct transfer between your previous and new device will be much easier.
To transfer data via the Samsung cloud, you’ll need to create a back-up of all the data in the Samsung cloud from the previous device. You can then restore the data in the new device by –
- Swipe the notification bar from the top and make a tap on the Settings icon.
- When the Settings page comes into the view, locate Cloud and accounts and tap on it.
- On the running page, select Samsung Cloud.
- Select the previous device from BACKUP AND RESTORE. Thereafter, tap on Restore data.
- Check the data which you’d like to restore to the new device. Then, tap RESTORE.
Syncing data
You can easily sync data on your Samsung device. To do this –
- Open the Settings app on your Samsung Galaxy J8 Plus.
- Go to Cloud and accounts settings.
- From the list of accounts, select Samsung Cloud.
- Tap on the three dots from the top corner in the settings and when the options roll out, select Sync settings.
- Check the items which you’d like this device to sync with.
Editing the Home screen
Do the following to edit and organize Home screen –
Add apps button
To switch between Home screen and App screen, you simply need to swipe up or swipe down. A convenient option is adding an Apps button among favorite apps on the Home screen. By adding this, you’ll be able to go to the app screen by tapping on the apps button. You can add the option by –
- Tap and hold an empty area on Home screen. Click on Home screen settings.
- Press Apps button and then select Show Apps button.
- Finally, click on Apply.
Reposition apps and widgets
To move an app or widget on Home screen –
- Tap and hold on the item you want to move.
- Drag it to the position that you prefer. In order to move the app to another panel, simply hold and drag the app to the edge of the screen.
Create shortcuts for apps on Home screen
You might want to have shortcuts of the apps that you use frequently on Home screen for convenience. To do so –
Open App screen.
- Tap and hold on the app for which you’d like to create a shortcut and drag it to the top or bottom of the screen.
Create folders
By creating folders, users can organize applications better.
- Tap and hold an application.
- Move it over another application. This creates a folder of those 2 apps. You can add more apps either by dragging and dropping them into the folder or by clicking on Add app.
Panel, Themes, and Wallpapers
- Tap and hold on any empty area on the home screen. You can now add or delete panels, select wallpaper or theme or widgets and can go to Home screen settings.
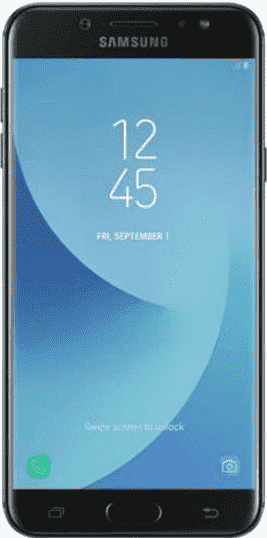
Lock screen
Whenever you press the power button or if the device is not used for a specific period, the screen turns off and gets locked. In case you didn’t create a screen lock during the initial set-up, you can unlock the lock screen by swiping in any direction.
- To set up a new unlock method –
- Swipe the notification bar from the top to down and tap on the Settings icon.
- Go to Lock screen and then tap Screen Lock type. Here, you can select and set screen unlocking PIN/ Pattern/ Password/ Face/ Fingerprint.
That’s all!