Are you curious to learn a perfect method to Use AOMEI Backupper to Backup moreover, Restore on your Windows 10 PC? This software is a pioneer one for backing up tasks and only a few simple steps complete the job. When people try to experiment with the newer versions of Windows then there is a huge chance of data loss. It is exactly for this time when you need an application like AOMEI Backupper. See an article on another popular utility – How to Backup and Restore in Windows 10, 8 By RecImg Tool.
This easy to use software saves from any sort of unknown virus attacks leading to the loss of data or system crash. In addition, it compresses the backed up data and obviously saves space on a drive. This is a very simple app with a great user interface. It is not at all confusing and even the novice can handle it.
How to Use AOMEI Backupper to Backup and Restore in Windows 10
Download AOMEI Backupper
Step 1 – Land on this page to grab the AOMEI Backupper software.
This software comes with various packages for different versions of Windows. Therefore choose the right one to get the best.
Step 2 – After the downloading is over, double click on its file to open. Then select a correct language through the drop down screen and follow the guidance ahead.
System Requirements
Though it comes in different executables yet it works across all the versions right from Windows 7 to Windows 10.
Use AOMEI Backupper
System Backup
This process helps to retain the data of your PC from any type of unforeseen system failure. It restores your data whenever there is a sudden error on the PC.
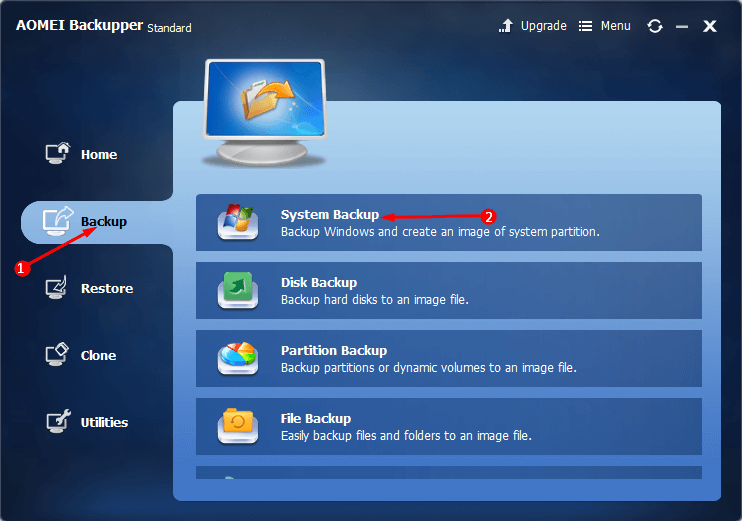
Step 1 – Make a double click on AOMEI Backupper icon from the desktop. Select Backup tab in the left pane and then System backup as shown in the given screenshot.
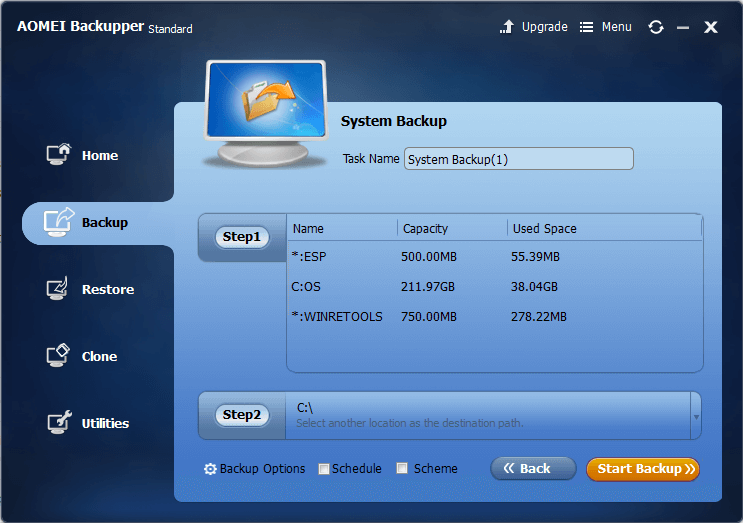
Step 2 – Here you find the two parts on the interface as Step 1 and Step 2. The first part speaks about the system partition.
Step 3 – Step 2 will ask to select the destination location of the path. Now click the button namely Start Backup that appears on the lower right corner.
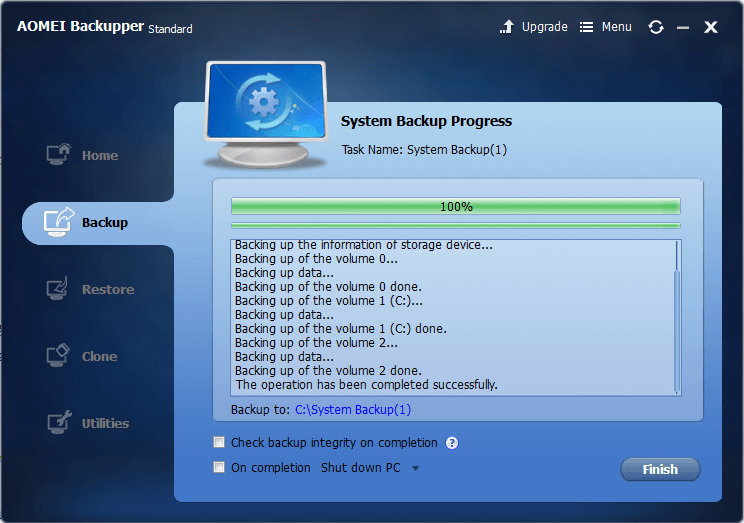
Step 4 – The progress bar will start working and once it reaches 100% the job completes. The back up of the device will stay on the Home Tab.
Restore Windows 10
System Restore turns out to be a blessing in disguise when the system crashes down.
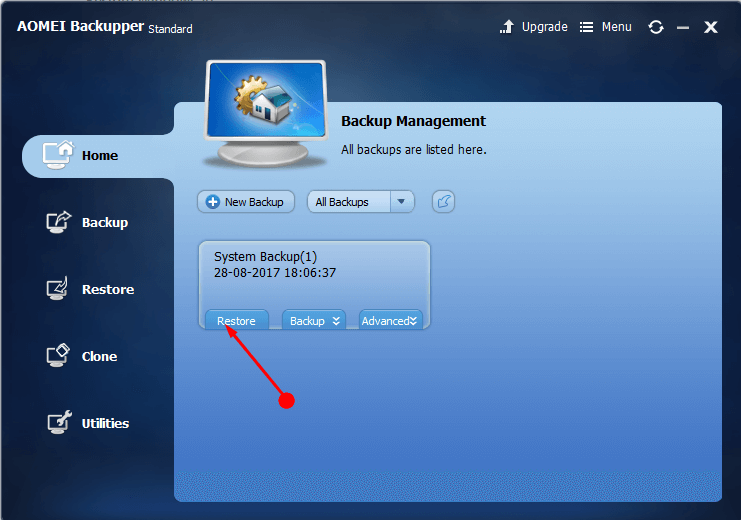
Step 1 – On the Home tab click the Restore button to get back the data. We recommend you to choose the latest backup to retrieve the latest one.
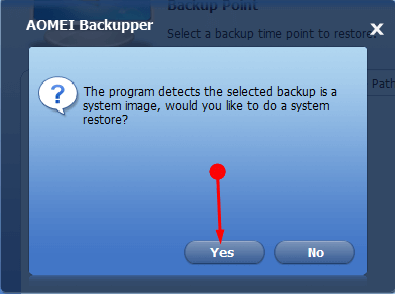
Step 2 – Click on the Yes button to confirm the process.
Step 3 – Now out of the entire list select the system backup image. Click the Next button to move forward.

Step 4 – Choose the destination folder where you want to place the files and moving ahead click the Next button.
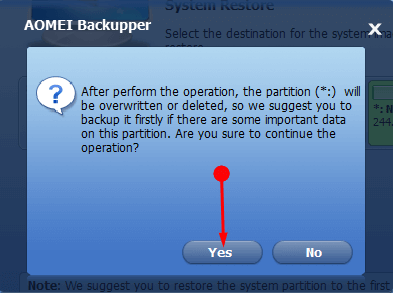
Step 5 – Finally, click on the Yes button to agree with the process.
Concluding Words
Thus you have seen how easy to Use AOMEI Backupper to Backup and Restore in Windows 10. Though this app takes a larger place on your PC but is completely worth it. Moreover, it comes with different executables for different versions.