Ways to Use Xmarks Sync for Firefox 4.4.0 with Steps. – You frequently bookmark websites on Firefox so that you can browse them anytime. But when you have multiple computers, it becomes difficult to get the same list of bookmarked sites on all. So, in this regard, Xmarks Sync comes of great help.
Xmarks Sync for Firefox 4.4.0 is a prominent free add-on that syncs bookmarks across internet browsers and computers. Once you install Xmarks Sync on computers and create accounts individually on these you will be able to access bookmarks.
Let us now see the steps and see how to use this add-on on Firefox.
Methods to Use Xmarks Sync for Firefox 4.4.0
You have to first download and install the Xmarks Sync 4.4.0 on all your computers. After setting up the add-on on one computer, simply log in with Xmarks credentials on various other PCs and you will get all the data on all the computers.
Download and Install Xmarks Sync for Firefox 4.4.0
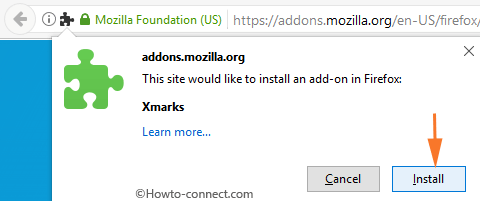
Step 1 – First of all, install Xmarks Sync on Firefox browser from here. On the website, you will see Add to Firefox button, click it.
Step 2 – The Xmarks Sync add-on will hardly take few seconds to download. A small box will appear near the address bar, click Install.
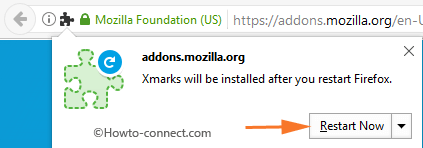
Step 3 – Next, you will see a pop-up that Firefox has to restart to completely install Xmarks Sync, so, click Restart Now.
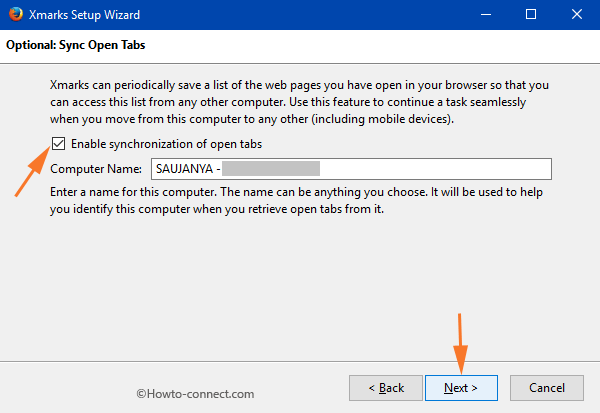
Xmarks Setup Wizard
Step 3 – After Firefox restarts, Log in to Xmarks box will show up on the browser. Now, create a new account on Xmarks Sync by providing the necessary details.

Step 4 – This will launch a window with a title Xmarks Setup Wizard. Now, check mark the box of Enable synchronization of open tabs and select Next.
Step 5 – Moving on, keep selecting the features that you wish Xmarks Sync should perform for you.
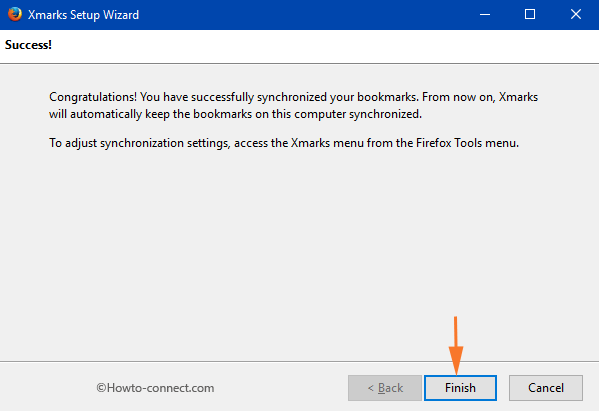
Step 6 – After choosing the features, Xmarks Sync will start the syncing process and then it will show you Xmarks Status. Lastly, click Finish after Firefox successfully uploaded the bookmarks to Xmarks server.
Step 7 – As the last step, go to your email and verify the account with Xmarks by following the guidelines on the email.
Afterward, on other computers, just install Xmarks Sync following the above steps and log in with your account. Follow the instructions to sync bookmarks from its server to your computer.
Xmarks Settings
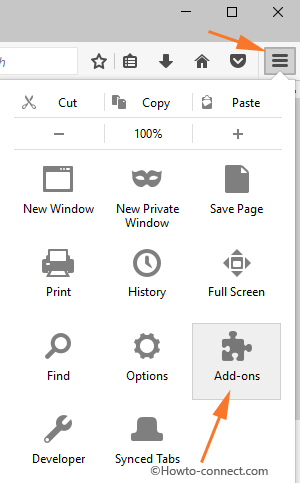
Step 1 – To begin with, click the Open menu button that shows up on the far right-hand of Firefox and select Add-ons tab.
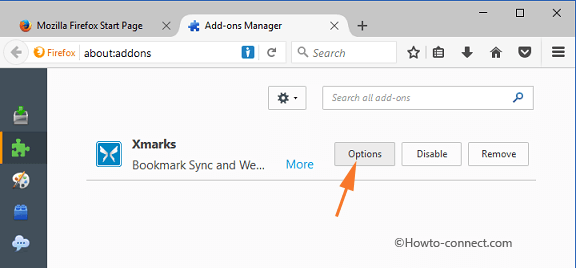
Step 2 – Now, Extension pane will be visible. Moving ahead, select the Options button of Xmarks.
Step 3 – Xmarks Settings window will include six different tabs – Status, Sync, Restore, Profiles, Discovery, and Advanced.
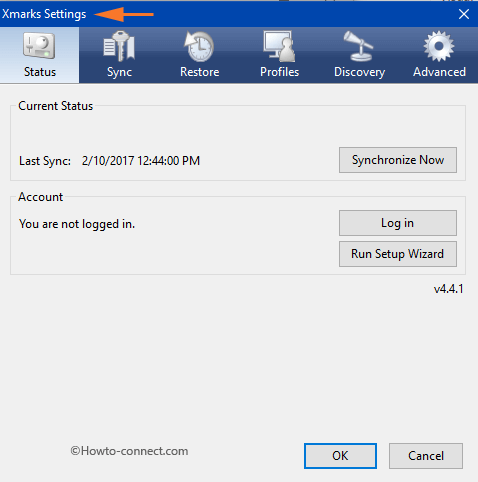
Status – It lets you know the current status of the sync. In addition, you can also log in to Xmarks account from this tab.
Sync – Manage synchronization types and options from this tab.
Restore – Use this tab to restore the bookmarks to an earlier version.
Profiles – Allows to Create and manage the sync Xmarks profiles.
Discovery – This tab of Xmarks Sync allows you to handle site information, such as Enable site info.
Advanced – All the advanced settings of Xmarks Sync for Firefox 4.4.0 are listed here.
This add-on is also supportable with these browsers – Chrome, Safari, and Internet Explorer.
Conclusion
To use Xmarks Sync for Firefox 4.4.0 is very simple. You know the importance of Synchronization across the devices and browsers very well. Use Xmarks Sync for Firefox 4.4.0 now and share your thoughts using the comments form.