We always like to keep attractive desktop background on our PC. Desktop background Slide Show on the PC is not a new feature and makes the desktop look more beautiful. But sometimes users might not like to have the slide show on PC as it sucks battery and slows down PC Speed a bit. If you are a Windows 10 user and disable desktop background slide show then follow the tips we are writing here to enable or disable.
Enable or Disable Desktop Background Slide Show on Windows 10
Through Power Options
1. Write Control Panel in the Start menu Search box and click on Control Panel in Search result.

2. Click Power Options link in Control Panel.
![]()
3. Tap on Change plan settings link which resides just beside your chosen power plan.

4. Hit on Changed advanced power settings link to open the new window entitled Power Options.

5. Double Click Desktop background settings to expand it downward and open a new option named Slide Show.

6. Double click on Slide Show. You find here links Paused or Available in On Battery and Plugged conditions.
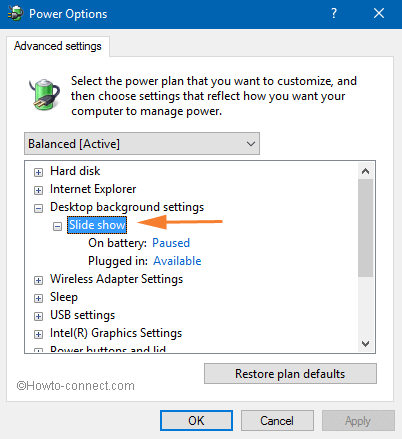
7. Here you need to change the setting as per your need. If you want to enable Desktop background slide show then change both links to available and if you want to disable change the links to Paused.if you need to customize it according to the power whether it is electric power or battery you can do this from here.
8. If you need to customize it according to the power whether it is electric power or battery you can do this from here.
On battery – Paused to disable Slide Show.
On battery – Available to Enable Slide show.
Plugged in – Paused to disable Slide Show.
Plugged in – Available to Enable Slide Show.
Finally, click on Apply and OK.
Now you can sign-out and sign-in to save the changes which you have done on your Windows 10 PC and enjoy it.
Through Settings
Nowadays, Windows 10 facilitates to Enable furthermore Disable Desktop Background SlideShow pretty snugly via Settings.
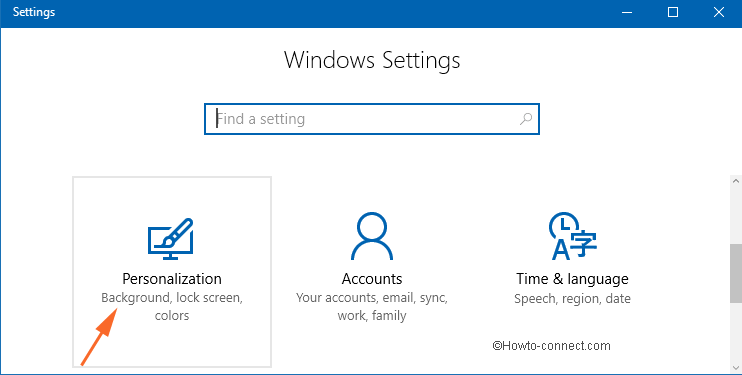
Step 1 – Gently press the pair of Win & I keys to bring the Settings interface on the screen.
Step 2 – Locate Personalization and execute a click on it.
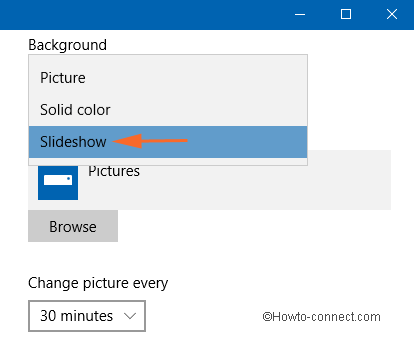
Step 3 – Navigate to the right-hand side, click on the Drop down just underneath Background and choose Slideshow.
Step 4 – Hit Browse button right underneath the headline Choose albums for your slideshow.

Step 5 – Once Select folder window comes, click the location where you accumulate beautiful photos and hit Choose this folder.

Step 6 – If you prefer to disable Slideshow then choose another option in the Drop down.
Step 7 – To determine the frequency of Slideshow pictures click the drop down below Change picture every. Choose a favorable time interval for the transposition of the photos.
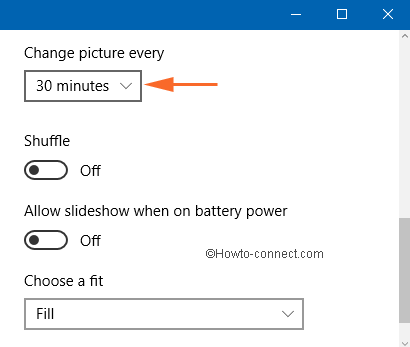
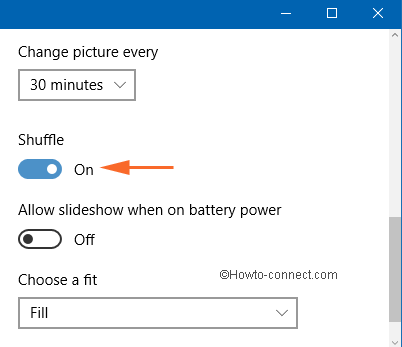
Step 8 – If you like to Shuffle the Slideshow Pictures, pull the slider below Shuffle in the forward direction.
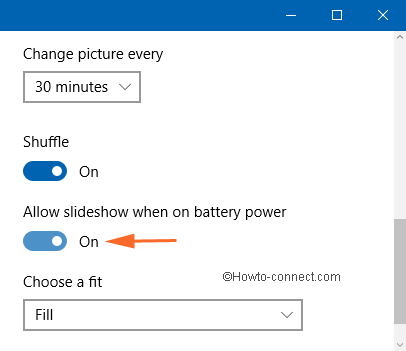
Step 9 – Do you Allow Slideshow when on battery power? If yes then pull the toggle under the concerned heading towards On.
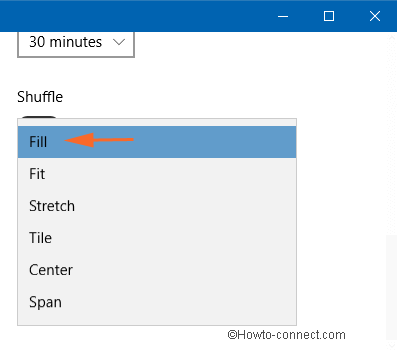
Step 10 – Subsequently, locate the heading Choose a fit and click the drop down. Pick out the fit from the choices Fill, Fit, Stretch, Tile, Center, Span.
Once you apply these settings, you will view the Slideshow as per your preferences.
There are two type of applications for “slide show” at least. One is desktop background, and the other is screen saver. On “screen saver” the slides SPAN three monitors, and, thus, are mostly off the screen. How can I get it to FIT on all applications?
Even with it disabled in the power settings, my background still automatically changes and it’s really annoying. Especially since I have one vertical display, so everything gets cropped all terribly when it switches to a widescreen image, and vice versa on the other monitor when it gets a portrait.
Why isn’t there a “Change picture: [NEVER]” option? I want to choose how to personalize my own computer, not let Microsoft decide.
I recently upgraded to windows 10 from 8. when it was running on 8 I paid to upgrade windows solitaire collection to stop the adverts. now i’m being asked to pay again to get something I already paid for upgrade to premium solitaire collection. why?
No you can’t set.
Can I set the speed of the slideshow?
take all the pictures from the theme put into a folder and point the slideshow to that folder
This unfortunately does not address my problem. I have recently installed Windows 10 and wish to have the background as one of the Windows themes operating as a slide show. However although I can do this with my own photographs I cannot do it with any windows theme. It will only allow the slideshow option with my own photographs. The windows theme will provide a fixed background, which can be changed occasionally manually but the slide show will not work. Is this a known fault or is this a peculiarity of my laptop. I would be most grateful if you can solve this annoying feature.