File History is a significant tool incorporated into Windows 8 in order to create aggregate backup files via automatic mode. It performs similar Windows Restore point and permits you to restore your personal documents, desktop, important data, favorite folder backup etc in another mass storage devices (USB Pen drive, USB Hard disk ) or network locations. Although recovery software is also used to perform restore action yet access to file history tool is a simple process in Windows 8. In this post, you will go through a comprehensive compilation of Windows 8 File History Backup.
File history recognizes the correct file version and restores it only at genuine locations. It also controls backup operation and permits you to handle it with file versions. File History tool is designed to create a regular backup of your favorite folders, contacts, Desktop, data (Videos, Images, MP3, and My Documents History). Now we will elaborate the process of tweaking Windows 8 file History Backup and Restore.
How to create Windows 8 File History Backup
At first, you have to start the File history in Windows 8.
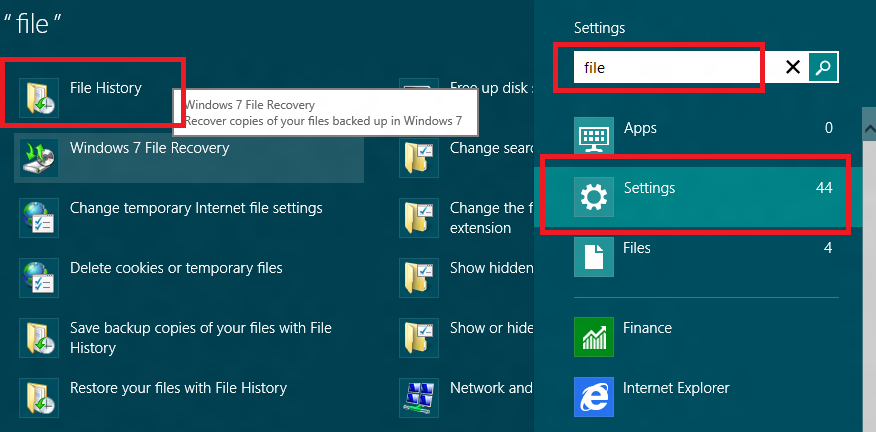
- Click shortcut Windows Key + F to launch the Apps Search box. Now click on the Settings button in the right panel.
- Type File in the blank search box.
- It brings the list of search results on the left side. Click on the option File History.
- File History dialog box appears in front of you. You can create file History backup in either external device or remote network drive respectively. If you choose USB drive to store the backup, click on Turn on to enable File History feature.

- You may configure settings in file History dialog box by click on the Advanced Settings in the left panel.

- Although File History tool searches only USB drive default yet you can also set the network location drive to store backup files. So click on the Change drive link in the left pane.

To Perform Restore action from Windows 8 File History Backup location
In the File History dialog box bottom pane, an important option called Restore Personal Files is present. This option is used to restore from genuine locations after checking and selecting correct file versions.
Now insert backup stored drive (USB Pen drive or USB hard Disk) in your computer.
- Click on Restore Personal Files and choose desired folder or libraries to perform restore actions.

- Before starting the Restore process, you have to set the restore output locations in either desktop or on computer local drives.
- Click on the Settings button which is located on the top side.
- Choose the button Restore to determine the output location.

- Identify the specific file version (libraries or file folder) and tap on the Restore button on the bottom navigation pane to start the restore action.


Store Windows 8 File History Backup in local drive from File History –
Windows 8 File History tool recognizes only the external drives (USB pen drive or hard disk) to store the backup. But you have no external storage device this time, so configure any local drive (D: drive of computer partition) to set it up as a backup storage location in the File History.
- You need to Enable drive sharing for the drive of your choice. So input a right-click on the drive in the Explorer and pick the option Share with from the drop-down menu and hit Advanced Sharing.

- Now click on the Advanced Sharing button inside the opted drive Properties dialog box.

- Check the small box facing Share this folder and write the share name as Backup and then hit on Add button.
- Now bring a click into effect on Permissions button.
- A new dialog box titled Permission for Backup surfaces. Here check all three boxes – Full Control, Change and Read.
- At last, click on Apply after then OK button.

- If drive sharing has been completed on your computer then open File History dialog box.
- Click on the Change Drive option from left panel.

- Now tap the Add network location and find the network location of the opted backup drive. Click on the OK button.

File History feature acts are used to store the regular backup of your computer in easy modes and permits you to verify and restore original file versions from backup locations.