Turn ON and OFF Windows Defender Notifications on Windows 10. – Although a number of antivirus software are available in the retail market, Windows operating systems are already equipped with an inbuilt antivirus solution. This solution is none other than Windows Defender.
By default, Windows defender stays around in turned ON state until you run an outsider antivirus software. Windows defender sometimes does not recognize if new antivirus software is installed. In this circumstance, or even when you oppositely don’t prefer windows defender to safeguard the machine, you manually switch it to OFF condition.
Windows Defender ejects notifications about certain events itself. If there is any notification, it means there needs to be some user interaction with the problem to rectify it. With Windows 10 particularly, the Windows Defender also carries a characteristic titled ‘Enhanced Notifications’ which arrive even when there are events running internally that are not hazardous.
This feature though very safe but as there are frequent notifications, it seems to be very annoying at times. Windows 10 has more than just one way to turn OFF these notifications.
How to turn ON and OFF Windows Defender Notifications on Windows 10
Method 1 – Using the Settings Application
Step 1 – Press Win Key + I and launch Settings home page.
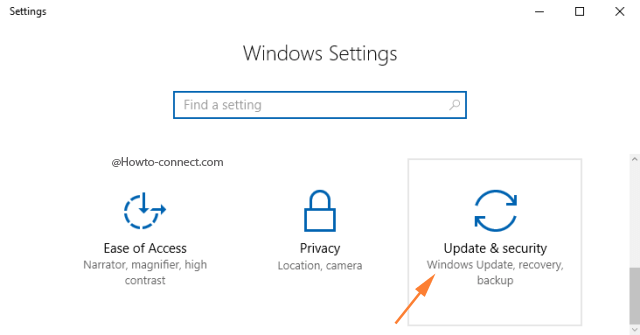
Step 2 – Choose the last icon, Update & Security.
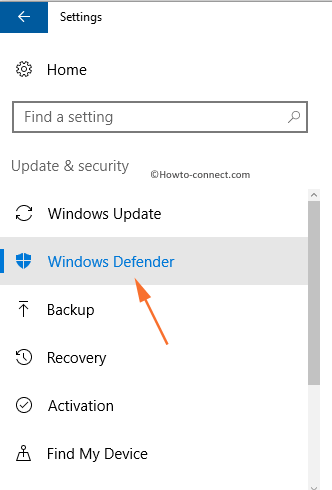
Step 3 – Now, click Windows Defender which is available in the left pane.
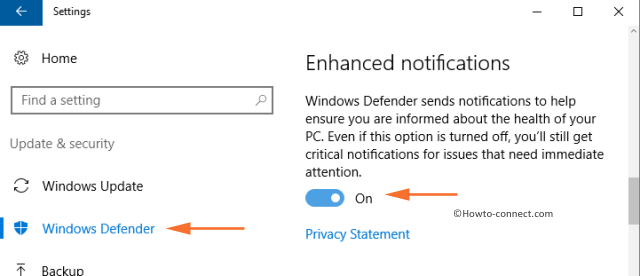
Step 4 – On the right panel, find Enhanced notifications. Use its toggle switch to either turn the notification ON or OFF.
Method 2 – Using Group Policy Editor
Using the Group Policy is the best option to control the Windows Notification. This is because it gives us extreme control over the program and the options are available to us in a very simple and straight-forward way.
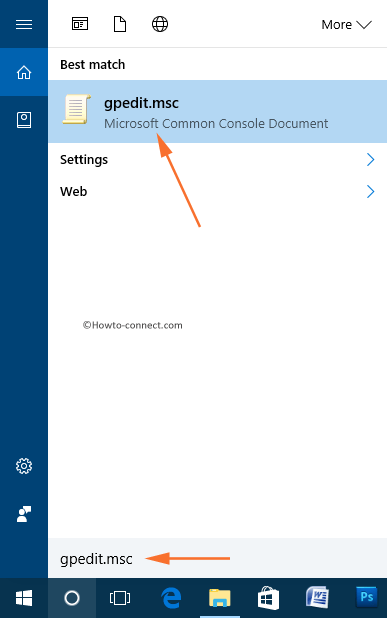
Step 1 – Tap on Windows key and start typing the code gpedit.msc. As a result, Cortana will show the same command on the top, click on it.
Step 2 – Now select the options as mentioned in the Group Policy Editor interface:
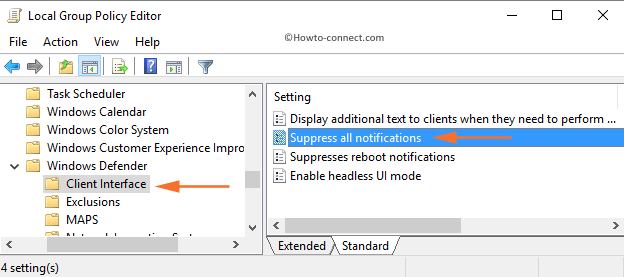
Computer Configuration > Administrative Templates > Windows Components > Windows Defender > Client Interface
Step 3 – On the right panel of Client Interface, locate and double-click Suppress all notifications setting.
Step 4 – This will open up a new window, where you can see three radio buttons on the left portion.
Not configured – This is the default option. Select this policy to specify if you desire Windows Defender notifications to display.
Enabled – If you choose this option, Windows Defender notifications will not come up anymore.
Disabled – This is same as the first option, Not configured. With this option, Windows Defender notifications will show on clients. If you select this option, Windows Defender notifications will come into view.
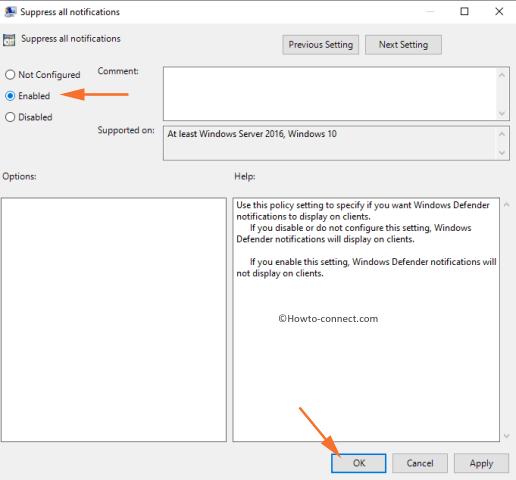
Step 5 – Depending on your requirement, choose any option and then click Ok to effectively manages to Turn On / Off Windows Defender Notifications on Windows 10.
Method 3 – Using Registry Editor
Using this advanced method also, users can handle the notifications of Windows Defender. This method is little similar to the Group Policy.
Reference – How to Enable Windows Defender Via Registry Editor Windows 10
Step 1 – First of all, launch taskbar search and start typing the code regedit. The result will display regedit with its icon on the top, click on it.
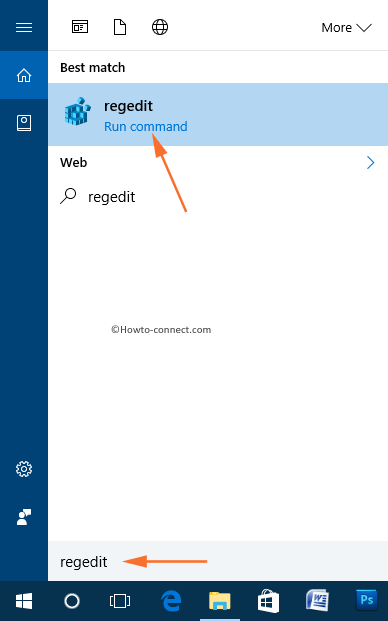
Step 2 – Affirm the UAC prompt by clicking on the Yes button.
Step 3 – Now, navigate to the following key as mentioned.
HKEY_LOCAL_MACHINE\SOFTWARE\Policies\Microsoft\Windows Defender\UX Configuration
Step 4 – Create a key if it is not present already. For instance, if the key UX Configuration is not there, then quickly generate it. Hence, right-click on Windows Defender key, choose New and click Key from the submenu. Now, name this key as UX Configuration.

Step 5 – Next, move to the right pane of UX Configuration. There, locate an empty space, do a right-click and point to the option New. A submenu will pop up, click DWORD (32-bit) Value.

Step 6 – Now, name this DWORD as Notification_Suppress and then double-click on it.
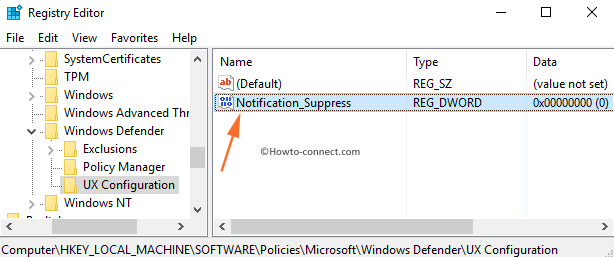
Step 7 – An Edit box will appear, and by default, the value for this DWORD is 0. Set any of the below numbers as Value data, depending on your requirement.

0 = Turn On Windows Defender notifications.
1 = Turn Off Windows Defender notifications.
Therefore, Notification Suppress registry key effectively manages to Turn On / Off Windows Defender Notifications on Windows 10.
Conclusion
Now, apply any of the methods and have your own control over the notifications. Whatever may be your choice, the software will be active in the background. You may always look for the critical events and unblock the file that was downloaded for instance by going into the quarantine section.
FYI
The path, in this article’s instructions above are as follows: Computer Configuration > Administrative Templates > Windows Components > Windows Defender > Client Interface
In my version of Windows 10 ENT 21H2 x64, the path is as follows: Computer Configuration > Administrative Templates > Windows Components > Microsoft Defender Antivirus > Client Interface
Kind regards