XFINITY WiFi is Turkish company that provides fast internet access (From 10 to 400 MBPS) through hotspot. They offer the network to both of customers and non-customers as well with safety and advanced security features. We will cover the ways to get connected with XFINITY Free WiFi and fix if any issue occurs.
How to connect with XFINITY Free WiFi in Windows 10
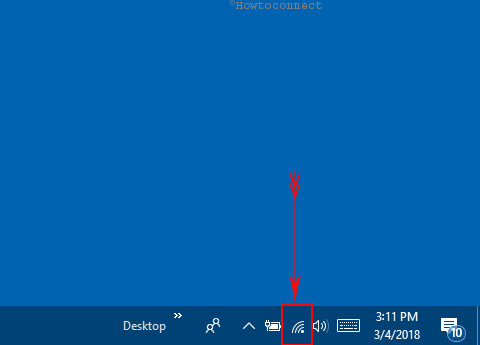
1. From Action center
Once you enter the range of Xfinity WiFi, your device will include its SSID in the list of available network’s flyout. Follow the instructions in order to connect –
Step-1: Perform a click on the Network icon in Action center from the distant right of the taskbar.
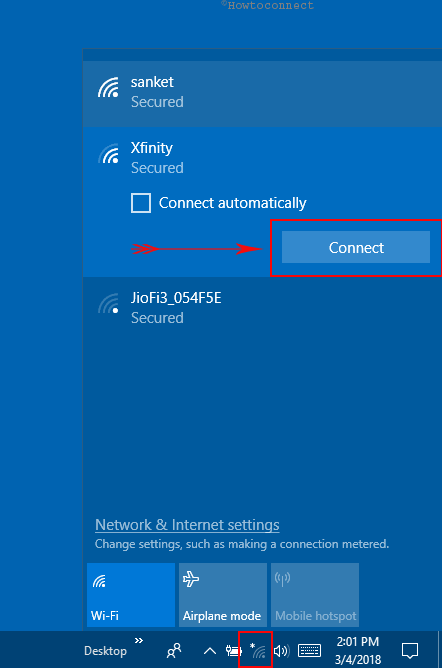
Step-2: Select Xfinity WiFi from the list of available networks and click it.
Step-3: Now, press the Connect button from the details pane. In a while, your system will identify the IP address and get connected to XFINITY Wireless Gateway.
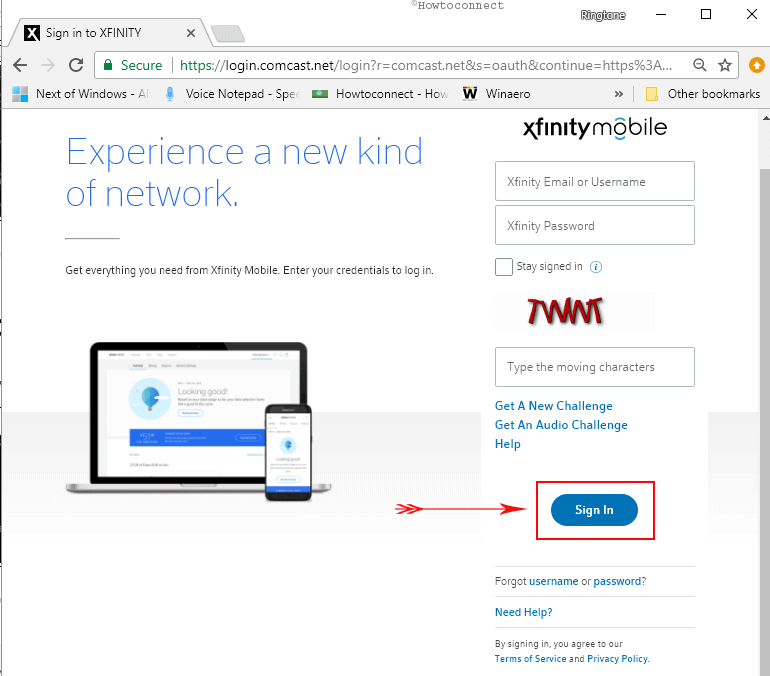
Step-4: Now open a web browser and allow the XFINITY WiFi login page to appear. Type username, password, device name and press Sign in button. You will be taken to XFINITY homepage directly. Enjoy browsing
Connect XFINITY Free WiFi from Network Connections window
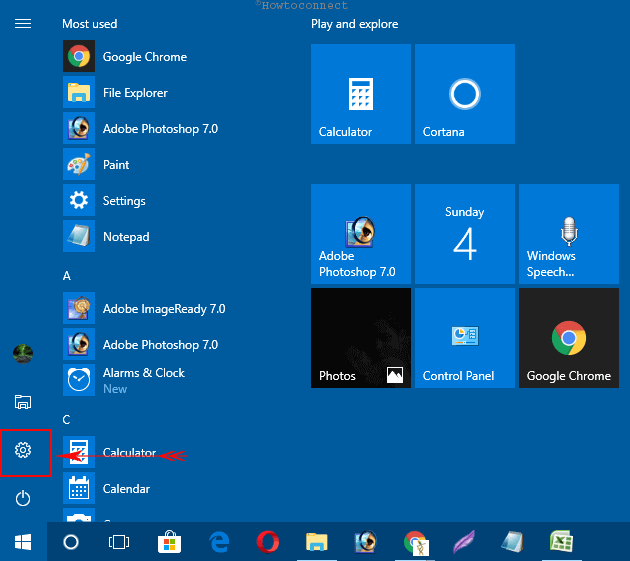
Step#-1: Open the start menu and make a click on Settings cog.
Step#-2: On the default Windows Settings app, select Network & Internet.
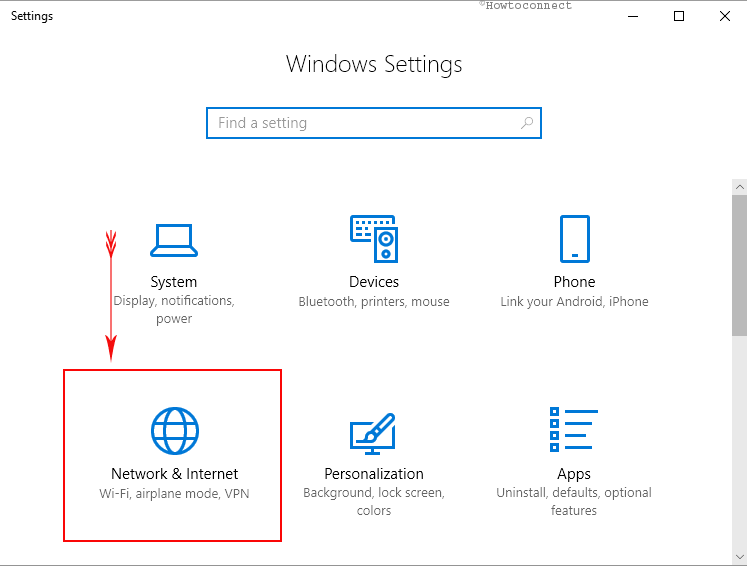
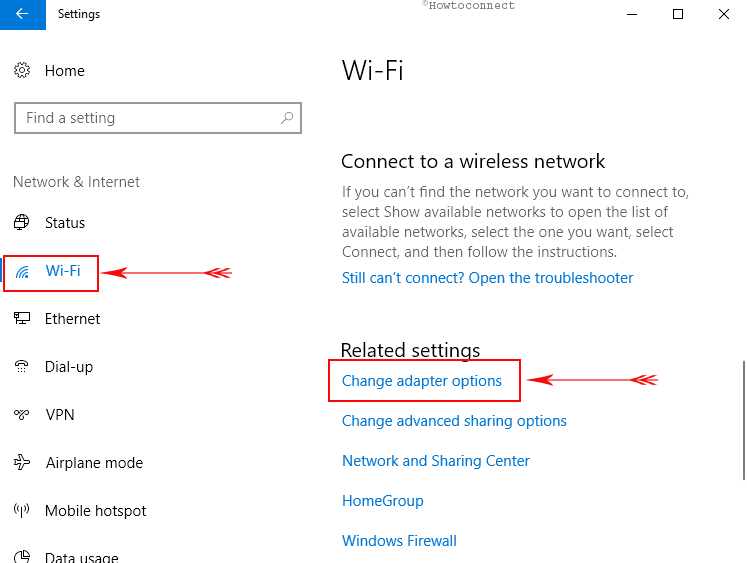
Step#-3: Click on Wi-Fi from the left pane and jump to the corresponding right side. Scroll down and perform a click on “Change adaptor options”.
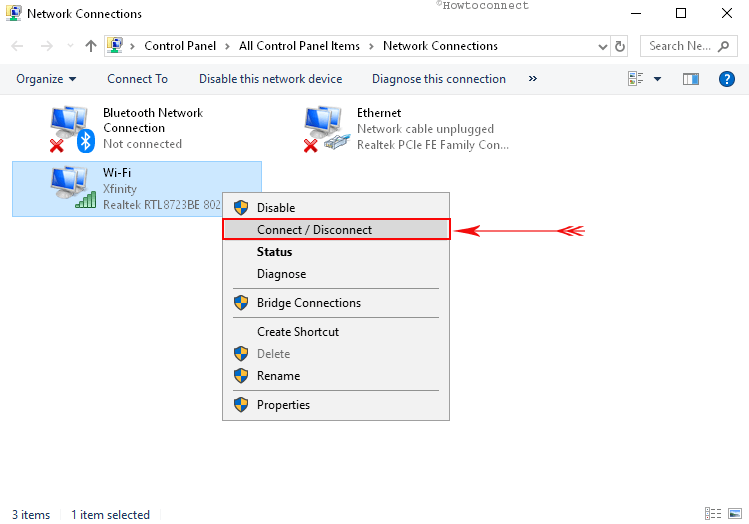
Step#-4: Once guided to Network Connections window, make a right click on XFINITY WiFi thumbnail and select “Connect/Disconnect” option.
After establishing a connection, it’s time now to Sign in to XFINITY Free WiFi.
Connecting XFINITY Free WiFi using location search
- Open the Internet Browser and visit Xfinity website.
- Scroll down to reach “Two easy ways to find hotspots” and make a click on “Interactive Map”.
- Type the name of your area in location search at the top left corner and hit the “Go” option.
- Select XFINITY WiFi from the search result and it will be automatically connected if you are verified.
Note- You can also use the alternative way of downloading app location right beside “Interactive Location” option. You need to provide your credentials in the app. Instead, when you are a new user and don’t have a username, you can add by verifying phone number through this link.
Sign in to XFINITY Free WiFi
- Launch the Internet browser and you will be straightway guided to XFINITY Free WiFi login page if you have connected to it.
- Provide the credentials here and in the last section, put the name of the device you are logging in.
Note- If you do not have the username and password, you need to create one following this link.
- Finally, carry out a click on “Sign in” option from the bottom to continue.
With approval checking all the credentials, you will be guided to the XFINITY Free WiFi homepage. Therefore, you can now start experiencing this and browse Internet from here.
Using XFINITY WiFi Windows connection manager
In order to have a better experience with XFINITY Free WiFi, you can bring Windows connection manager into practice. This will allow you to connect it automatically with more secure way.
If you have the connection manager already and signed from there, your device will automatically connect with the Private home network when at home.
Some people have filed complaints that while connecting with Home network, they have failed to do so. It finishes up with the error message like- “can’t connect to this network”. In this case, we recommend you to follow the below guidelines and troubleshoot the problem.
How to Fix XFINITY Free WiFi issues
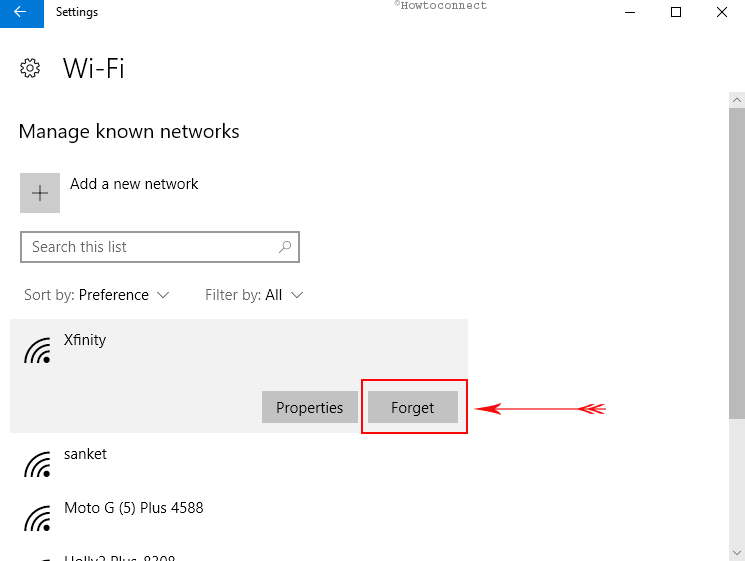
Launch the Windows Settings app with Win+I hotkey and navigate to “Network & Internet” section.
Choose Wi-Fi from the left flank, bounce to the adjacent right side, and then hit the link Manage known networks.
Do a click on the Xfinity and Select “Forget” from the expanded pane.
Now go to the network flyout and connect Xfinity again.
This might resolve your problem regarding failure to connect to the Private home Wi-Fi network.
Such easy to XFINITY Free WiFi How to Connect in Windows 10