Instructions here will help you with 13 Ways to open Magnifier in Windows 10. The main work of this tool is to enlarge a part of your computer screen. If your eyesight is weak, this app will be pretty useful for you as it allows to make text, images and other things bigger. Using Magnifier tool is easy because you don’t have additional pressure to download it. All you need to do is launching the app and then put your pointer to the specific space that you want to magnify.
Windows Magnifier is a built-in feature of Microsoft that belongs to Ease of Access category. It can be used in variegated modes and types such as Full-screen, Lens and Docked. For a better experience, you can customize its settings too. On account of that, you need to turn on Magnifier first and to do so there are multiple ways including keyboard shortcut, Windows search, Task Manager, Run Dialog box, etc. Let’s disclose them one by one.
Open Magnifier in Windows 10
Here are 13 Ways to open Magnifier in Windows 10 –
1] Use hotkey to quickly turn on Magnifier
The fastest method to get access to Magnifier is using keyboard shortcut. To do so, press Windows key and + at one go.

2] Via Run Dialog box
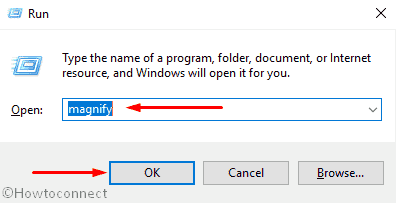
Step-1: At first, open Run Command using the hotkey Win+R.
Step-2: Upon appearing, type magnify in the text area and click the OK button.
3] Open Magnifier through Start menu
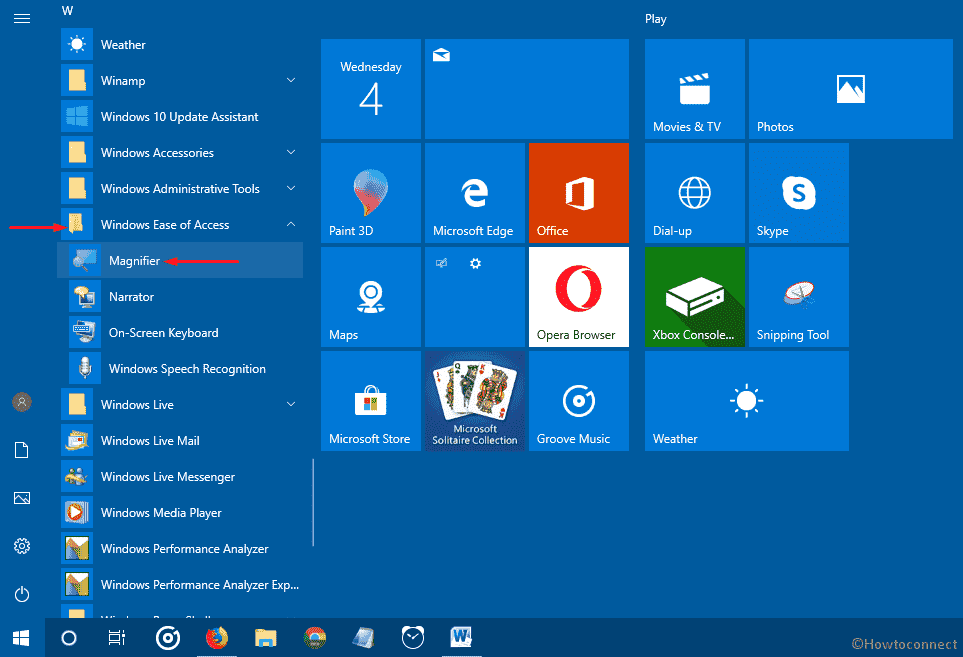
- Press Windows key to bring up Start menu.
- When it becomes visible, click the # icon from the top and then select W alphabet.
- Locate Windows Ease of Access eventually make a click on the arrow icon lying beside it.
- Once you see the expanded options, click Magnifier to open.
4] Make use of Windows search
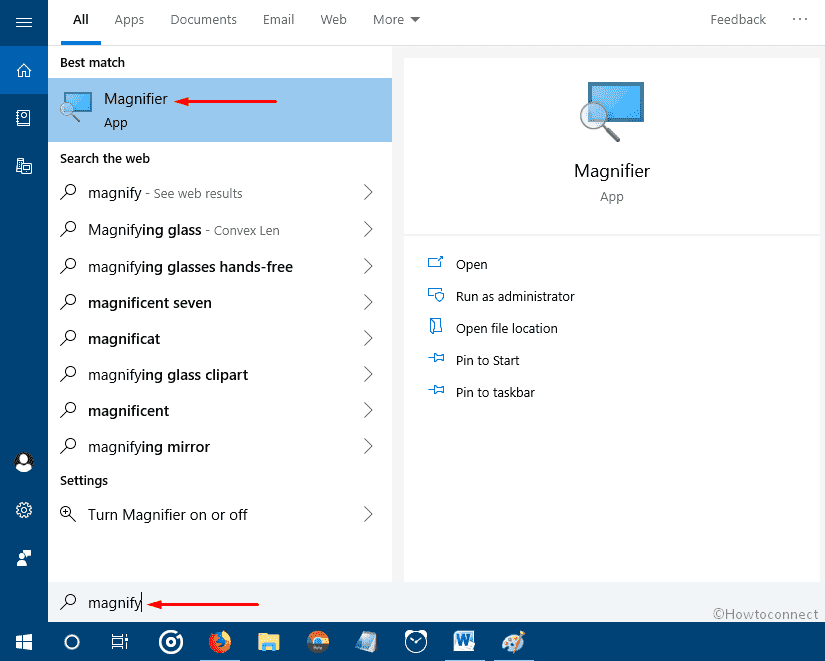
- Make a joint press of Win+S to call up Windows search.
- In the text bar, type magnifier.
- When the result shows up, press Enter from your keyboard.
5] Turn on Magnifier through Settings app
- Invoke Power user menu by pressing Win+X at once.
- Once it comes into view, click Settings.
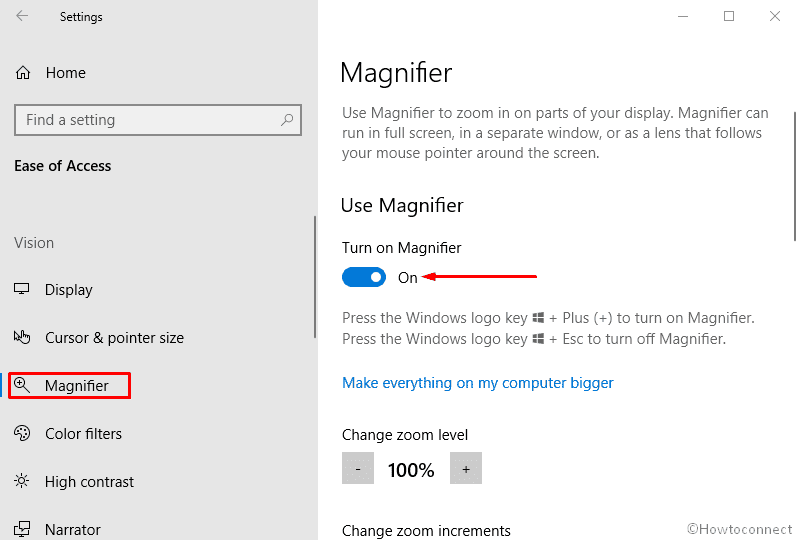
- Next, take your mouse pointer to Ease of Access and click on it.
- On the next page, select Magnifier from the left column and move to the adjacent right.
- Hover the cursor to Turn on Magnifier option and switch its toggle button to right side.
6] Create desktop shortcut
- Press Windows and Q keys together to view Cortana with text mode.
- Write magnify in the provided search bar.
- When you see highlighted Magnifier in the top, right-click on same and select Open file location.
- A new page will become apparent entitled Windows Ease of Access.
- From there again right-click on Magnifier and select Send to >>> Desktop (create shortcut) from the fly-out menu.
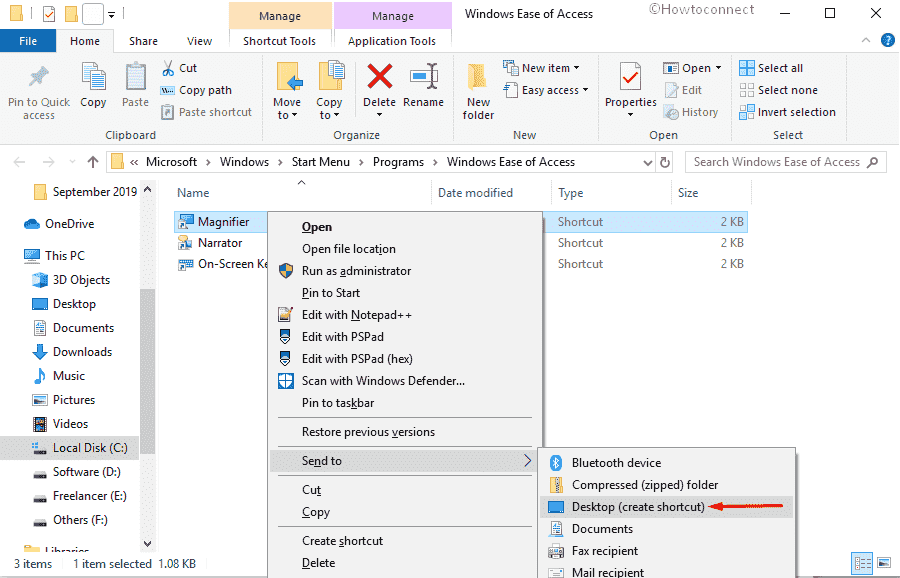
Hereafter, whenever you need to turn on Magnifier, go to desktop screen and double-click on the shortcut you made.
7] Assign hotkey to open Magnifier
- First of all, you need to make a desktop shortcut of Magnifier. For that, follow the above method.
- Thereafter, proceed to Desktop screen using Windows and D keyboard shortcut.
- Right-click on the formed shortcut and select Properties.
- On the running wizard, click on the bar assigned for Shortcut key.
- Type any preferred key and the system will add Ctrl+Alt before it. See snapshot –
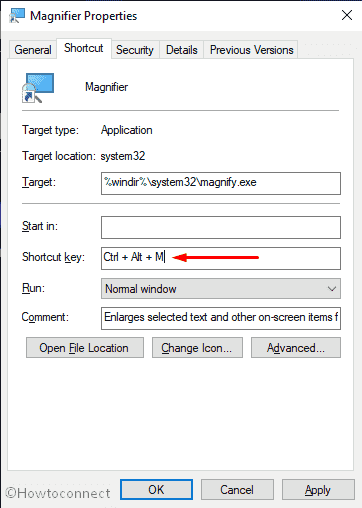
Once you are done, click the Apply button followed by OK so that you can use the generated hotkey.
8] By means of Command Prompt
- Open Run dialog box and type cmd in it.
- Click the OK button to open Command Prompt.
- When the black window arrives, type magnify there and hit Enter.
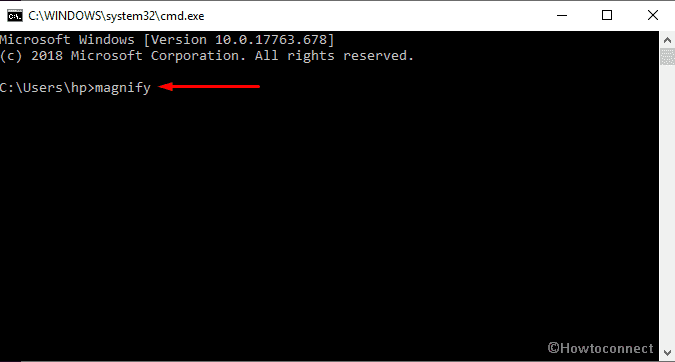
9] Turn on Magnifier herewith PowerShell
- Click Start button and write powershell.
- When the result turns up, click Windows PowerShell.
- Wait for few seconds and let PowerShell become ready to execute a command. Thereafter, type magnify after the blinking cursor and press Enter key.
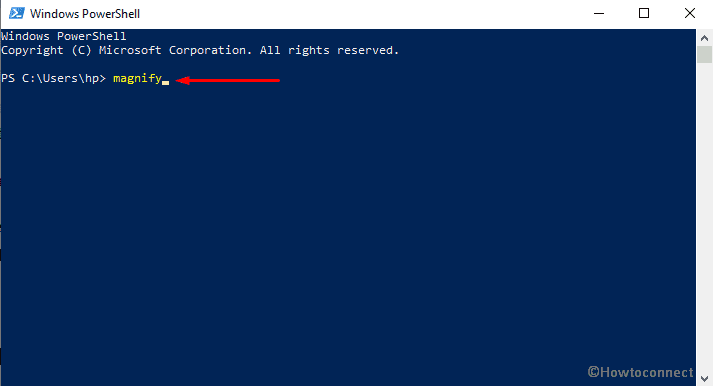
10] Take the help of Task Manager to open Magnifier
- Press Ctrl+Alt+Delete hotkey simultaneously and then select Task Manager from the appearing blue page.
- Once Task Manager rolls out, click on More details.
- From the Menu bar, click File followed by selecting Run new task.
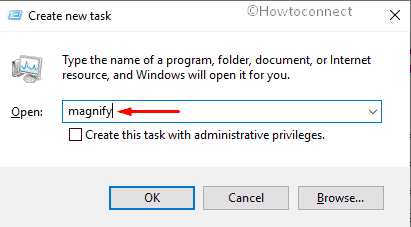
- On the next wizard, write magnify in the given field and hit Enter key to open Magnifier.
11] Go through Control Panel
- Click the Cortana icon located in the Taskbar and type control panel.
- Once the result comes into the sight, hit Enter key.
- Move the pointer to View by option and set it to Large icons.
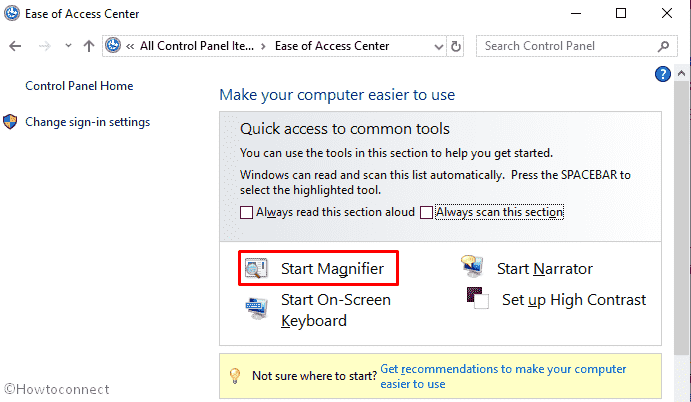
- Now, select Ease of Access Center.
- On the consequent page, click Start Magnifier.
12] Search into File Explorer to open Magnifier
- Launch File Explorer by clicking the folder icon from the Taskbar.
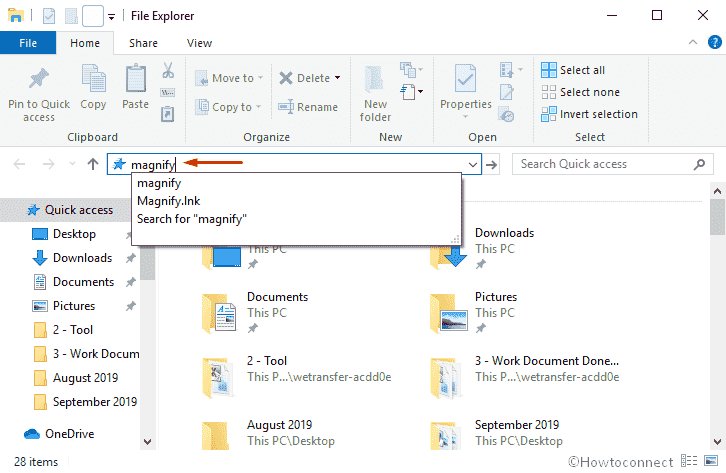
- Once appears, take your mouse pointer to the address bar and double-click on its empty space.
- Write magnify there and press the Enter key.
13] Take a look at System32 directory
Step#1: Make headway to desktop screen and double-click on This PC.
Step#2: On the subsequent page, surf the following directory –
C:\Windows\System32
Step#3: When you reach there, press Ctrl+F to active its search option.
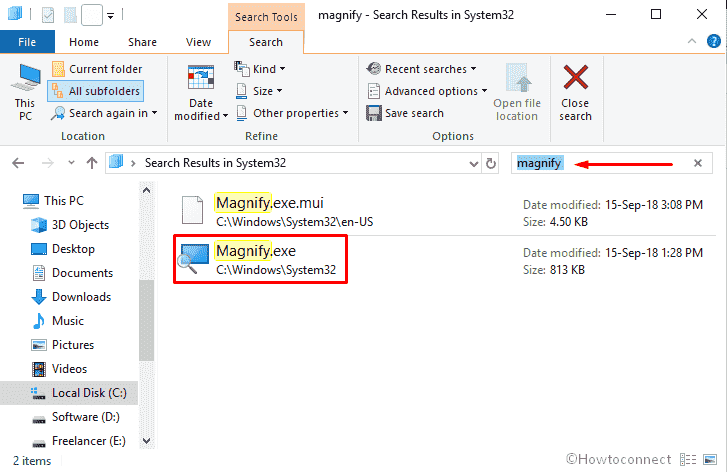
Step#4: Now, type magnify and let the system bring up result for you.
Step#5: When the outcome becomes visible select Magnify.exe to turn on Magnifier.
Methods:
1] Use hotkey to quickly turn on Magnifier
2] Via Run Dialog box
3] Open Magnifier through Start menu
4] Make use of Windows search
5] Turn on Magnifier through Settings app
6] Create desktop shortcut
7] Assign hotkey to open Magnifier
8] By means of Command Prompt
9] Turn on Magnifier herewith PowerShell
10] Take the help of Task Manager
11] Go through Control Panel
12] Search into File Explorer to open Magnifier
13] Take a look at System32 directory
That’s all!!
