Lock Screen timeout in Windows 11 is set to 60 seconds following the built-in configuration in Windows 11 so the display goes to sleep after the time frame ends. This is really a very short span so the screen soon extinguishes automatically if you step away from the workstation. Moreover, you have to enter the login credentials at the lock screen in order to turn the system active. Some users have found it really difficult to access Windows within this short time period. This write-up is basically for the beginners who opt to change Windows 11 Lock screen timeout so that it may not go to sleep or lock so quickly when staying idle.
Windows 11 users can change lock screen timeout and increase the interval. There are a couple of ways to do so from the Settings app, Control Panel, and tweaking the registry. All methods are described in the below segment.
Change Windows 11 Lock screen timeout
Here are 4 Ways to change Windows 11 lock screen timeout –
Way-1: Increase Screen timeout from Settings app
The settings app in Windows 11 is the best place to modify any existing system without making abnormal changes to the system. To change your computer’s lock screen timeout, access the Settings app initially. Here is how to do that –
- Press – Windows key and I.
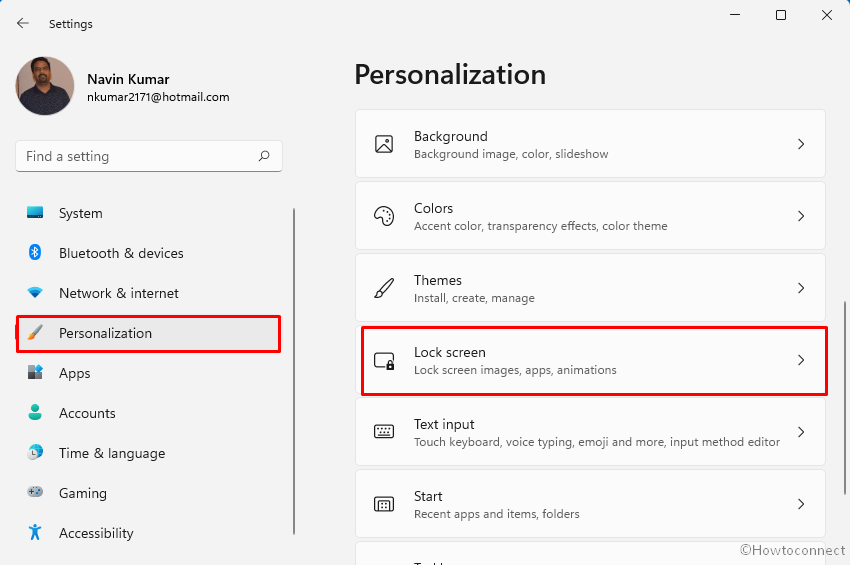
- When the Settings app opens up, click Personalization from the left pane.
- Choose Lock screen on the right side.
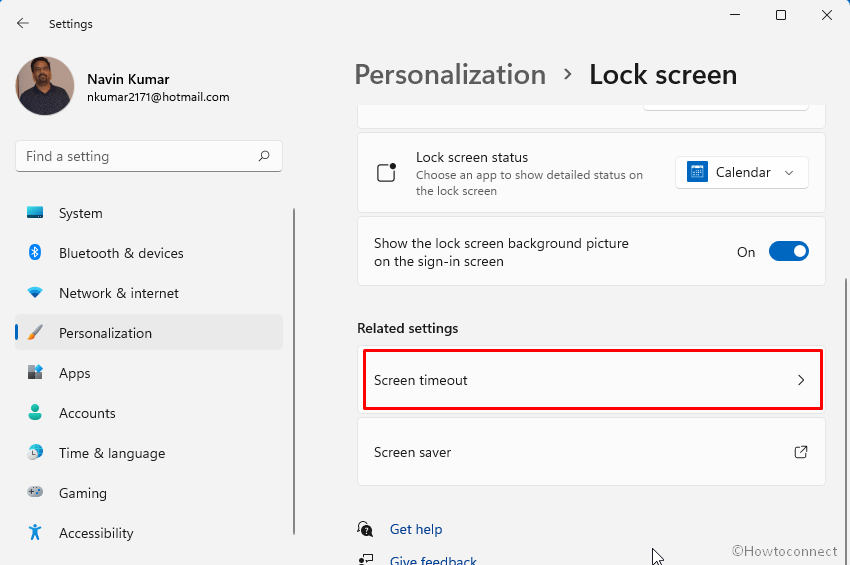
- Scroll down to the Related settings area.
- Click – Screen timeout from there.
- From the following window, head towards the Power section.
- Click and expand Screen and sleep.
- Adjust the areas cited here and change the screen timeout as you want.
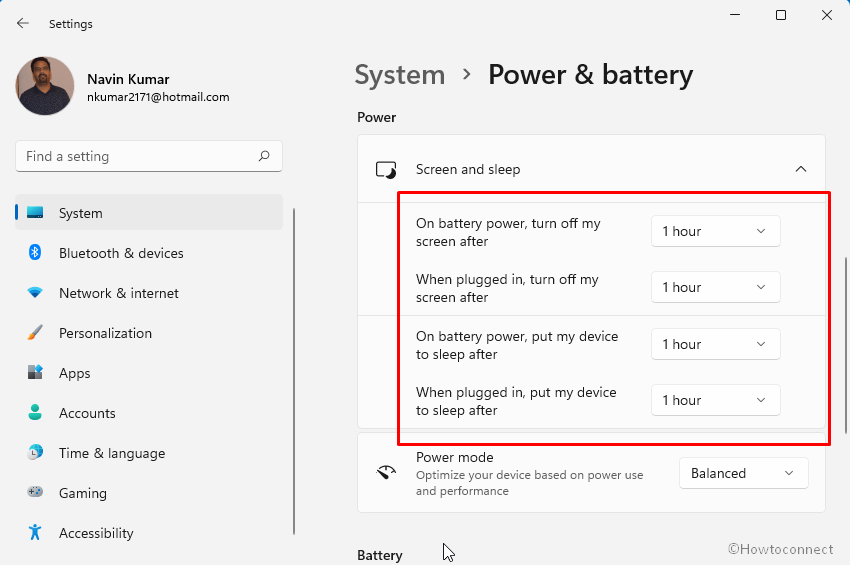
Note: Choose Never if you don’t want to lock the screen when the PC is plugged into the power. You can choose 5 minutes when the computer is On battery and you have to conserve battery life. All the adjustments should be carried out as per the need and keep a track of the laptop battery life.
Way-2: Tweak Windows Registry
Another easiest way to Change Windows 11 Lock screen timeout you need to make a tricky change in Windows Registry. This is a professional workaround and needs expert’s hands to accomplish. Any mistake in doing so will cause damage to the system which is irrecoverable. If you are confident enough, follow the below guidelines precisely to carry out this task –
- Press – Windows + R together.
- In the Run dialog box, type – regedit. You can see How to open Registry Editor in Windows 11 (Best Ways.
- Press – Enter key and Registry Editor will be opened.
- From the left side pane of following window, navigate to below path –
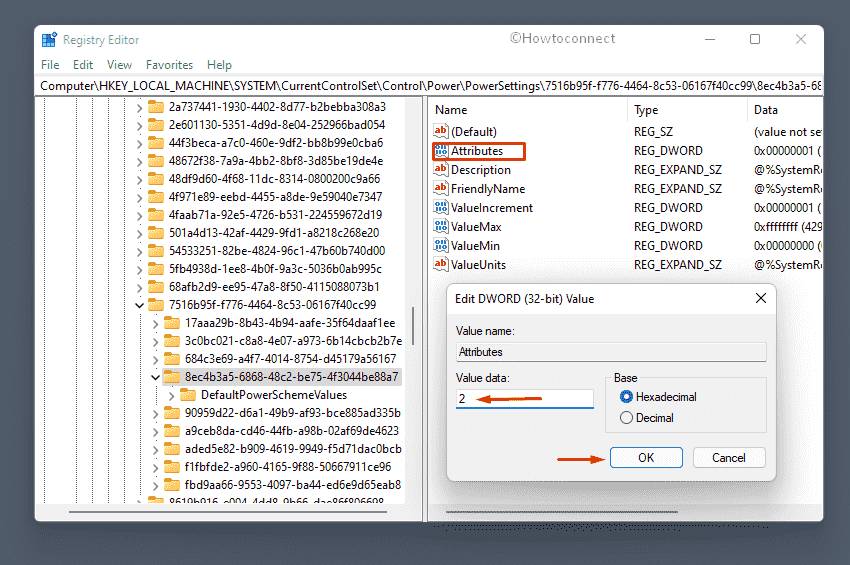
“Computer\HKEY_LOCAL_MACHINE\SYSTEM\CurrentControlSet\Control\Power\PowerSettings\7516b95f-f776-4464-8c53-06167f40cc99\8EC4B3A5-6868-48c2-BE75-4F3044BE88A7”
- Once reached, move on to the right side and double-click – Attributes.
- Set the value data to 2.
- Click – OK to make the changes.
All these settings will enable an option in Windows 11, that is called “Console lock display off timeout.” Having done the previous task, you have to customize this option to change screen timeout settings. Follow the next few steps now from Control Panel –
- Press the Windows key and type – control panel.
- Select the app from the best-matched results.
- When the app homepage is upfront, click – Power Options.
- Reach to your preferred power plan options and hit – Change plan settings.
- Click – Change advanced power settings from here.
- In this window, scroll down and expand – Display.
- When you will see Console lock display off timeout option, double-click the same to expand.
- Adjust the default time of 1 minute to any interval of screen timeout you want, in minutes.
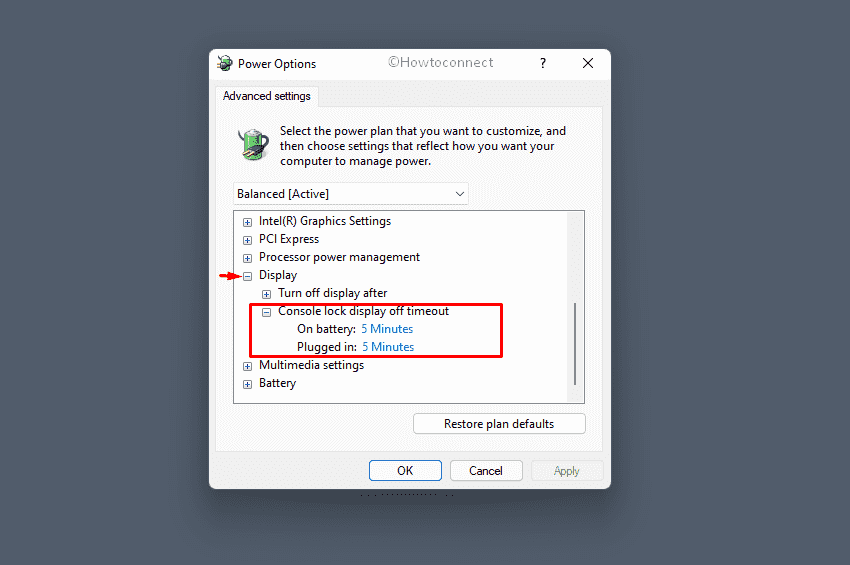
- Click Apply and then OK.
Way-3: Adjust Lock Screen timeout – cmd commands
Windows Command Prompt is a bit advanced utility to make changes to the system using suitable commands. Before applying an appropriate command line, you need to access the Elevated Command Prompt (with Admin Privileges). You can also Change Windows 11 Lock screen timeout by executing a command too. For that, follow the way –
- Press – Windows + S.
- Type – cmd using keyboard.
- When Command Prompt appears in the best match result, right-click it.
- Select – Run as Administrator.
- To allow User Account Control, click – Yes.
- After being guided to the black window, enter the below command –
powercfg.exe /SETACVALUEINDEX SCHEME_CURRENT SUB_VIDEO VIDEOCONLOCK 60
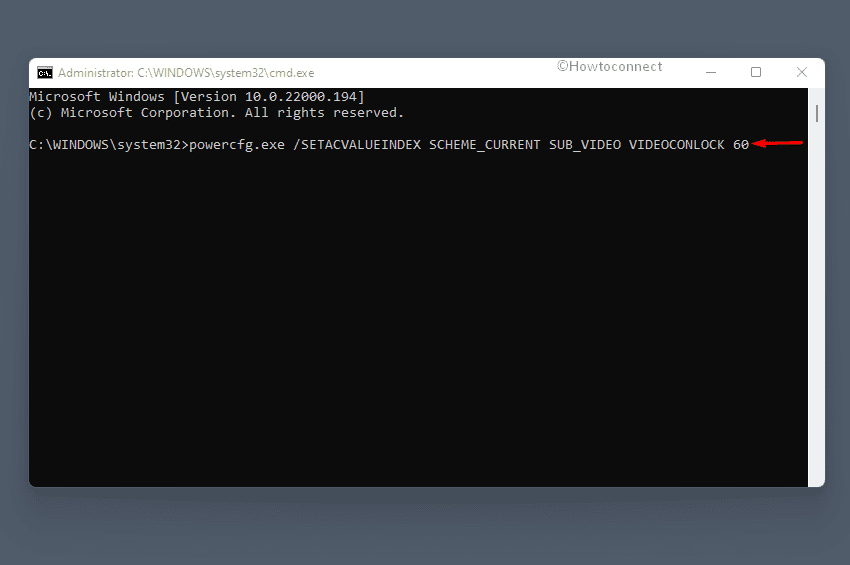
- Press – Enter.
Note – In the above command, we have used 60 seconds. Change this time as per demand such as for 5 minutes, type 300 at the end of the command.
- After that, insert the following command and press Enter key –
powercfg.exe /SETACTIVE SCHEME_CURRENT
- You can press Windows + L keys in order to check the newly adjusted settings.
Important: In the second step, we have used the command line tool for using the machine with AC power plugged in. If you opt to change the timeout for tablet or laptop running on Battery, replace /SETACVALUEINDEX by /SETDCVALUEINDEX and execute.
Way-4: Using Control Panel
Control Panel holds almost advanced options to make significant changes to the system. Rather than the Settings app, you can access Control Panel as well to make adjustments to default set up if you feel it easy. To modify Windows 11 Lock screen timeout from Control Panel, follow the below guidelines –
- Click search icon from the taskbar.
- Type – control panel.
- Hit – Enter key.
- When the app shows up, make sure the View by type is set to either Small icons or Large icons.
- Click – Power Options.
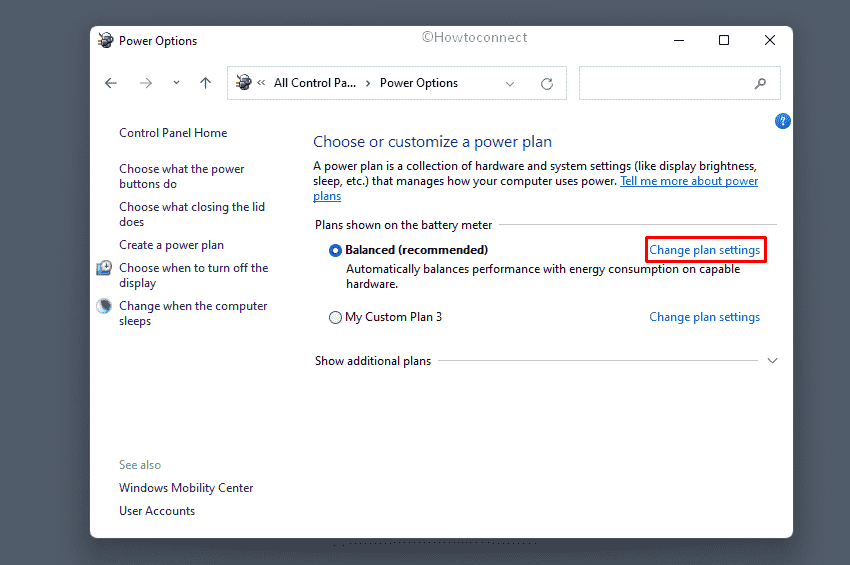
- In the following window, head over to Balanced (recommended) power plan.
- Click on – Change power plan settings link.
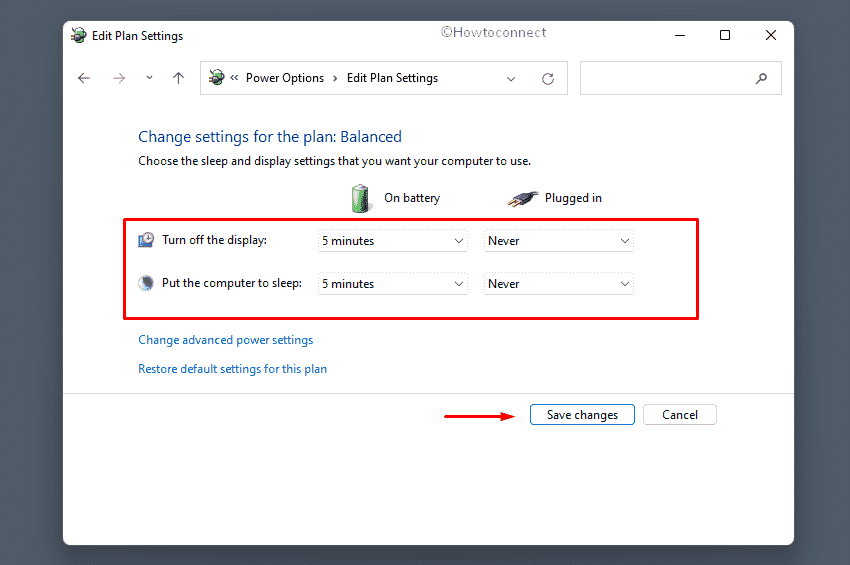
- Change Turn off the display and Put the computer to sleep options by clicking dropdown menu.
- Select – Never while Plugged in and choose 5 minutes when on Battery to save the battery life.
- Finally, click – Save changes button.
Methods list:
Way-1: Increase Screen timeout from Settings app
Way-2: Tweak Windows Registry
Way-3: Adjust Lock Screen timeout using commands
Way-4: Using Control Panel
That’s all!!