Procedures to connect to WiFi on Windows 10 are available here with clear-cut instructions. Windows 10 includes modern features and provides a different way from Windows 8 and 7 when you go to access internet.
The network flyout plays the main role to establish a connection to get data packets on your systems. But you can open this pane from various locations. In addition, you have the ability to do the same using command prompt pretty effectively.
List of Ways to Connect to WiFi on Windows 10 –
1. From Network icon on the Taskbar
2. Using Windows Settings App
3. Via Control Panel
4.Through Network Status Settings
Connect to WiFi on Windows 10
Before proceeding further, make sure to Switch on the Router and check the internet connection is okay. Here are the simple ways to Connect to WiFi on Windows 10 –
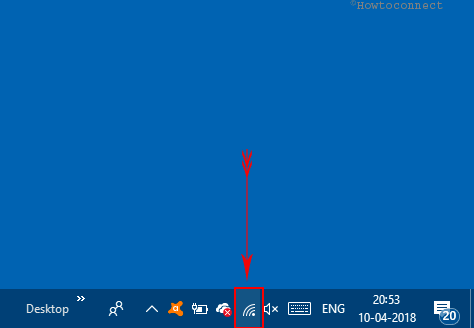
Way-1: The Easiest method – From Network icon on the Taskbar
Step-1: Make a click on the “Network icon” in the notification area of the taskbar to open the network menu.
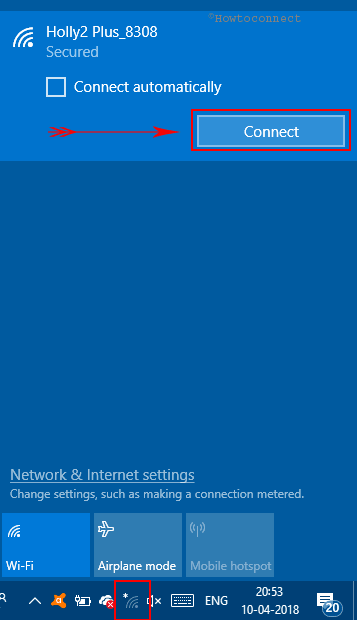
Step-2: Locate a network and do a click on it to expand the tray. Now press Connect.
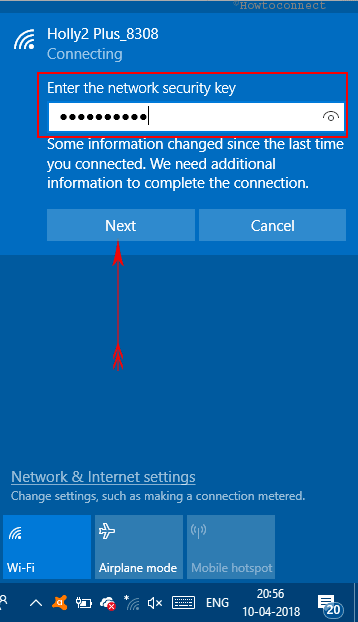
Step-3: If you are using the network for the first time the system will ask you to enter the Security key. So type the same and hit on Next.
Step-5: But you connect to a Known network you will enjoy the access without entering any key.
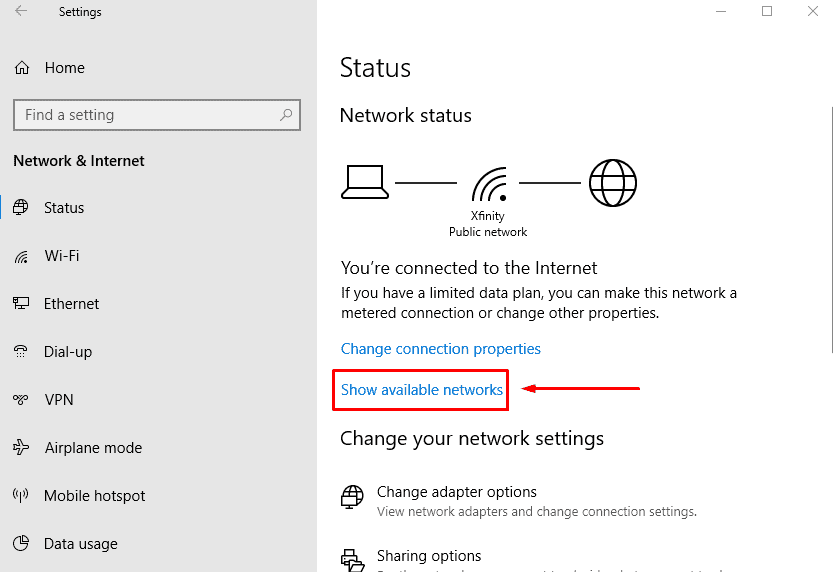
Way-2: Using Windows Settings App
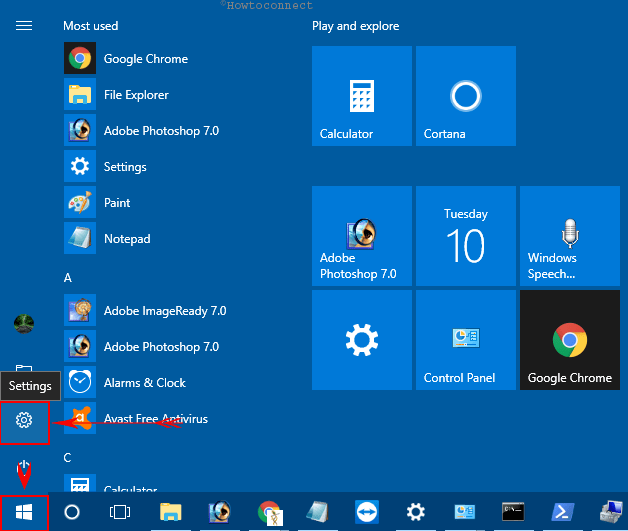
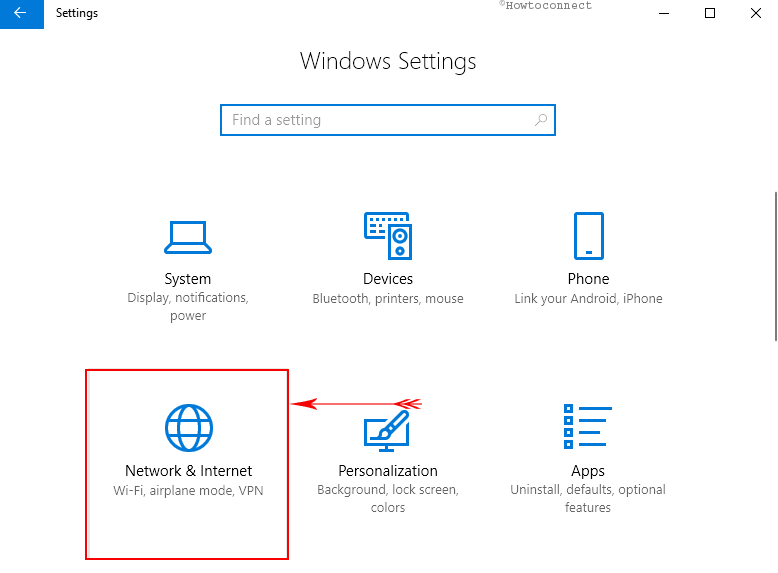
Step#1: Press the “Start button” and when the Start menu appears, perform a click on the Settings cog.
Step#2: Once you view Windows Settings App, select “Network & Internet“.
Step#3: On the next page, Select Wi-Fi from the left pane. Now jump aside to right side, and click on“Show available networks” link.
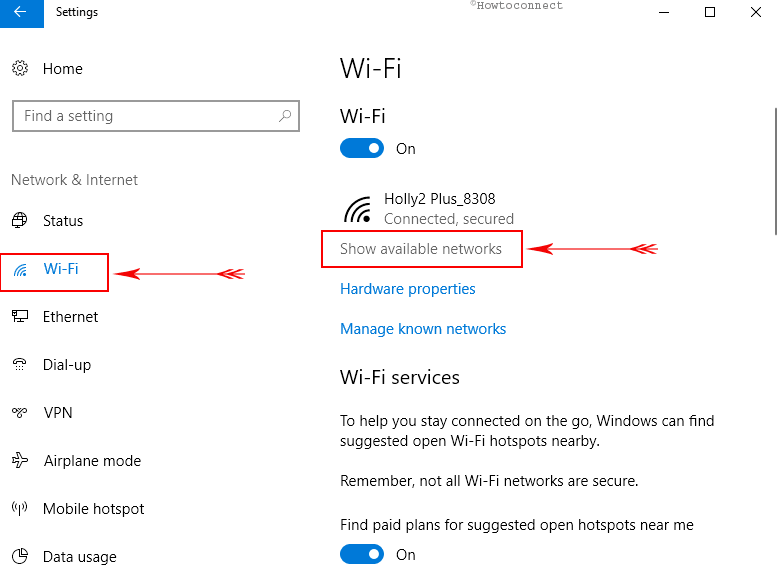
When available networks will appear at the bottom right corner, choose one to get connected (Follow Way-1).
Way-3: Via Control Panel
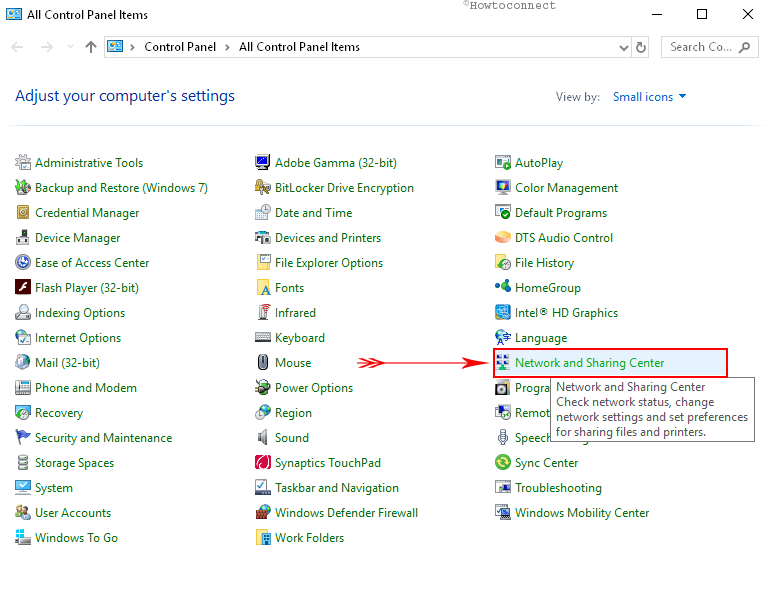
Click on the Start button, type cp, and then press Enter.
Once the Control panel appears, locate Network and Sharing center, make a click on it, and allow the window to be visible on the display.
Choose Change adapter settings option from the left pane.
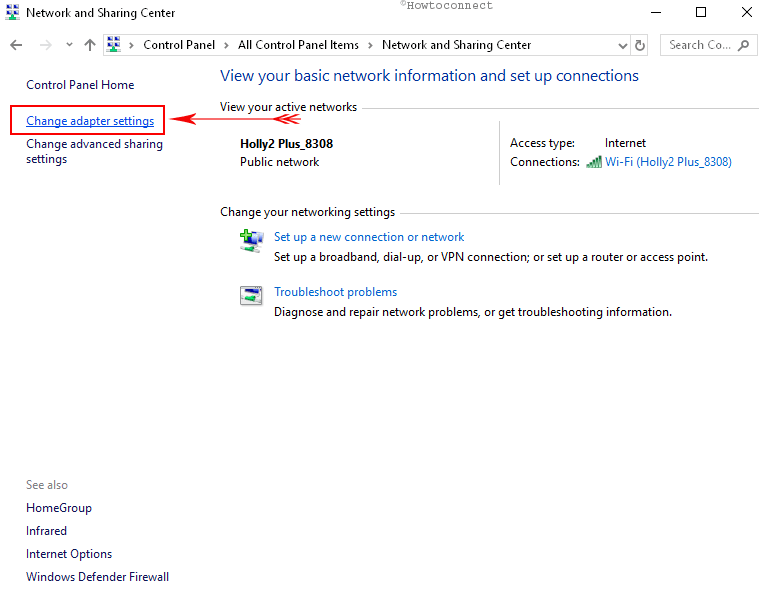
On the subsequent window, locate the WiFi adapter, from which you are going to access the internet. Do a right click and select, Connect / Disconnect.
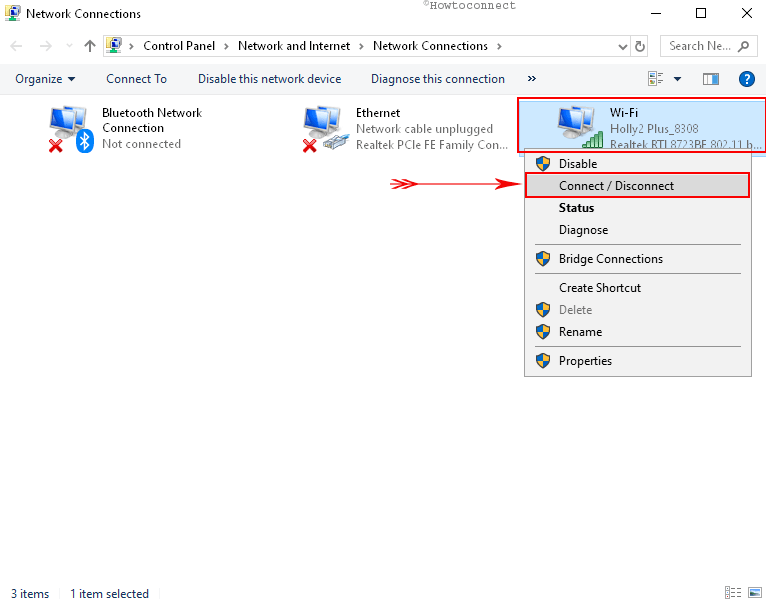
You will get the network pane appearing on the right bottom of the screen having a list. Now pursue the steps in Way-1
Way-4: Through Network Status Settings
Follow Way-2, Step-1 and 2, to reach Network Status Settings and go to the right pane.
Perform a click on Show available networks and allow the network flyout to appear. Select one and connect using the Way-1.
Note: – You can directly navigate to Change adapter settings window using shortcut ncpa.cpl.
That’s it. These simple ways would be helpful for you while connecting with Wireless network.