With Windows 10 Fall Creators Update (v 1709), the built-in Photos application has gained certain additional features in its list. You can now directly Add Slow-Motion Effect to Video in Photos App even without involving a third party program. Usually, any software that is used for adding slow motion effect to videos is too expensive as well as hard to afford. But with this default application, you can add this attribute easily along with viewing picture files.
In earlier days, people used to add the slow-mo effect in videos with the help of third-party utilities like Adobe Premier. So, with a view to allowing users to perform this work natively, Microsoft introduced slow motion feature in Photos app. The best thing about this is, you can see the video after adding effect before saving it. This will facilitate the users with finding further improvements. Today, in this tutorial, for beginners we present you a sequence of steps following which you can perfectly Add Slow-Motion Effect to Video in Photos. To avail this facility, kindly ensure to update the Photos app to its latest version. This version of the application is presently available for the users running Windows 10 Fall Creators Update.
Add Slow-Motion Effect to Video in Photos App Windows 10
Step-1: First of all, open File Explorer and go to the folder that contains the video file you prefer to add Slow-mo.
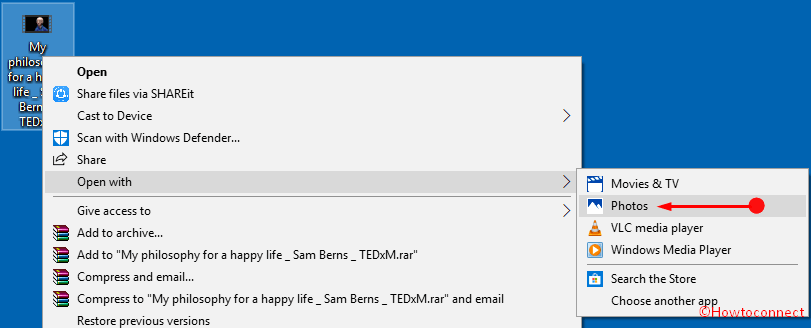
Step-2: Locate the video file and put a right click and select the option Open With. From the list of options look for Photos and click on it. This action immediately launches the video in the built-in app of Windows 10.
Step-3: Upon opening the file in Photos, click anywhere on the black portion to explore its options.
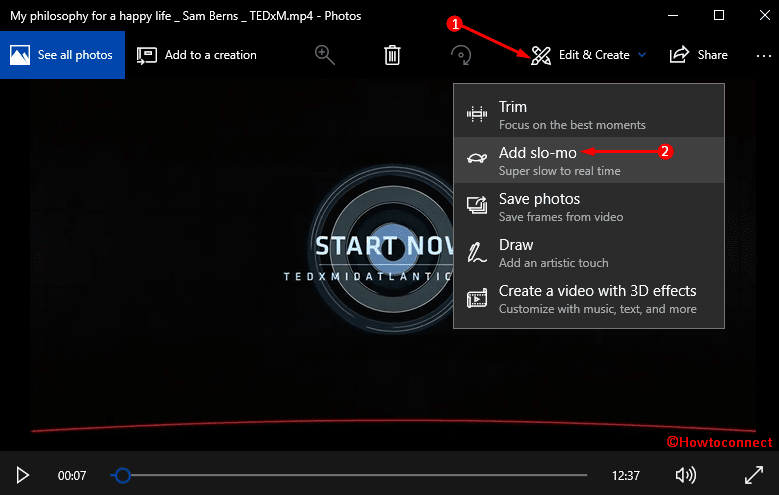
Step-4: Here, click on Edit & Create button to open a drop-down option list. Select Add slo-mo option from here. If you cannot find these options using this way, click on the 3 (…) dot option.
Step-5: Now, first, select the speed of motion using its slider that appears on top of the screen. Once you set the speed level, you should choose the portion where you want to apply this effect.
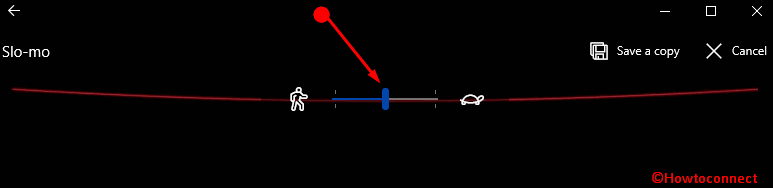
Step-6: Moving on, use the blue-colored sliders on the video to select the area where you want to implement it.
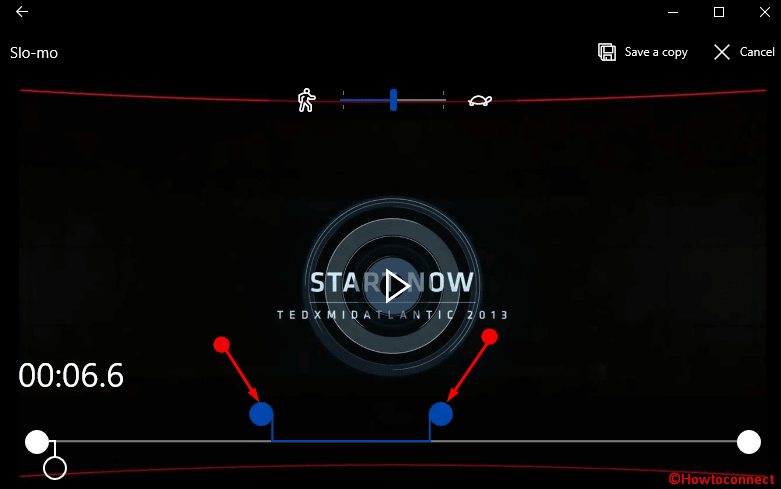
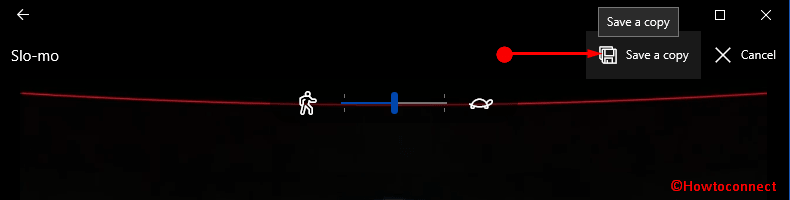
Step-7: Click on the Play button to preview the video with the slow-motion effect. Lastly, after reviewing the video and satisfactory edition, select the option Save a copy located at the rightmost corner. A new file will be saved in the same folder and won’t make any change in the original one.
Therefore, the new video with slow motion feature is ready for you. Open this one with your favorite video player and enjoy.
Photos app provides certain basic yet a decent range of editing tools. Along with the tools, it also contains interesting features. For example, it allows you to View Exact Duplicate Images as a Single File.
Conclusion
Slow motion feature was used first in the movie Matrix back in 1999. We got the taste of slo-mo and found it cool. With the advancement of technology, this one gained a new dimension. Using a third-party software for editing video and adding slow motion is costly. At the same time, we prefer to have everything on our computers nowadays. It’s a huge achievement of Microsoft to provide the users the feature in order to Add Slow-Motion Effect to Video in Photos App. The above guideline will be a great help if you are going to add this effect for the first time as well as all others.
I understand how you bookmark the slo-mo portion with the 2 blue sliders, but then what is the purpose of the white slider?