BitLocker commonly needs a security chip called Trusted Platform Module, popularly known as TPM on your PC’s motherboard. This chip generates and stores the encryption key that you use for decrypting the file. But if you proceed to encrypt the drive without TPM, the OS directs you to set a system policy. Fortunately, for the systems that don’t support the installation of this chip, Windows provides you an option to Allow BitLocker Without a Compatible TPM.
The problem is that some older hard disks don’t possess TPM chip and even some new ones also. This happens when the manufacturer prefers to keep the costs low. However, you can easily bypass this restriction of the chip and continue with the encryption process through Group Policy Editor. But before you head towards the steps ensure that your PC is not joined to a domain. This process works perfectly when you do it for your own computer. Note – BitLocker feature is available only on computers loaded with either Windows 10 Enterprise and Windows 10 Professional.
How to Allow BitLocker Without a Compatible TPM in Windows 10
Step 1 – Open “Group Policy Editor” to Allow BitLocker Without a Compatible TPM in Windows 10. To launch it, first, type in gpedit.msc on Cortana text box. Press Enter when the same command shows up as the result.
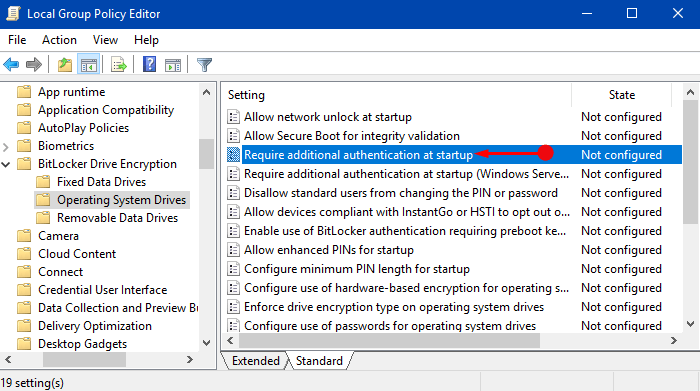
Step 2 – Navigate to the given path in the left sidebar of the window that opens up.
Local Computer Policy => Computer Configuration => Administrative Templates => Windows Components => BitLocker Drive Encryption => Operating System Drives
Step 3 – Now, shift to the corresponding right pane of Operating System Drives. Here, search for the setting namely Require additional authentication at startup and double-click it.
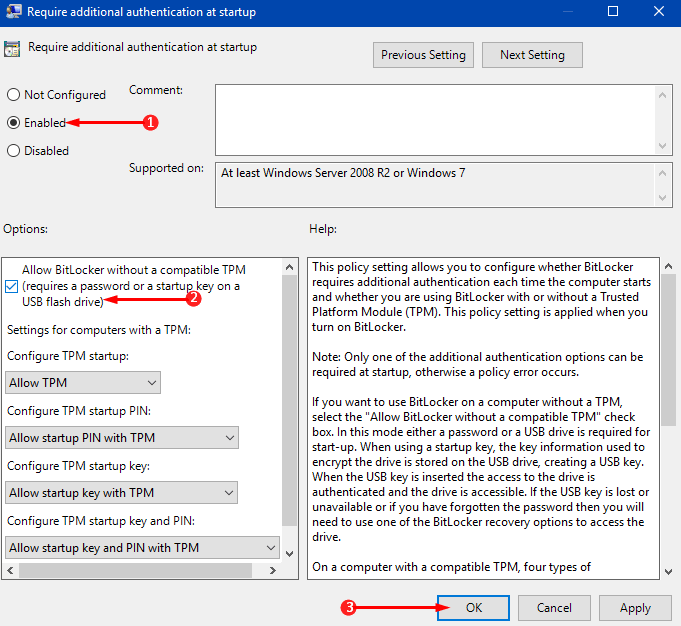
Step 4 – Moving ahead, click Enabled button. Also, ensure that the option “Allow BitLocker without a compatible TPM (requires a password or a startup key on a USB flash drive)” is selected (see screenshot). Lastly, click OK to implement the TPM modification.
For reference, you may like to follow our guide on How to Change BitLocker Password in Windows 10.
Setup BitLocker Without TPM
Step 1 – Once you make the above changes in the Group Policy, you have to enable BitLocker. To do so, navigate Control Panel => BitLocker Drive Encryption => “Turn on BitLocker” for the drive you want.
Step 2 – As you don’t have the TPM, it provides you two options – a) Insert a USB flash drive and b) Enter a password.
Step 3 – So, choose the option as per preference and continue to Encrypt Drive Partition using BitLocker.
You may find another guide interesting to read – How to Change Default BitLocker Encryption Method and Cipher Strength on Windows 10.
How to Know If Your PC Has a TPM
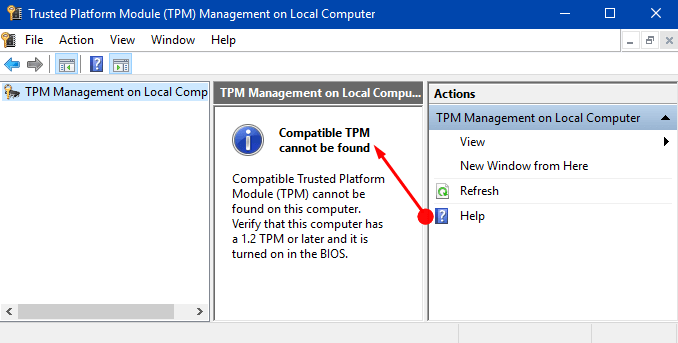
Step 1 – Type tpm.msc on Cortana and press Enter to launch TPM Management snap-in console. If your PC does not have TPM, then console shows that Compatible cannot be found (see screenshot).
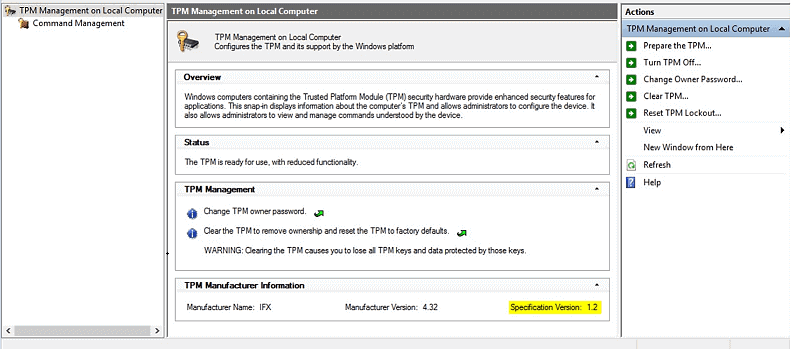
Step 2 – If the device has a TPM, you can see its manufacturer’s name, version, status and so on.
Conclusion
Hopefully, after following the above series of steps you can pretty much easily Allow BitLocker Without a Compatible TPM in Windows 10. However, when the PC boots, if you fail to provide password or USB drive, then BitLocker won’t be able to decrypt the drive. Hence, be careful with the password and enhance the security of your system to another level.