In Windows 10, sometimes you might encounter Firewall blocking printer issue. The problem commonly occurs because of harder security settings in this built-in protection tool. The configuration doesn’t Allow Printer through Firewall in Windows 10. In addition, this issue may also occur due to third-party antivirus or firewall software. The problem prevents you from running the printer on your desktop.
Windows Defender Firewall includes a number of security features to ensure the safety of your computer against dangerous malware attack all around. In Windows 10, the default setting of this application remains turned On. So, if the Windows cannot connect to the printer during set up, you need to add an exception for its application.
Ways to Allow Printer Through Firewall in Windows 10
Here is how to allow Printer Through Firewall in Windows 10 –
1] Through Control Panel
Step-1: Click on the Start button and type control panel. Press Enter.
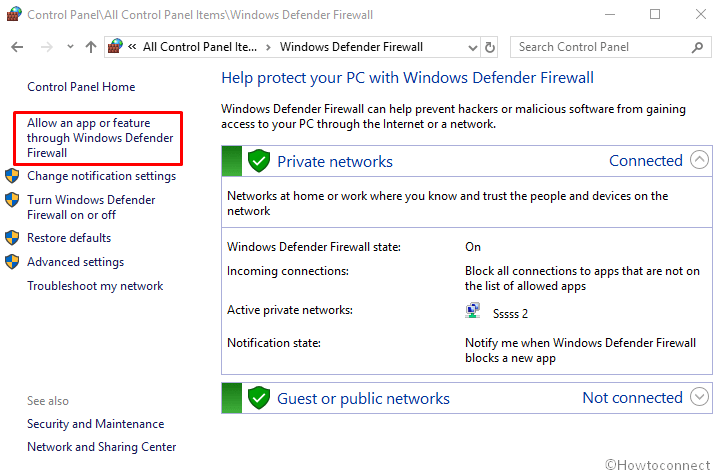
Step-2: Select Windows Defender Firewall.
Step-3: From the left panel of the following window, choose the link “Allow an app or feature through Windows Defender Firewall”.
Step-4: On the following page, click on the Change Settings button.
Step-5: Under, Allowed apps and features, a list of the program will prompt in a new window.
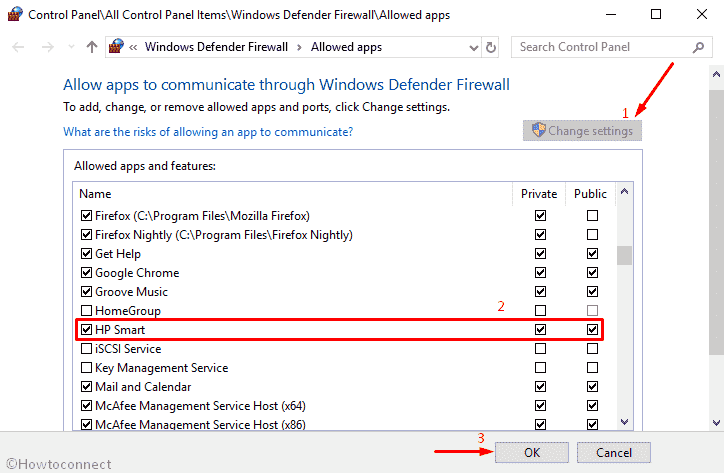
Step-6: Check the printer programs you want. Subsequently, under the Name section, mark checkbox ahead of the required program.
Step-7: This will Allow Printer Through Firewall in Windows 10. Also, mark the box for Private and Public network.
Step-8: Now, hit the OK button.
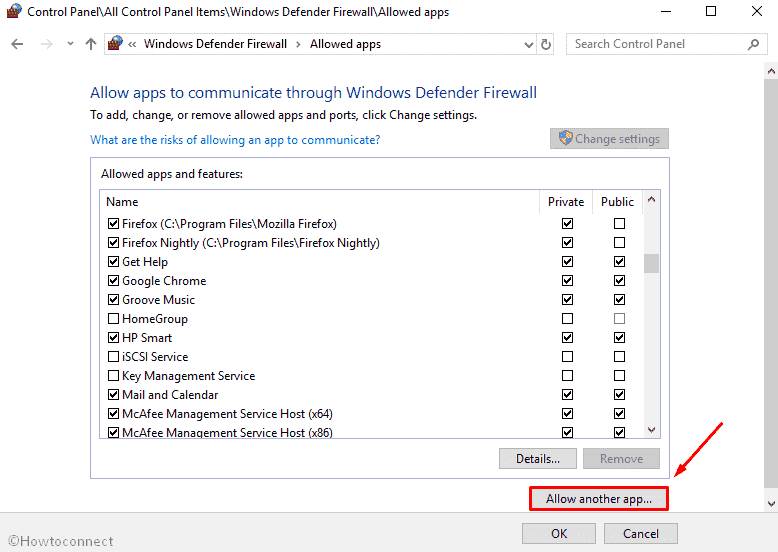
Step-9: If the required printer is not listed there, select the Allow another app button.
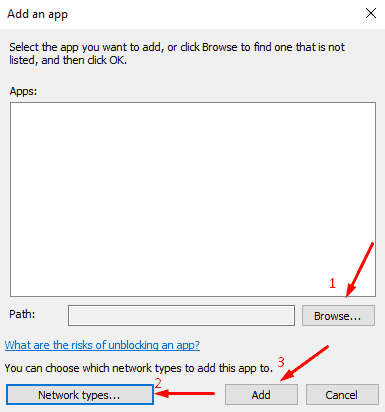
Step-10: A dialog will appear, hit Browse.
Step-11: Select the Printer software and click on Open.
Step-12: Now, hit Network types, and mark against both Private and Public networks.
Step-13: Click on Add and then OK.
Step-13: Make sure that the added application is now available in the Checkbox. Finally hit the OK button.
See – Allow Apps to Communicate through Firewall in Windows 10.
2] Through Windows Settings to Allow Printer Through Firewall
If the above method doesn’t work for you, follow the given instructions –
- Press Windows key+S and let the Taskbar search appear.
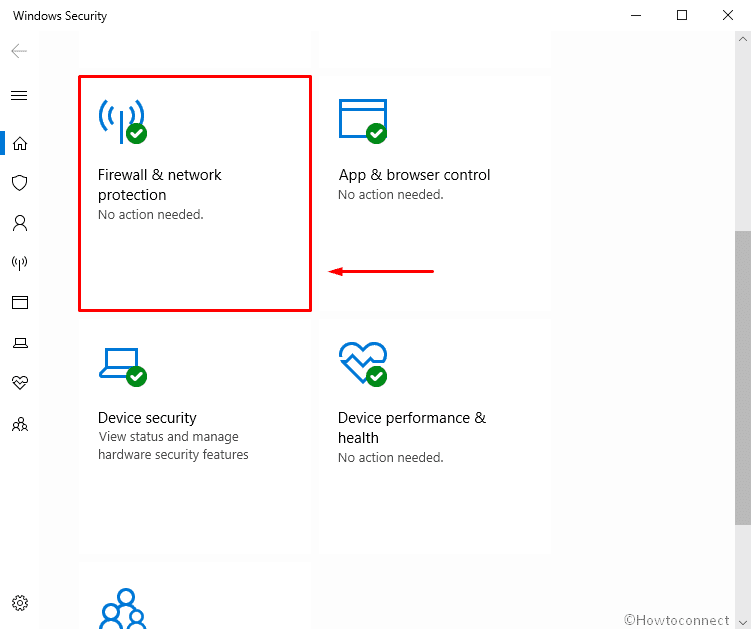
- Type security and press Enter.
- On the following page, click on “Firewall & network protection”.
- Select the link saying ‘Allow an app through firewall’ on the Windows security app.
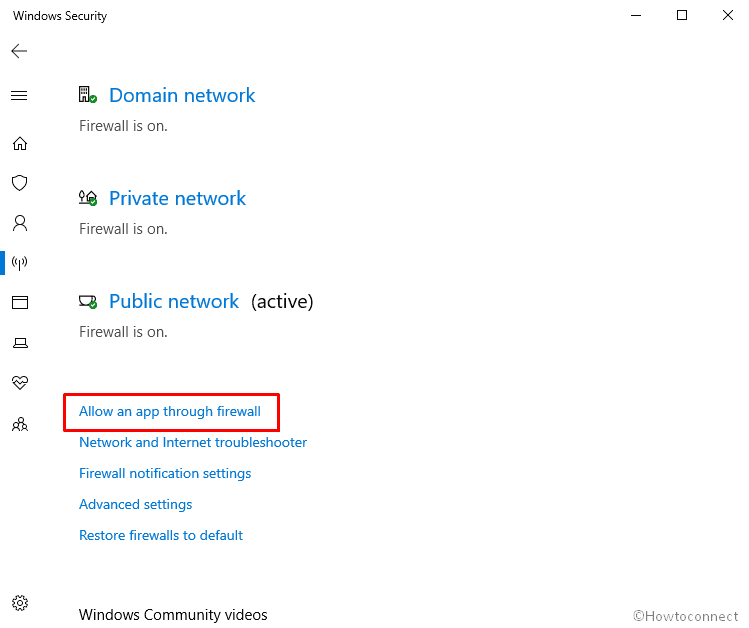
- Above the right side of the box, click on the Change Settings.
- Now, in the box, check the printer programs which you want. Under the Name section, mark checkbox ahead of the required program.
- Mark the box for Private and Public network.
- Now, hit the OK button and you’re done.
That’s all!!!