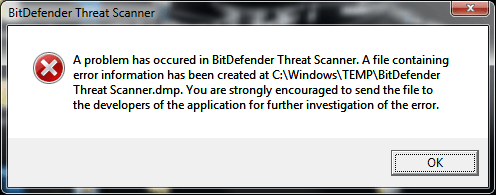
Do you see a frequently appearing error message BitDefender Threat Scanner on your Windows 10 PC? The issue specifies the presence of a Threat Scanner.dmp file in your Temp folder. In most cases, this dmp file is completely unreadable in Notepad. Also, if you don’t close the pop up, then your PC restarts forcibly after a while.
BitDefender Threat Scanner error occurs irrespective of the cases you have installed this antivirus or not in your Windows 10 PC. After installing the recent update of the solution, some users confront this problem. However, lots of users are out there who don’t use BitDefender at all but still find error pop up.
In such cases, it is the Spybot’s file that is damaged. Once you replace the Spybot’s corrupted file, things will work smoothly. Just like other popular antivirus solutions, Spybot also combines BitDefender technology and that is the reason the error states about the creation of a dmp file.
So, stick to the tutorial and let’s walk through all the solutions to bypass this BitDefender error.
How to Fix BitDefender Threat Scanner Error in Windows 10
Solution 1 – Clear temp folder
The pop-up notifies that information related to the error is stored in temp folder. However, when you locate and try to open that dmp file, it fails to load. So, the first attempt you should take is to completely clear out the entries that are present in temp folder. For many users, cleaning this folder bypasses the problem completely and to do so, follow the given steps.
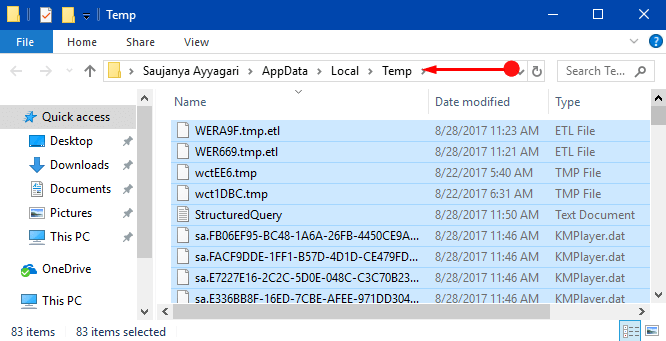
Step 1 – Open Run by jointly pressing Windows + R keys to get rid of BitDefender Threat Scanner. Type temp in the provided text field and click Ok button.
Step 2 – The above action opens temp folder, select all the entries and press Delete key.
Note – In case, any specific entry is running, then Force Close Ongoing Programs in Windows 10.
Step 3 – Moving ahead, again launch Run, type in %temp% and press Enter to execute it. This opens the Temp folder for your user account, select all the items. Finally, press Delete to eradicate all the items of the folder.
Step 4 – Once you clear all the entries from the folder, restart Windows 10 PC. In the end, see if BitDefender Threat Scanner still occurs or not.
Follow our detailed tutorial to Remove Temporary Files on Windows 10.
Solution 2 – Download and Run a Patch
If you have upgraded your BitDefender, you may likely to face this specific BitDefender Threat Scanner error message on Windows 10. So, the possible workaround that BitDefender suggests is to download and run a patch depending upon the architecture of your operating system.
Step 1 – First of all, figure out the architecture of your Windows 10 operating system.
Follow our tutorial to Find the Version of Windows Installed on System.
Step 2 – Depending on the version and architecture, run the patch accordingly. Go to this web page and click Run this patch for 32 bit or 64 bit as per requirement.
BitDefender introduced this patch to fix this particular error that comes up after updating it. So, after running the patch, it should resolve the BitDefender issue.
Solution 3 – Fix Spybot’s Corrupted File
As mentioned earlier, many times, this error also happens because of Spybot’s corrupted file. The root cause is that Spybot uses this specific BitDefender Technology and when its file gets damaged, it leads to this error.
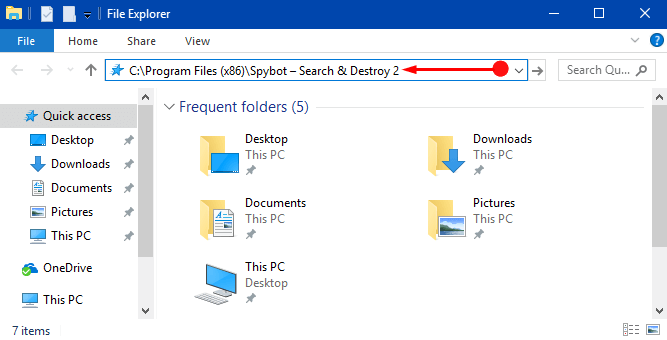
Step 1 – Open File Explorer to resolve BitDefender Threat Scanner. Once you launch it, navigate to this given path –
C:\Program Files (x86)\Spybot – Search & Destroy 2.
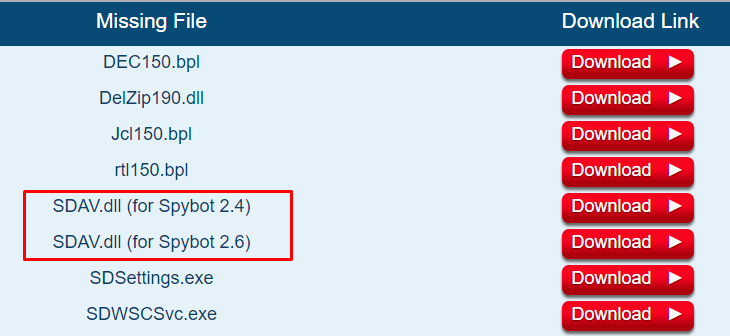
Step 2 – Here, search for a file namely SDAV.dll. This is the file that leads to the occurrence of the error. If the file seems to be missing from the Spybot – Search & Destroy 2 folder, you face this error. Or, if the file size is not 32KB, this error message pops-up on the PC screen.
Step 3 – So, if you don’t see the SDAV.dll file in the folder, then visit this web page and download the missing file.
Step 4 – After downloading the file, copy it and travel to Spybot – Search & Destroy 2 folder (for entire path, see Step 1). Paste the SDAV.dll file in the folder.
Step 5 – In case, the SDAV.dll file is already existing in the folder, then verify its size. If its size is not 32KB, you need to replace it immediately as it got corrupted.
Note – To confirm the size, right-click on SDAV.dll and click Properties. Here, you can read its size.
Step 6 – So, to replace it repeat Step 3 and 4 and paste the new file. While pasting it, you may come across Replace or Skip files dialog on the PC screen. Moving ahead, click the first one, “Replace the file in the destination“.
Once you successfully substitute the damaged Spybot’s file, the BitDefender Threat Scanner error note should not appear.
Conclusion
Hopefully, any of the above three solutions will help you to bypass this strange BitDefender Threat Scanner error in Windows 10 OS. The error seems to be a little annoying especially for those who are not using BitDefender. However, if you are aware of more solutions that can overcome this BitDefender error, do write them to us.
Hi, I know it’s been a while since you wrote this, but came across the problem myself and it’s tricky little #$%$. In my instance, the threat message comes up and may or may not allow my mouse or keyboard to connect on post 2. It seems intermittent. It also exhibits, when I can put in my password, a very slow connection to the home screen.
I noted in your article – #3 – to use a patch for windows 10. I followed the links and the connected articles only mentioned 7 and XP – the patch I tried for 64 bit would not load because of OS incompatibility.
Do you have any updates to the article for Windows 10? Seems like something is missing.
Thanks in Advance,
Doug
Your solution to the BitDefender error message worked! I tried several others that did not work.