You are able to choose a date to pause updates in Windows 10. This OS version allows to control and manage the update by temporarily stopping it. When you select an option in this concern Windows will interrupt the patches and builds until the specific date. The setting is available in the Updates & Security category after the arrival of Windows 10 18282. See – How to Stop Windows 10 Update in Progress.
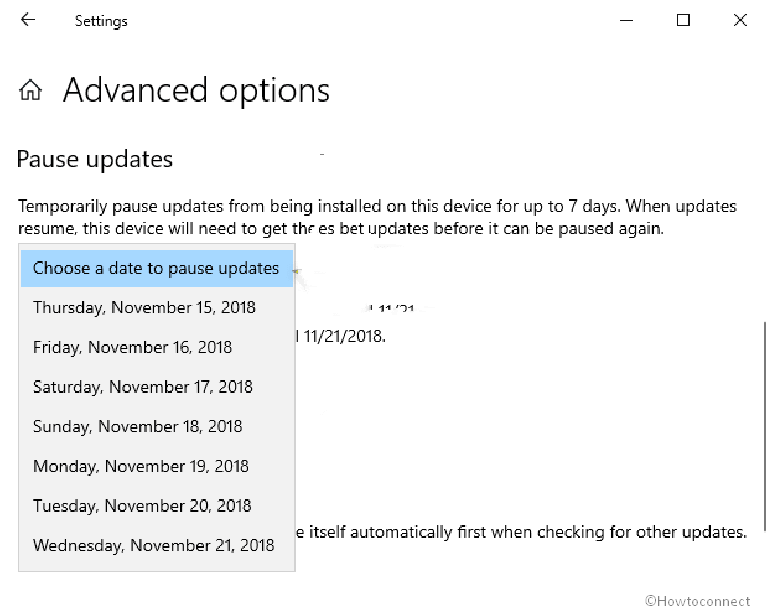
To Choose a Date to Pause Windows Update you need to use a dropdown predefining dates in chronology. However, even after this setting is enabled, Windows Defender definition updates will still continue to come and install on your PC.
Way to Choose a Date to Pause Updates in Windows 10
Here is how to choose a date to pause updates in Windows 10 –
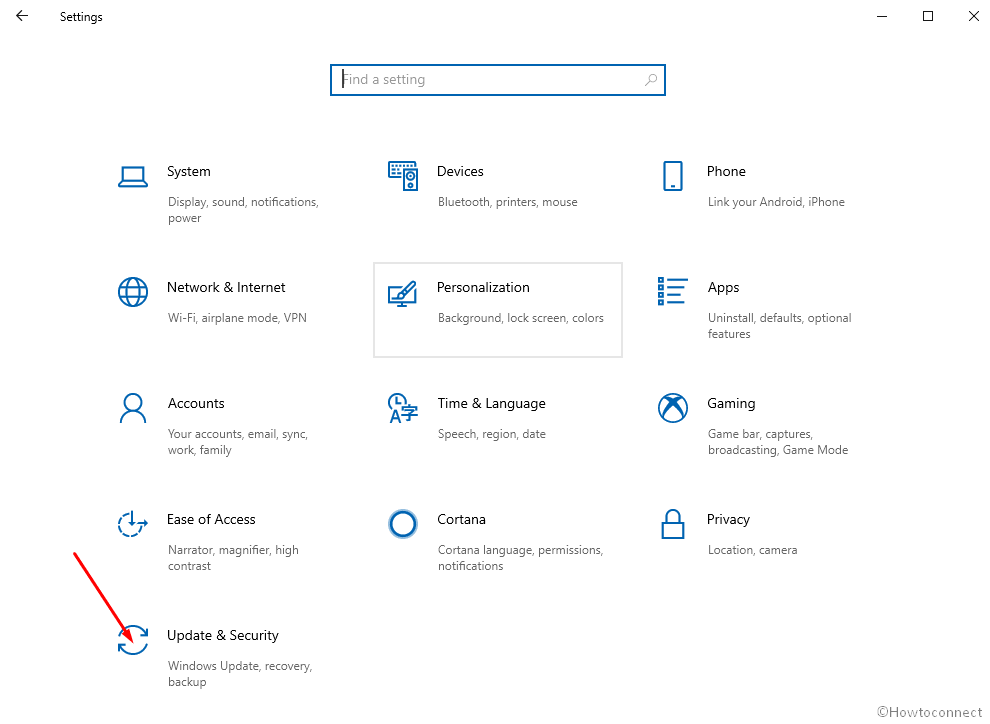
Step-1: Open Settings by simply pressing Windows+I altogether on your keyboard.
Step-2: Go to the Update & security icon.
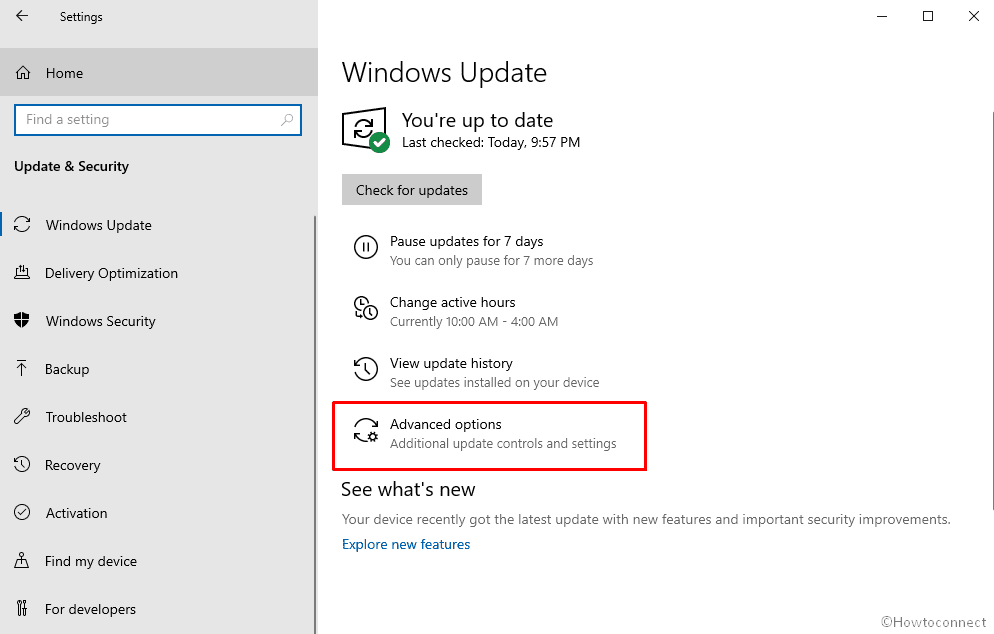
Step-3: Once you reach Windows update page, click on Advanced options, the choice at the bottom.
Step-5: Now click on the dropdown saying Choose a Date to Pause Updates. You will see a list of 7 successive dates; select one on your preference.
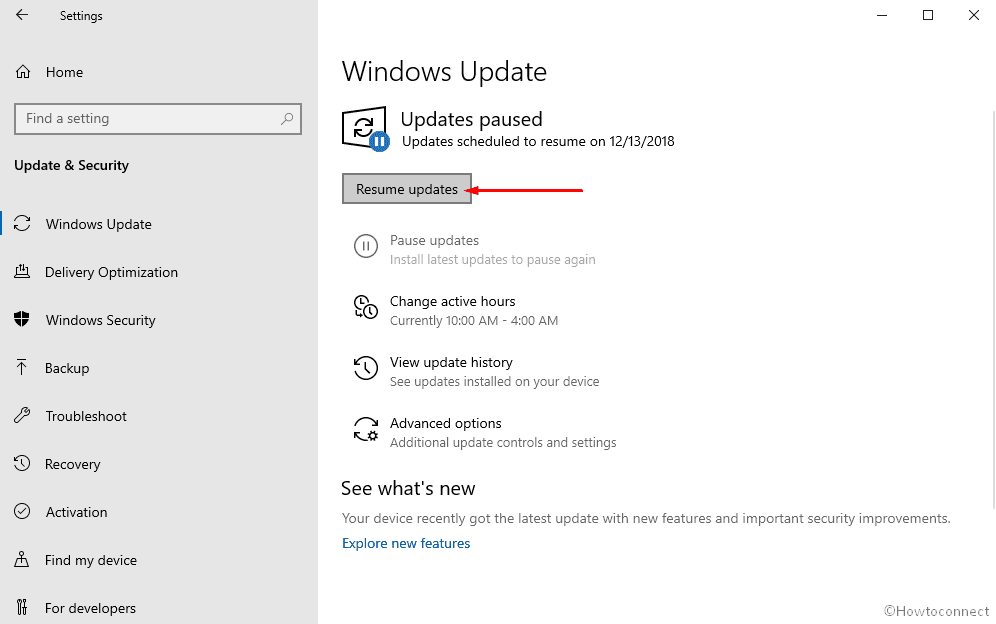
You will not get any Windows update except some like Windows Defender Definition update onward. But the matter of relaxation is that you have the ability to resume the same from this location. Once you Choose a Date to Pause Updates, Check for updates button is converted to Resume.
So go to Windows update using the methods explained in Step-1, 2 and 3. Now select Resume from Windows updates section.
Note that user must sign in as an administrator in order to pause or resume updates.
That’s all.
Additional –
1) How to Choose Branch Readiness Level When Updates are Installed in Windows 10
2) How to Limit Windows Update Bandwidth in Windows 10
3) How to Get Windows Update With PowerShell in Windows 10
4)How to Verify if You Are Updated on Windows 10
5) How to Pause Windows Update on Windows 10