Did you also confront iTunes Error Code 0xe80000a in Windows 10 while you make an attempt to update, download, or install the software? In addition, this code also occurs when you connect, remove, or sync a device. Mostly this issue happens due to the installed security program which prevents the normal operation of iTunes.
The experts and support team of iTunes suggest performing minor changes in the Windows Defender Firewall to bypass this error code. Moreover, try to keep the system as well as the drivers up to date to avoid such issues. However, another possible cause can be the not working of Apple Mobile Device Service (in short AMDS). All you need is to change its Startup type and it will resolve the problem. So, let us explore all the possible workarounds in details and see which one lets you play your favorite track again on iTunes.
iTunes Error Code 0xe80000a in Windows 10 Solutions
Here is how to fix iTunes Error Code 0xe80000a in Windows 10 –
iTunes is one of the well-known media players for the PCs. There are so many purposes served by this application like Online Radio Broadcaster, Huge Media Library, and more other features. This software can be used on iOS, Android as well as Windows. It supports several formats like mp3, mp4, wav, aac etc. In simple words, it could be used to access all the entertainment files present on your Device.
Here is the complete guide on how to fix iTunes Error Code 0xe80000a in Windows 10.
Activate iTunes under Windows Defender Firewall
Windows Defender Firewall is a utility program used to prevent the working of several applications. Hence allow the iTunes app under this program so that it could work smoothly.
Note: Please ensure to have the administrator rights in order to perform the below changes.
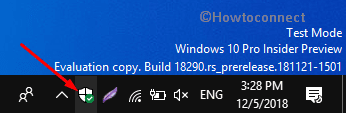
Step-1: Go to the system tray and click the shield icon to access the Windows Security app.
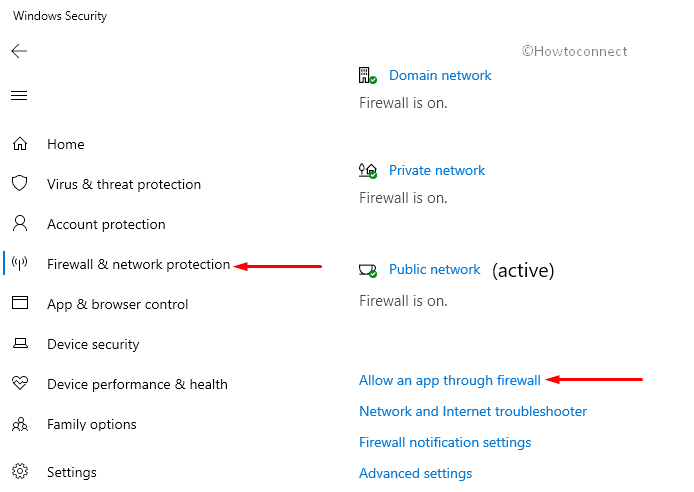
Step-2: Click Firewall & network protection category on the left sidebar. Switch to the corresponding right pane and click the option namely Allow an app through firewall as shown in the below snapshot.
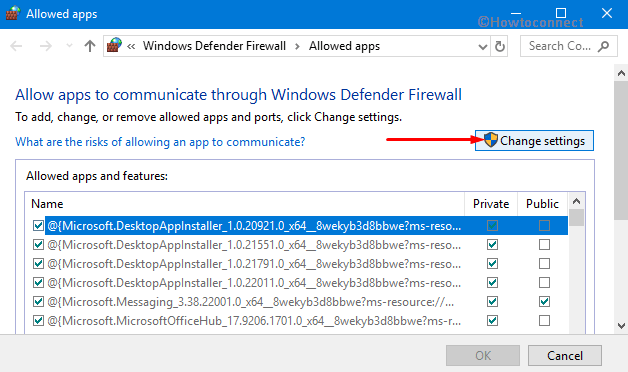
Step-3: On the following window, click the Change settings button (see snapshot).
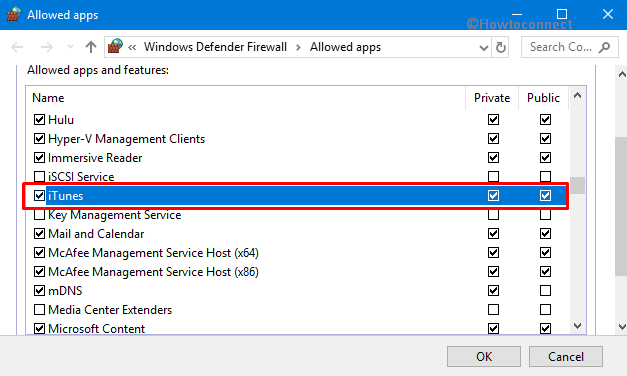
Step-4: Here, locate iTunes from the list and ensure that it is checked under both Private and Public networks.
Step-5: Moving ahead, find out Bonjour and see if it is selected for the Private network. In case, you cannot get these apps and features, perform a hit on “Allow another app” button.
Step-6: Click on the Browse button and select the iTunes’s path in the below-given directory and select iTunes.exe.
C:\Program Files\iTunes
Step-7: Now follow the above steps again and add the Bonjour to the list. Click on the Add button under Add an App dialog box.
Step-8: Once you successfully add the app in the list, click the OK button and close Windows Defender Firewall.
Hope this will bypass the iTunes Error Code 0xe80000a on your system. If not, try next fixes.
Perform Windows Update
The outdated version of Windows OS is also accountable for the iTunes Error Code 0xe80000a issue. Therefore check if any pending updates are available for the operating system and update the same as soon as possible. This procedure will not only resolve this trouble but also enhance the system’s overall performance.
First of all, open Windows Settings, the built-in application by pressing “Win + I” hotkeys.
Click on Update & security category.
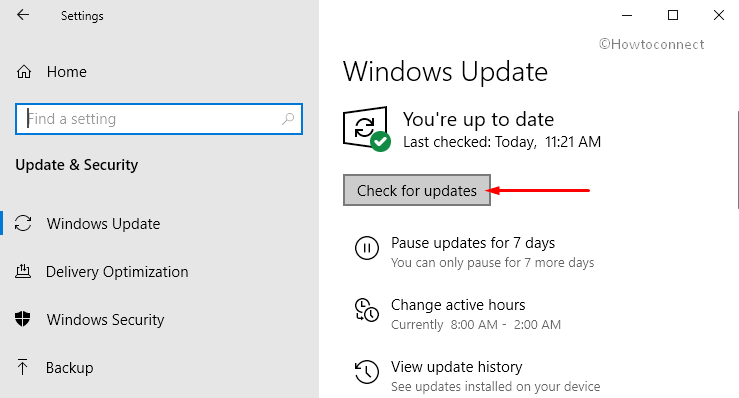
Under Windows Update section, jump to the right pane. Click on Check for updates button (see snapshot). This process will check for the availability of the pending updates for your system. If yes, the same will be downloaded and installed all by itself.
In case you do not want to reboot the system, see the way to Set New Active Hours.
Once you download the updates, “Restart Windows 10 PC” and check for the occurrence of iTunes Error Code 0xe80000a.
Check for any missing or corrupt Driver
The faulty driver might also be responsible to cause iTunes Error Code 0xe80000a. Hence the best way is to find out the missing driver and update the same to its latest version. This could save time as well as energy.
Perform a right-click on the Start and choose “Device Manager” from the Win+X menu.
Look out for the corrupted driver (the driver which is containing yellow exclamation mark) and right click on the same.
Select Update Driver option on the context menu. After that go through the on-screen instructions of the wizard to complete the procedure.
Once the update gets over, reboot the system. Check if the trouble iTunes Error Code 0xe80000a has vanished or not on the system.
Restart AMDS (Apple Mobile Device Service)
If the system fails to identify the iTunes on Windows 10, then there is a possibility that the “Apple Mobile Device Service” is not started. If that’s the case, just restarting the AMDS might be the workaround to fix iTunes Error Code 0xe80000a.
First of all, close iTunes and disconnect any of the presently connected devices.
Hit “Win logo and R” hotkeys to open the Run dialog box. Type in “services.msc” in the void box and hit Enter to open Services Console.
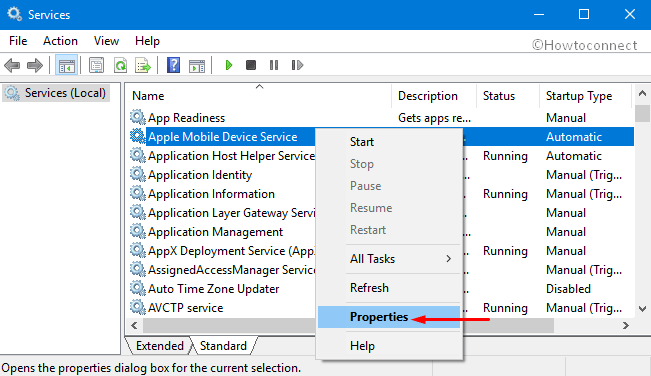
Here, locate and right-click on Apple Mobile Device Service and select Properties option.
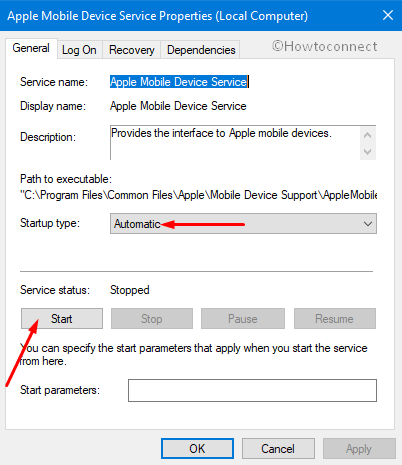
Click the drop-down next to the Startup type section. Choose Automatic. Next, go to the Service status section and hit the Start button (see snapshot).
Finally, reboot the system, and see the error. If it doesn’t show up, connect all the external devices and use iTunes smoothly.
That’s all!!!