Whiteboard, the built-in digital canvas on Windows 10 available as Store app, allows you to draw your imaginations, create content, and get together. The application is where you have the ability to convert your work into charts and shapes on an endless canvas with an interface designed for pen, touch, and keyboard. Tools and settings like Ink to table, Object Snapping, Export, Format background make the utility enough efficient for inking and showing creativity. You can now create Follow ups list on Microsoft Whiteboard in Windows 10.
Recently, Microsoft Whiteboard added Follow ups list (Preview) that will let you add the things you have forgotten or some more rememberable in the digital sackcloth. You can assign this task to anyone in your group. You may see all the work you could do with this app here – How to See and Use Windows Ink Workspace in Windows 10.
Create Follow ups list on Microsoft Whiteboard
Here is How to Create Follow ups list to Microsoft Whiteboard in Windows 10
- Check if “Windows Ink Workspace button” is located on the taskbar. In case you notice it is unavailable, right click and select Show Windows Ink Workspace button.
- Click on the icon, and select Whiteboard.
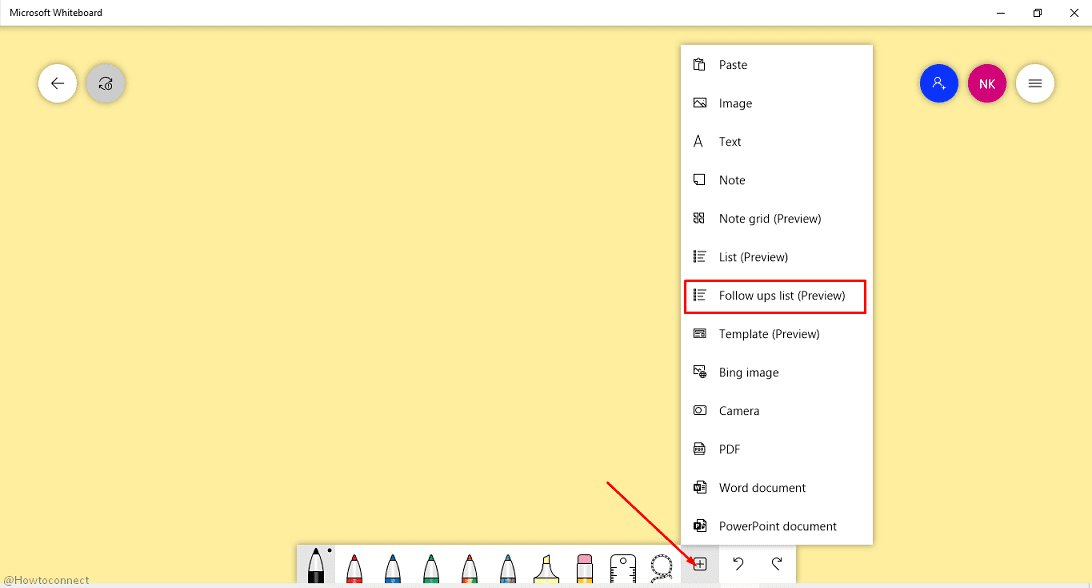
- Allow the Microsoft Whiteboard appear, and click on Insert menu.
- Select Follow up list (preview).

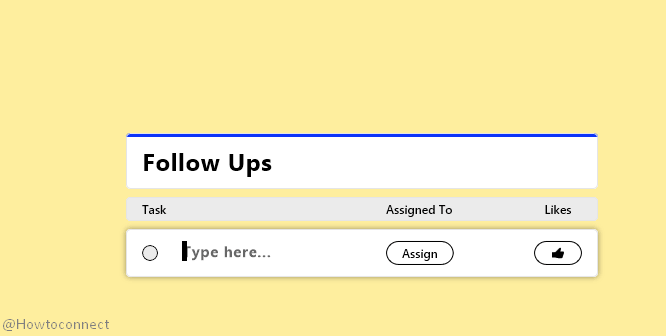
- Follow ups region will appear on the screen. Click on Type here under Task.

- Write your follow up task and click on Assign.
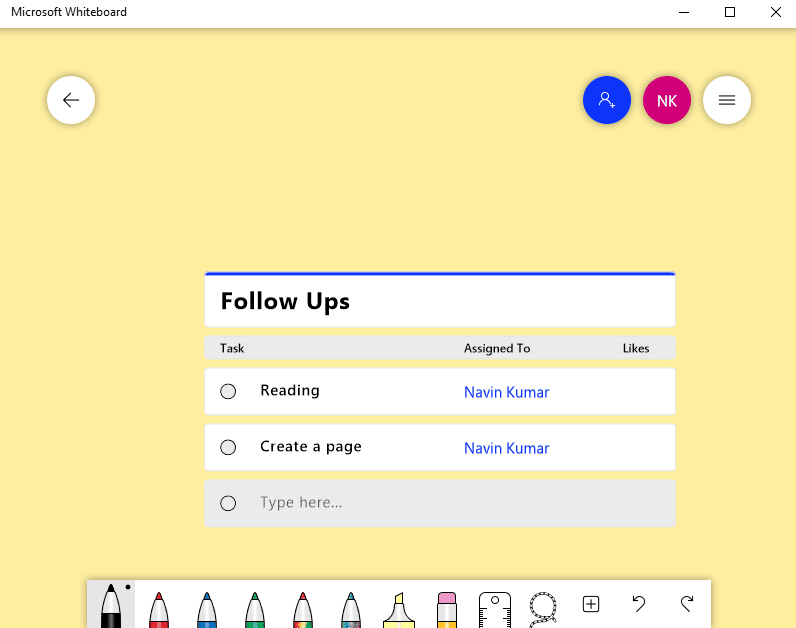
- Select the account to which you want to assign the task.
- You can also like this follow up task using the thumb icon here.
- To modify, click on the Task name and choose Edit item text.
- Furthermore, you can Copy, delete, Change Bullet list, Sort list, Cut and write Alt text for the task using different commands. Do whatever you need.
- Repeat the action to Create more than one follow ups tasks and arrange them as you want.
That’s all!!!
