Today, in this article, we will discuss the way to Customize Access Denied Message in Windows 10 and 11. In many cases, administrators keep the use of Windows 10 restricted to some extent for certain users or user-categories. When a user tries to get access to the files for which they are restricted, they will get an error message stating denied access. Or, they may see a message instructing them to contact the administrator to gain access.
This is to prevent them from accessing important files or folders on the system without explicit permissions. Such restrictions are often necessary because changes made by those users could potentially affect the stability and performance of the system.
Customize Access Denied Message in Windows 11 or 10
The ability to control the level of access that users have in a system is definitely an important factor in a huge corporate system. Not just for Enterprises, but this control can be handy for even Home versions which have multiple user accounts set up.
Windows 10 has a setting to manage and customize the access denied message for all possible content and resource available on the system.
This option is available in the Windows Group Policy Editor. Here are the steps you need to follow for managing the access denied message:
Step-1: Press Win logo + R keys to open Run dialog box. Type in gpedit.msc and click OK to continue.
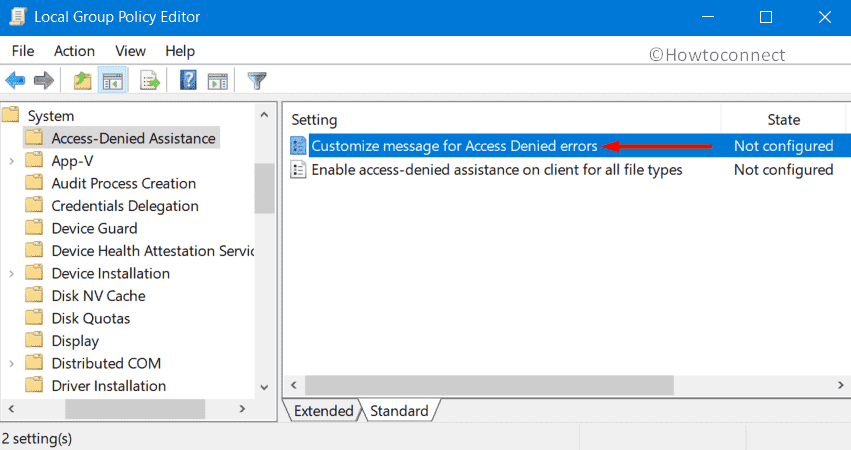
Step-2: Once you access Group Policy Editor, navigate to the path mentioned below.
Computer Configuration => Administrative Templates => System => Access-Denied Assistance
Step-3: Switch to the right pane of Access-Denied Assistance. Here, double-click the policy namely Customize message for Access Denied errors.
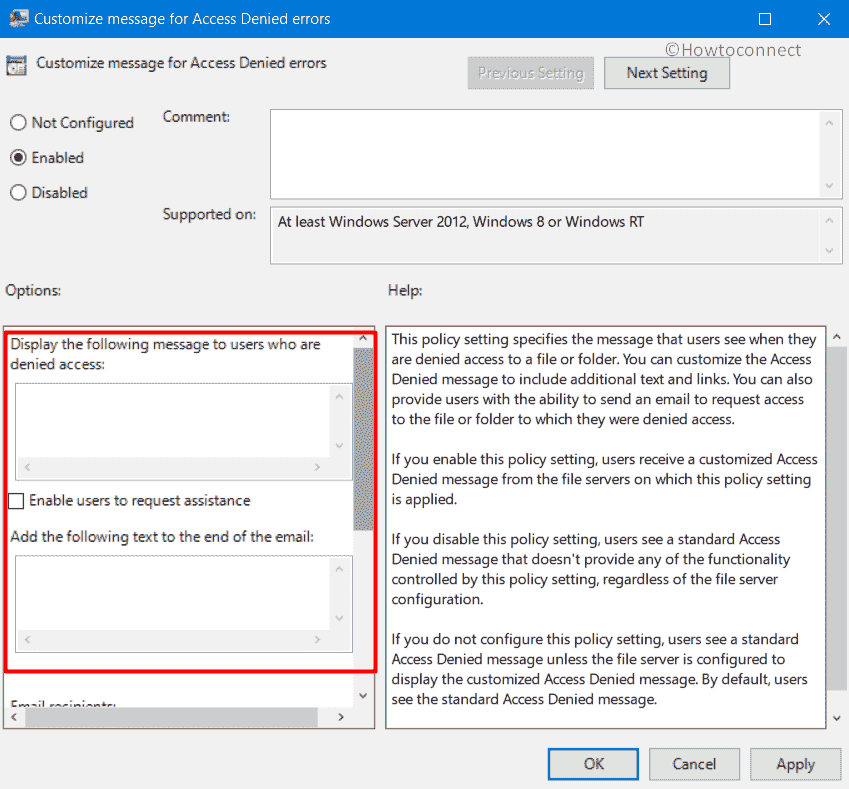
Step-4: When the policy window opens up, select Enabled radio button.
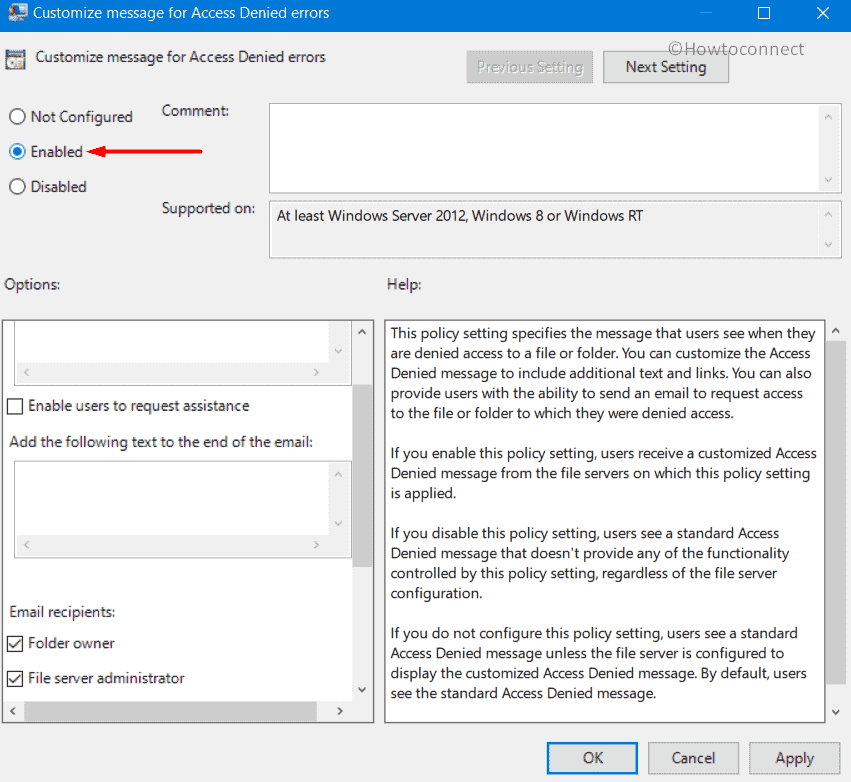
Step-5: After you enable this policy, you will be able to create a custom message. Go to the ‘Display the following message to users who are denied access’ section at the lower left side of the window. So, type a denial note as per preference. The system will display this very message when any user tries to access the restricted content.
Step-6: Moving ahead, you can also set up the additional parameters. Checkmark the box Enable users to request assistance. Doing so will provide the users with the ability to send an email request to access the specific file or folder for which they were denied.
Step-7: Next insert your customizable text in the box below the option Add the following text to the end of the email.
More about the policy
When you Customize Access Denied Message in Windows 11 or 10, you can see the guideline and description that Microsoft shares about the policy.
The description states that this group policy, when enabled, allows you to display customize access denied message to the user. It can include additional links or texts. Also, you will be able to let the user contact the administrator by sending an email requesting access to a folder or file.
If you disable this policy, the system will display the standard message for access denied. This eliminates any functionality offered by this policy set-up. You should note this if you have already set up any restrictions or if you are planning to do so.
The access denied message customization policy was brought out far back, with Windows 8 and is available in other versions including Windows Server 2012, Windows RT, etc.
Note that you must enable restricted access before you enable this policy.
- Go to the above-mentioned location (Computer Configuration => Administrative Templates => System => Access-Denied Assistance).
- On the right side, find and double-click the other policy “Enable access-denied assistance on client for all file types”.
- Choose Enabled option. Click Apply and OK.
That’s all!