Methods to Disable Windows 10 Advertisements Manually with steps. – Windows 10 users are receiving ads on various locations of the OS. All it started from Start Menu and slowly tips, tricks and ads are growing in other locations as well. Microsoft defines this behavior as suggestions but most users are not in favor of these ads. Windows 10 includes several settings that allow you to turn off advertisements for the respective locations.
Hence, in this guide, you will learn instructions to Disable Windows 10 Advertisements Manually. In the beginning, users receive ads only in the Start Menu, but now, they are visible on the taskbar, File Explorer, Windows Ink Workspace, Lock Screen and so on. All these locations have different settings and each setting controls the way Windows work. So, let us see the locations where ads are displayed and then see the steps to manually disable them.
Ways to Disable Windows 10 Advertisements Manually
In the below sections you have to deal with different settings to Disable Windows 10 Advertisements Manually.
Disable Suggestions on Start Menu
On top of the Start Menu, the OS displays suggestions about some commercial and free games or apps. So, to stop Windows from continuously showing suggestions on Start Menu, you have to follow the below directions.
Step 1 – Press Windows logo+I keys altogether and allow the Settings program to appear. From the available categories of Settings, locate and click Personalization.
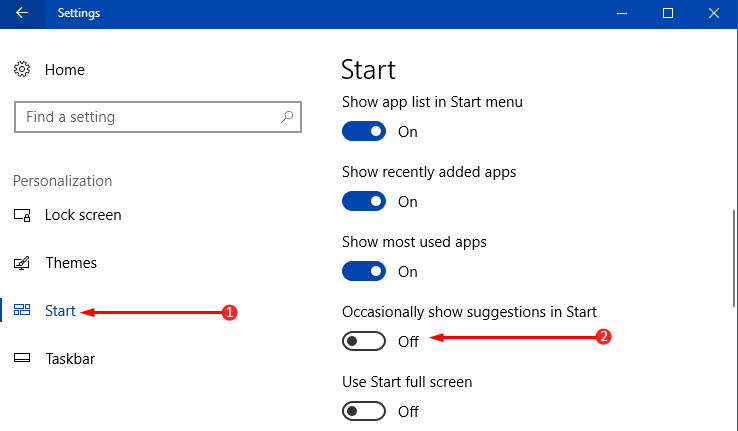
Step 2 – The left pane displays a few sections; select Start.
Step 3 – Moving ahead, on its right-side find the setting Occasionally show suggestions in Start and toggle it to Off.
Disable Advertisements on Lock Screen
Users using Windows Spotlight are likely to receive advertisements on the Lock Screen as well. An interesting part is that Lock Screen displays two different types of ads. First, it displays ads of wallpapers and second, it shows some tips and suggestions.
So, to stop these ads from coming up on Lock Screen, either disable it completely or use a local picture.
Step 1 – Perform a right-click on a vacant slot on the desktop and from the list of few options that pop-up, select Personalize, the last one.
Step 2 – This will immediately launch Personalization Settings page. Click Lock Screen tab on the left sidebar.
Step 3 – On its right pane, click the drop-down underneath the option Background. It will have three choices, select either Picture or Slideshow.
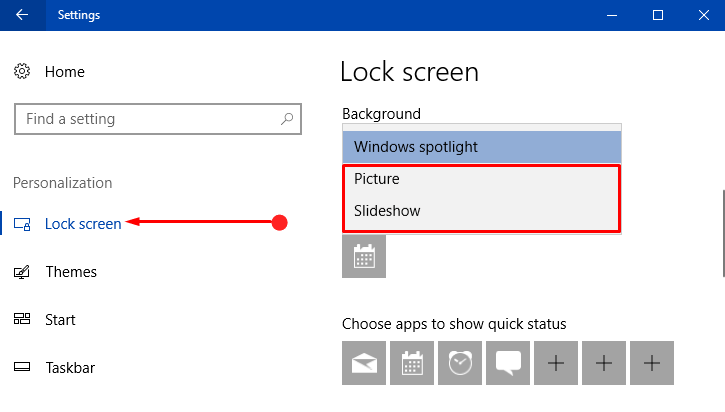
Note – Keeping Windows Spotlight will continue pushing ads on the Lock Screen and hence, changing its background is the best solution.
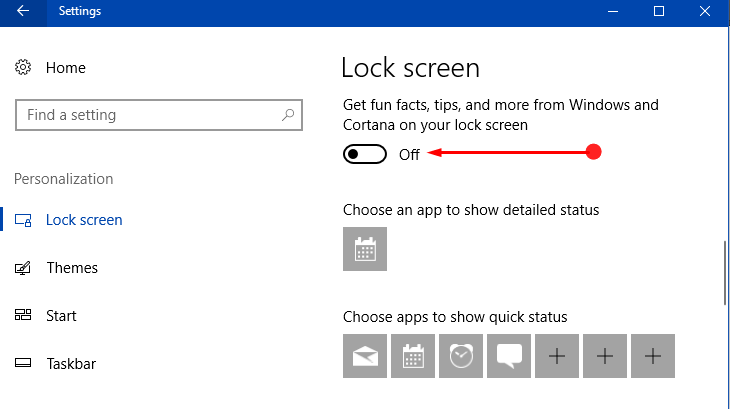
Step 4 – “Get fun facts, tips, tricks, and more from Windows and Cortana on your lock screen” option will be noticeable, just toggle the slider to OFF position.
Turn Off Advertisements on File Explorer
Not many users have seen ads on File Explorer but the number is definitely increasing. This is the most recent location where Windows suggested Office 365 subscriptions.
Disable Welcome Experience, Sign in Suggestions, and Advertisements on Taskbar
Windows 10 often displays tricks, or tips on the taskbar or show what’s new when you sign in.
Step 1 – Use the key combinations of Windows & I and when the Settings program comes up select System tab, the first one.
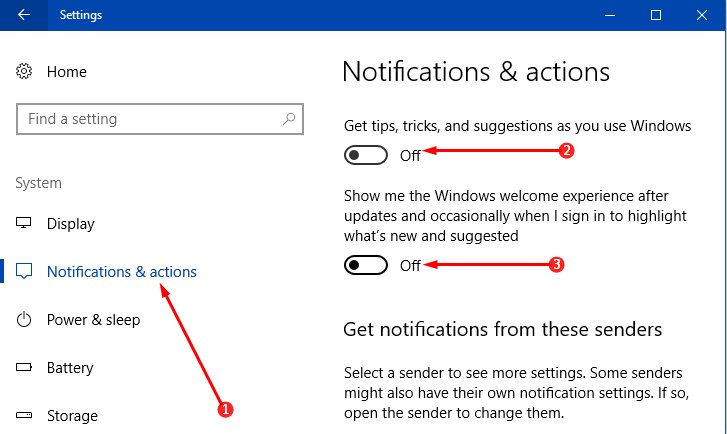
Step 2 – On the left pane, several segments are noticeable, click Notifications & actions. Shift to its right pane and locate the feature Get tips, tricks, and suggestions as you use windows and pull its slider towards the left and turn it Off.
Step 3 – Moving on, turn Off another feature Show me the Windows welcome experience after updates, and occasionally when I sign in to highlight what’s new and suggested.
Disable Suggestions on Windows Ink Workspace
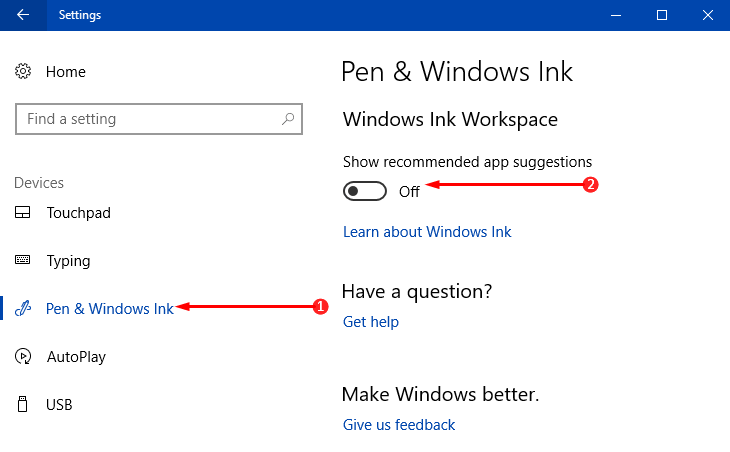
Windows 10 users who are using Windows Ink Workspace also receive suggestions on its interface, similar to Start Menu and to disable it, follow the below-mentioned directions –
Step 1 – Launch Settings application by clicking Windows logo icon on the left of taskbar and then click Settings, the tiny gear shape one. Moreover, you can use any of your preferable way to open the same, such as press Win+I keys.
Step 2 – Various tabs will show up on the Settings home page, find and click Devices.
Step 3 – Select Pen & Windows Ink segment on the left pane of Devices. Next, on its right, turn Off the feature Show recommended app suggestions.
Get Office and Get Skype
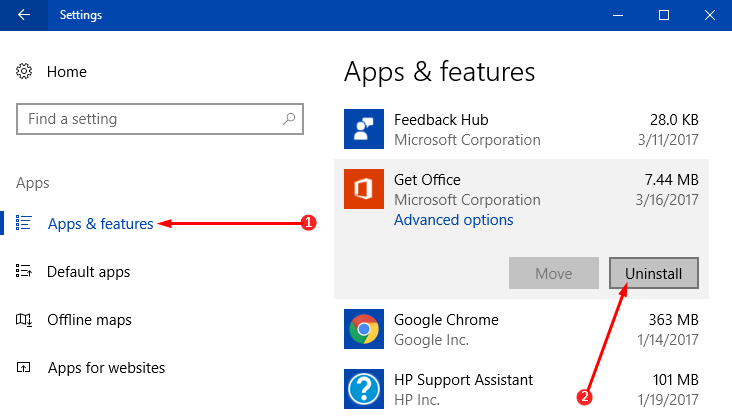
These two applications might be installed on your computer and both of them display advertisements respectively. Get Office advertises Office 365 whereas Get Skype describes Skype application. Even if you use them or not (Office 365 or Skype), these two applications (Get Office and Get Skype) serve no purpose at all. Hence, it is best to uninstall Get Office and Get Skype from the device.
Step 1 – First of all, access Settings program by pressing Windows-I keys altogether. In addition, launch Start Menu and choose the Settings icon from there.
Step 2 – From various categories select Apps.
You can read more about this category on How to Organize Apps Settings in Windows 10.
Step 3 – Apps & features will open by default and on it right-side search for the Get Office and Get Skype. Once you see them, select it and click Uninstall.
Conclusion
Slowly but gradually Microsoft increased the number of locations where it shows advertisements. So, completing the above steps will Disable Windows 10 Advertisements Manually on almost all the locations. Well, if you come across some other location where Microsoft is delivering advertisements, let us know about it in the comments form below.